Sentiment analysis seeks to understand a subject’s attitude or emotional reaction towards a specific topic or brand. Sentiment analysis does not have to be complicated and technical. It could be something as simple as getting a person in your team to find what is being said about your brand and product on review page and identify how much of it is good and how much of isn’t. There is no need for a big budget and a developer into complicated software, the cognitive service text Analytics API is a cloud-based service that provides advanced natural language processing over raw text, and includes four main functions: sentiment analysis, key phrase extraction, language detection, and entity linking.

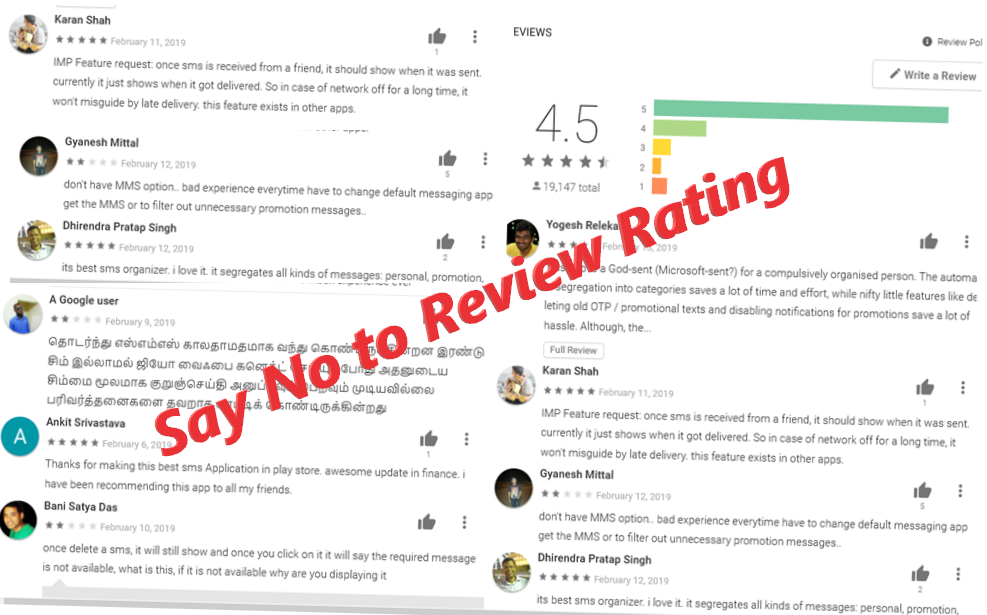
The most of the companies and brands now use sentiment analysis to find out what people are saying about them on social media. A bad review of social media can destroy a brand’s reputation if ignored or poorly handled. They aren’t simply rating their experience with 1 star or 5 stars. They’re also expressing their thoughts, feeling, expectations in free form text. This can be challenging to handle, especially if your company is getting a lot of feedback. When you have tens or even hundreds of thousands of feedbacks to read and manage, its easy to use cognitive text analytics service API.
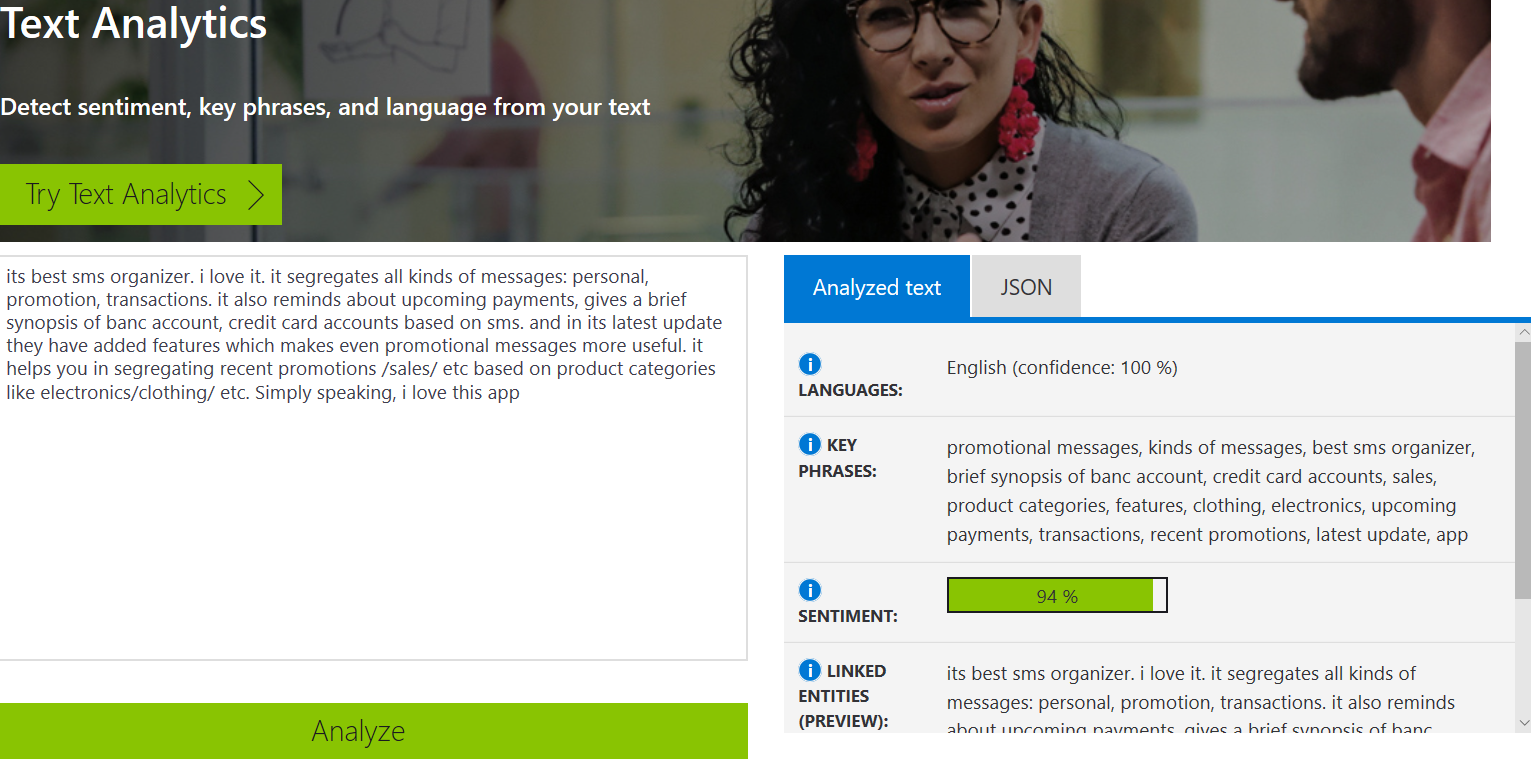
The Sentiment Analysis API evaluates text input and returns a sentiment score for each document, ranging from 0 (negative) to 1 (positive). This capability is useful for detecting positive and negative sentiment in social media, customer reviews, and discussion forums. Content is provided by you, models and training data are provided by the service.
Currently, Sentiment Analysis supports English, German, Spanish, and French. Other languages are in the preview. In this article, I will show how we can integrate sentiment API from Xamarin Mobile application using visual studio 2019
Text Analytics API Price
The Text Analytics API can be purchased in units of the S0-S4 tier at a fixed price. Each unit of a tier comes with included quantities of API transactions. If the user exceeds the included quantities, overages are charged at the rate specified in the pricing table below. These
overages are prorated and the service is billed on a monthly basis. The included quantities in a tier are reset each month. In the S tier, the service is billed for only the amount of Text Records submitted to the service. You can read more about pricing based on the country check out here
.

Create Text Analytics API Key
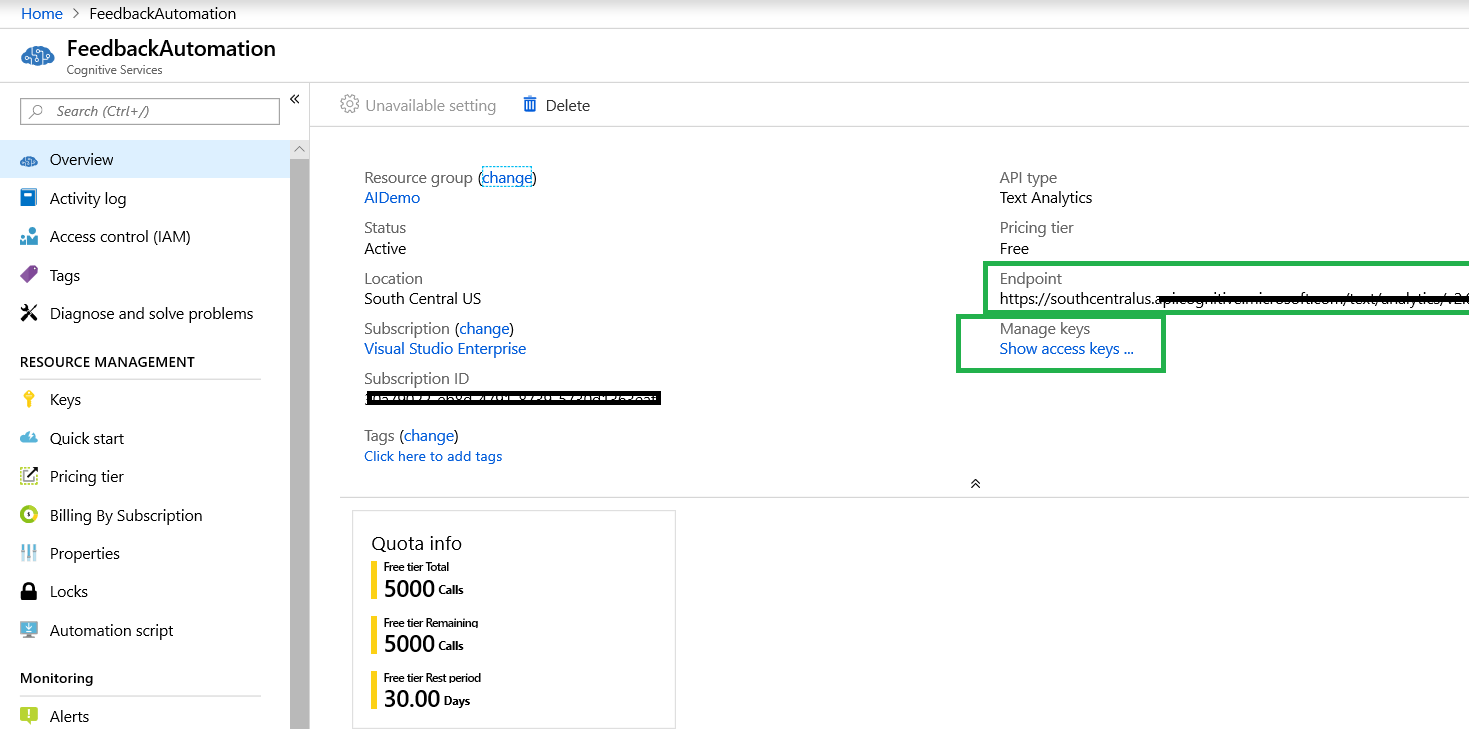
You need to create an Azure account, generate API key and end point URL based region for implementation to the Xamarin Mobile application.
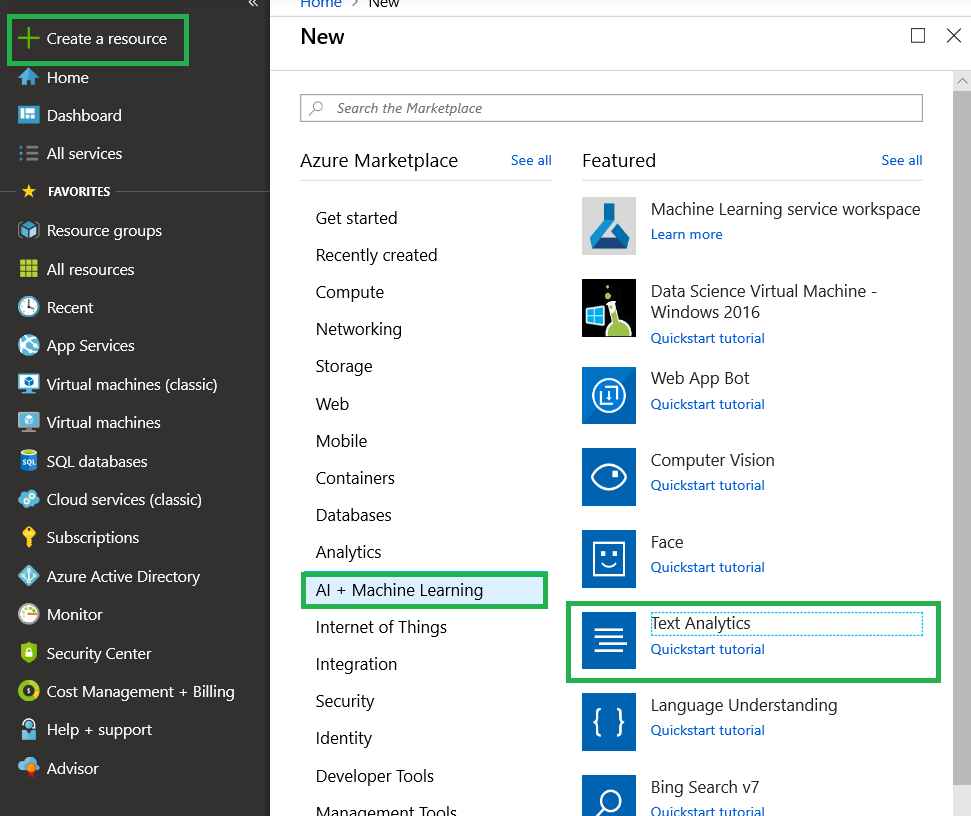
Step 2: Create On “+ Create a resource “> Under Azure Marketplace, select AI + Machine learning and discover the list of available featured. > Select “Text Analytics”
Step 3: On the create page, provide the name, pricing, resource group and click on Create

Step 4:Wait for a few seconds. After the Cognitive Services account is successfully deployed, click the notification or tile in the dashboard to view the account information. You can copy the Endpoint URL and Key in the Overview section for API calls in our Xamarin applications.
Build Xamarin Forms Application using Visual Studio 2019
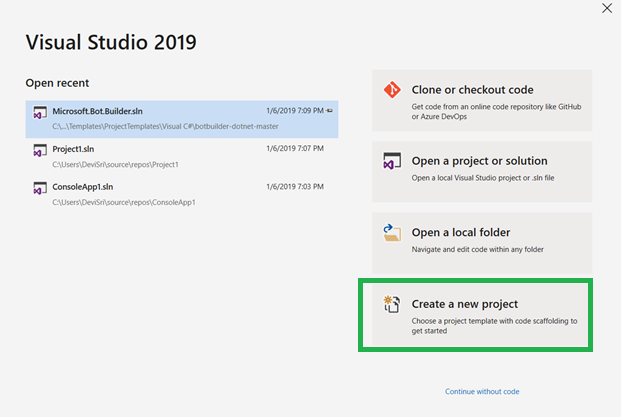
Let's start with creating a new Xamarin Forms Project using Visual Studio 2019. When accessing Visual Studio 2019 for the first time, you will come across a new interface for opening a creating the project.
Open Run >> Type “Devenev
.Exe” and enter >> Create New Project (Ctrl+Shift+N) or select open recent application.
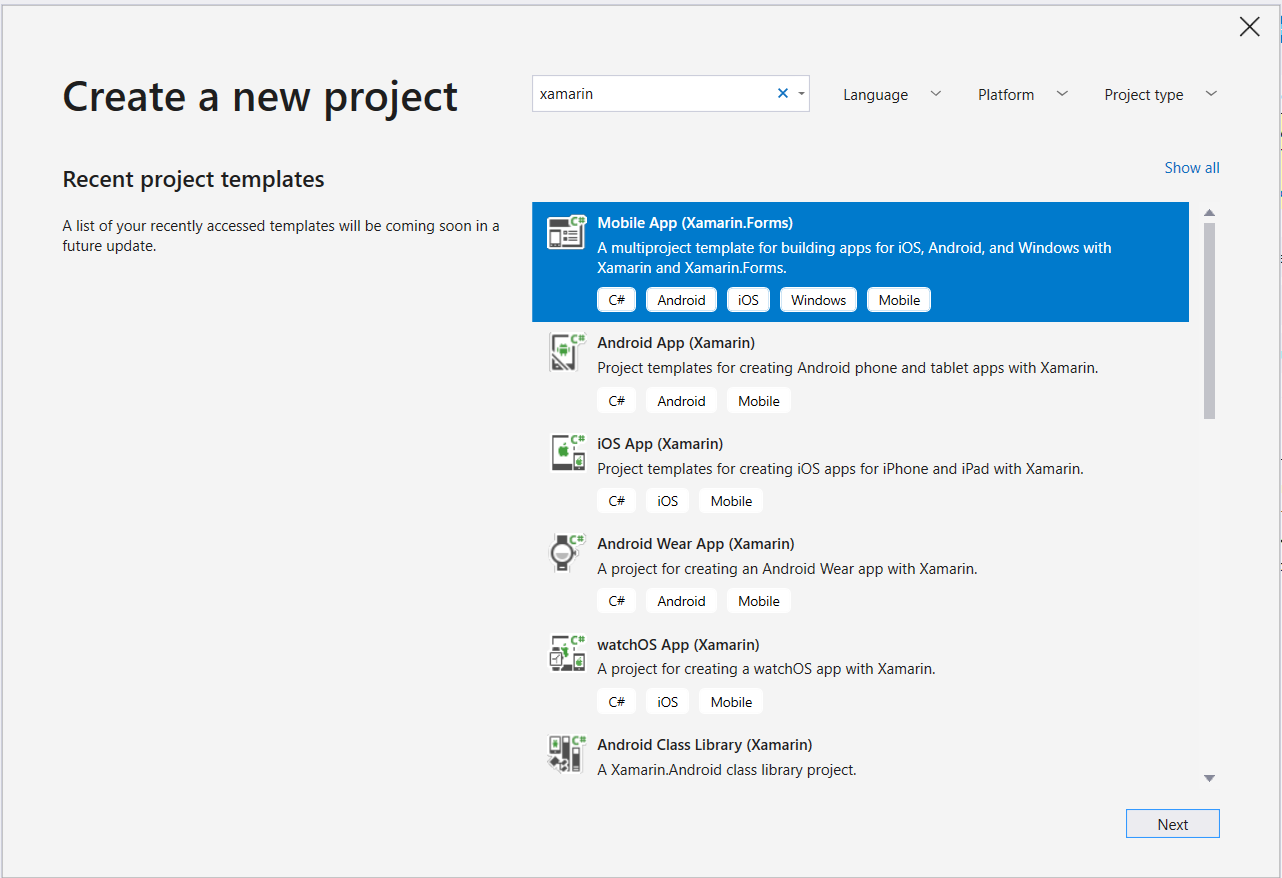
The available templates will appear
on a window like below. Select Xamarin Forms application with different mobile platform.
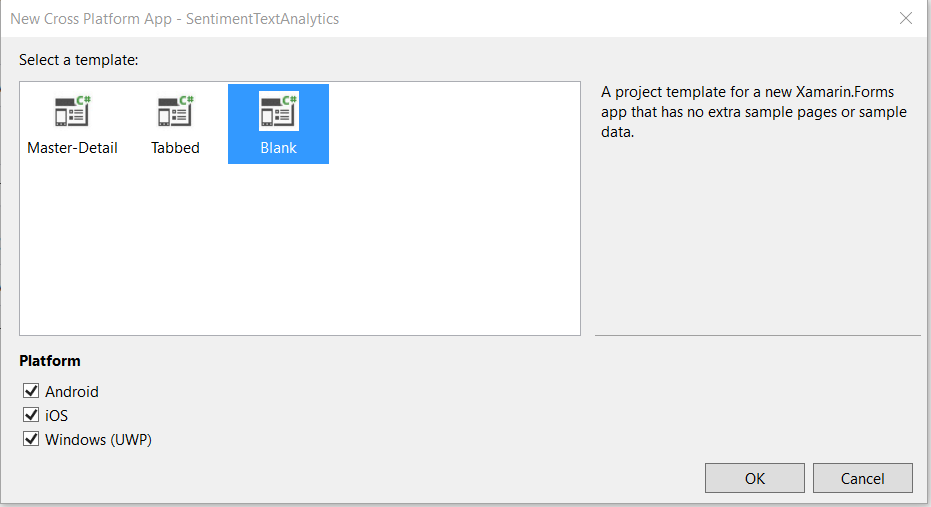
Provide project name, Location and solution name in the following configure new project screen

Select as Blank apps and select the platform
The Solution will be created with all the platform and PCL projects.
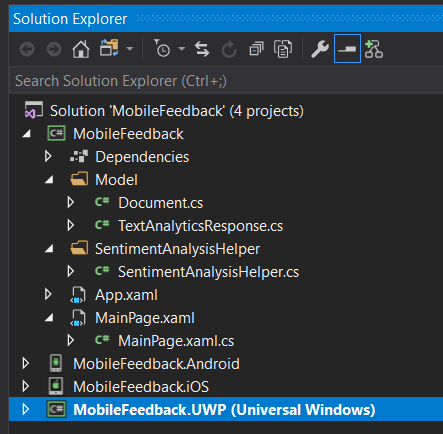
Xamarin UI Design:
The UI will have a few elements on the screen and overlay content view window. Editor control for providing user input value and an overlay window to show the result.
You can add Newtonsoft.JSON to solutions. Right click on Solutions > Manage NuGet Packages > select Newtonsoft.Json from Browse tab > click on Install.
<?xml version="1.0" encoding="utf-8" ?>
<ContentPage xmlns="http://xamarin.com/schemas/2014/forms"
xmlns:x="http://schemas.microsoft.com/winfx/2009/xaml"
xmlns:local="clr-namespace:MobileFeedback"
:Class="MobileFeedback.MainPage">
<ContentPage.Content>
<AbsoluteLayout>
<!-- Normal Page Content -->
<StackLayout AbsoluteLayout.LayoutBounds="0, 0, 1, 1"
AbsoluteLayout.LayoutFlags="All">
<Image Source="product.gif" VerticalOptions="Start" HorizontalOptions="Start" Margin="0,0,0,0" ></Image>
<Editor x:Name="txtfeedback" WidthRequest="100" HeightRequest="200"></Editor>
<Button Text="Submit" Clicked="Submit_Clicked"></Button>
</StackLayout>
<!-- Overlay -->
<ContentView x:Name="overlay"
AbsoluteLayout.LayoutBounds="0, 0, 1, 1"
AbsoluteLayout.LayoutFlags="All"
IsVisible="False"
BackgroundColor="#C0808080"
Padding="10, 0">
<StackLayout Orientation="Vertical"
BackgroundColor="White"
HeightRequest="175"
WidthRequest="300"
HorizontalOptions="Center"
VerticalOptions="Start"
Margin="0,20,0,0" >
<Image x:Name="imgstatus" WidthRequest="70" HeightRequest="70"></Image>
<Label Text="" x:Name="lblStatus"></Label>
<StackLayout Orientation="Horizontal" HorizontalOptions="Center">
<Button Text="OK" FontSize="Small"
VerticalOptions="CenterAndExpand"
HorizontalOptions="Center"
Clicked="OnOKButtonClicked" />
</StackLayout>
</StackLayout>
</ContentView>
</AbsoluteLayout>
</ContentPage.Content>
</ContentPage>
Create Document Entity Class
Create a class for Document class, it will deserialize the response and return an object of type TextAnalyticsResponse.The response format defined by the API looks like below document entity
using System;
using System.Collections.Generic;
using System.Text;
namespace MobileFeedback
{
class Document
{
public string Id { get; set; }
public double? Score { get; set; }
}
class TextAnalyticsResponse
{
public List<Document> Documents { get; set; }
}
}
Create SentimentAnalysisHelper Helper Class
You can replace Text Analytics API service endpoint and subscription key. If you don't already have these go back to the previous steps. Below is the complete class you need to add. We have to append /sentiment to the end of the ApiUri in order to invoke the sentiment operation.
 using
using Newtonsoft
.Json;
using System;
using System
.Collections
.Generic;
using System
.Net
.Http;
using System
.Text;
namespace MobileFeedback
{
static class SentimentAnalysisHelper
{
private const string ApiUri = "<API url>”;
private const string
SubscriptionKey = "<your Key>";
private const string Text = "The food was delicious and there were wonderful staff.";
private static
readonly HttpClient Client = GetClient
();
private static HttpClient GetClient
()
{
var client = new HttpClient
();
client.DefaultRequestHeaders
.Add
("Ocp-Apim-Subscription-Key",
SubscriptionKey);
client.DefaultRequestHeaders
.Add
("ContentType", "application/json");
client.DefaultRequestHeaders
.Add
("Accept", "application/json");
return client;
}
private static TextAnalyticsResponse DeserializeTextAnalyticsResponse
(string
json)
{
return JsonConvert
.DeserializeObject<TextAnalyticsResponse>(
json);
}
public static TextAnalyticsResponse GetSentiment
(string text)
{
var body = JsonConvert
.SerializeObject
(new
{
Documents = new object
[]
{
new
{
Text = text,
Id =
Guid.NewGuid
()
}
}
});
using (
var content = new ByteArrayContent
(Encoding.UTF8.GetBytes
(body)))
{
var responseMessage = Client.PostAsync(ApiUri, content).Result;
responseMessage.EnsureSuccessStatusCode
();
var json =
responseMessage.Content
.ReadAsStringAsync
()
.Result;
return DeserializeTextAnalyticsResponse
(json);
}
}
}
}
You can add following to code behind in the design file.
we'll add a method
(GetSentiment) to call the Text Analytics API sentiment endpoint. It will
deserialize the response and return an object of type TextAnalyticsResponse
.The method will take a string text as input, create the request body, and then send it to the Text Analytics API using an HttpClient instance.
using System;
using System
.Collections
.Generic;
using System
.Linq;
using System
.Text;
using System
.Threading
.Tasks;
using Xamarin
.Forms;
using System
.Net
.Http;
using System
.Threading;
namespace MobileFeedback
{
public partial class MainPage
: ContentPage
{
public MainPage
()
{
InitializeComponent
();
}
private void Submit_Clicked
(object sender, EventArgs e)
{
TextAnalyticsResponse result = SentimentAnalysisHelper
.GetSentiment
(txtfeedback.Text);
double?
score = result
.Documents
.FirstOrDefault
()
.Score;
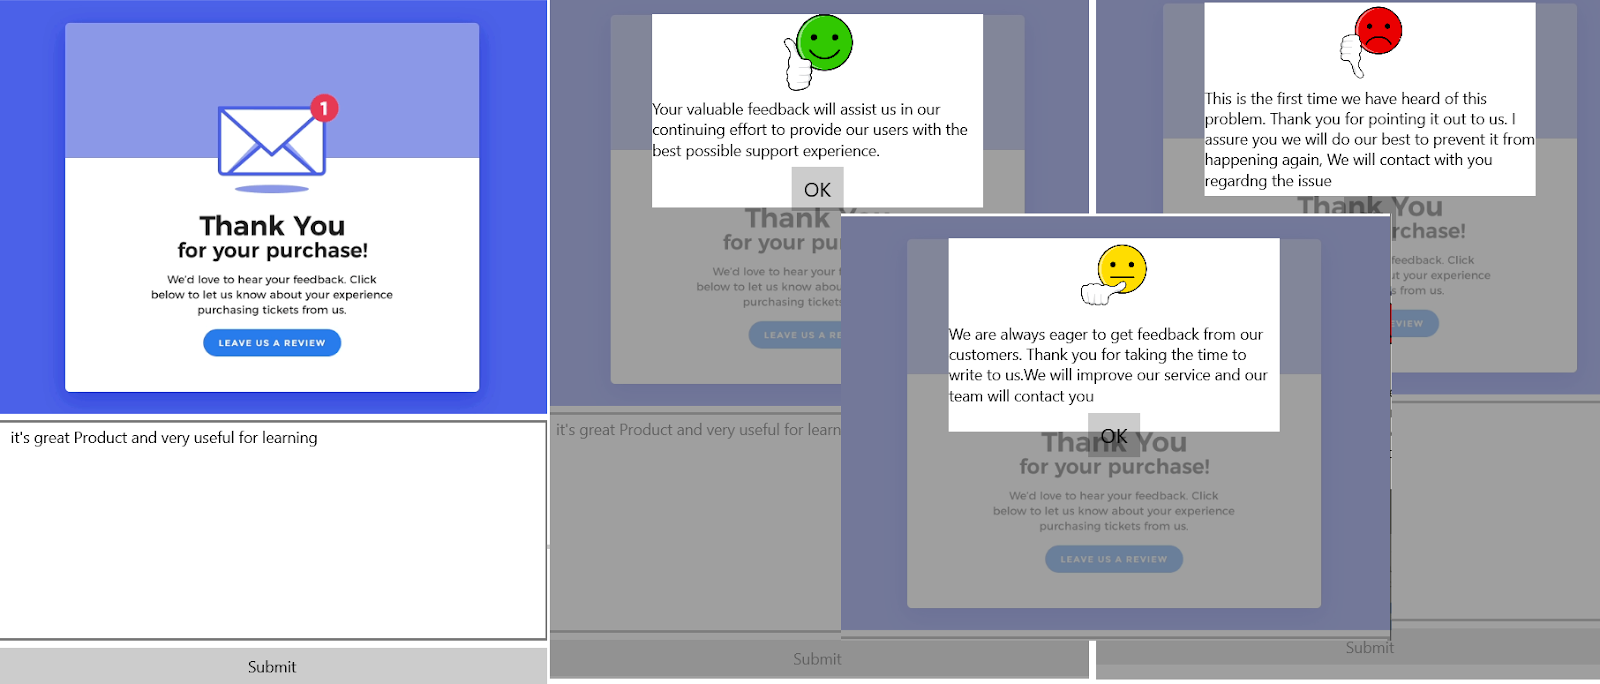
if(score < 0.5)
{
imgstatus.Source = "bad.png";
lblStatus.Text = "This is the first time we have heard of this problem. Thank you for pointing it out to us. I assure you we will do our best to prevent it from happening again, We will contact with you
regardng the issue";
}
else if
(score > 0.5 && score < 0.9)
{
imgstatus.Source = "okay.png";
lblStatus.Text = "We are always eager to get feedback from our customers. Thank you for taking the time to write to us
.We will improve our service and our team will contact you";
}
else if
(score> 0.9)
{
imgstatus.Source = "happy.png";
lblStatus.Text = "Your valuable feedback will assist us in our continuing effort to provide our users with the best possible support experience.";
}
overlay.IsVisible = true;
}
void OnOKButtonClicked
(object sender, EventArgs args)
{
overlay.IsVisible = false;
}
void OnCancelButtonClicked
(object sender, EventArgs args)
{
overlay.IsVisible = false;
}
}
}
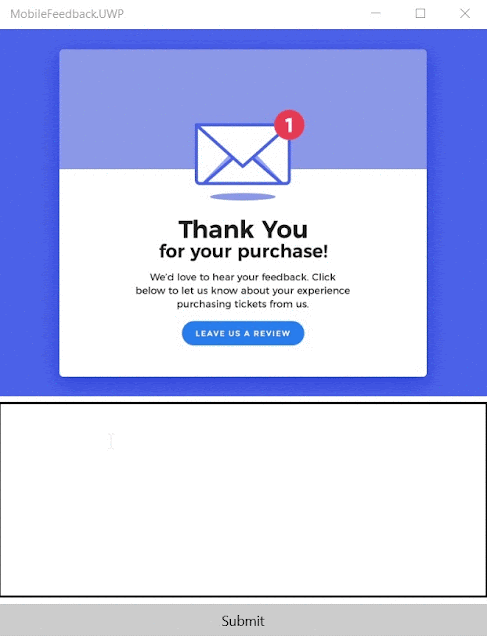
We have completed the code for consuming TextcAnalytics API. Now, we can select the platform and press F5. The output looks like below
Summary
In this article, you learned how to consume Text Analytics API and automate customer feedback without using rating. I hope this article will help you. Please leave your feedback/query using the comments box, if you like this article, please share it with your friends.


 Click on the channel you created to access your channel settings, and scroll down to find the Basic information > Channel secret.