Introduction:

Microsoft Academic is a free public search engine for academic publications and literature developed by Microsoft Research. In this library have 375 million entities ,170 million of academic papers. You can now create an account, log in, and create a public profile by claiming the publications you have authored. Claiming your publications will help improve search accuracy, and will showcase your work to the world.

The service replaces the earlier Microsoft research project, Live search academic, libra and Microsoft Academic search.


The Academic Knowledge API offers information retrieval from the underlying database using REST service endpoints for advanced research purposes.

Integrating Microsoft Academic knowledge(MAK) API into different application, we need to create to subscription id. In this article, I will show, how to generate MAK API key in azure.

Setup Academic Knowledge API:

You can follow the below steps for creating an Academic knowledge API account in the Azure Portal.

Step 1

Sign in to the Azure portal.

Step 2

Click + NEW and select / Search “Academic knowledge API” and read about the API and click on "Create".


Step 3:

Provide the API name, pricing, location, resource group and click on create.


Name - Microsoft recommends a descriptive name for API, for example - <common name><APIName>Account.

Subscription - Select the available Azure subscriptions.
Location - Select the service locations.
Pricing tier - You can choose your pricing tier. F0 is free service and S0 is paid service. Based on your usage, you can choose the pricing tier
Select the Resource group > confirm the Microsoft notice and click on "Create" again for creating the account.

Step 4:

Wait for few seconds, and you will get notification after completion. If Cognitive Services account is successfully deployed, click the notification to view the account information. You can see and copy the Endpoint URL in the Overview section.


Step 5:

You can also copy keys in the Keys section to start making API calls in your Xamarin or other applications.


Summary

In this article, you learned about how to Create a Microsoft Academic Knowledge Cognitive Services APIs account in the Azure Portal. If you have any questions/ feedback/ issues, please write in the comment box.

Building Chat Bots with Bing search results using Bot Framework

Introduction:

The Bot Framework supports different types of rich cards, Azure AD authentication and provides a richer interaction experience to the users, I have already shared about message design, login and deployment in my previous article. In this article I will share about how to connect and deploy bots into Bing Search.

You can build Bing Bot Application using Bot Framework and connect application to the Bing channel, whenever user search tag /category text and Bing search output show your Bot along with your website.


You can follow below give steps for implement your bot application into the Bing Channel.

Setup and Create New Bot Application:

You can read my previous article for create a Bots Application Using Visual Studio 2017 from following URL http://www.c-sharpcorner.com/article/getting-started-with-bots-using-visual-studio-2017/

Deploy Bot to Azure:

You can read my previous article for deploy bot application into Azure using Visual Studio 2017 from following URL http://www.c-sharpcorner.com/article/getting-started-deploy-a-bot-to-azure-using-visual-studio-2017/


Publishing Bot on Bing:

Step 1: Publishing a bot on Bing, you can navigate to Bot Framework Portal https://dev.botframework.com/bots > Login with Microsoft account > Select deployed bot application > click the Channels tab, and then click Bing.


Step 2: 

Upload Bot png icon within 32kb. Bot Icon will help people to find bot on Bing with image

Step 3: 

Provide Bot application basic information
Display Name - provide a bot display name. This name will appear in Bing search results.
Long Description – provide about bot application. The bot must operate as described in its bot description.
Website - Link to your website with more information about this bot. 


Step 4: 

The Category and tags option will help us for search bot , You can select relevant category and provide tag value with comma separated .


Step 5: 

You can provide the following publisher information.
Publisher Name
Publisher Email
Publisher Phone


Step 6: 

Provide the privacy and terms url and Click on Submit for Review


Step 7:

 The review process will take a few weeks or days and you will get approved email confirmation. after approval, you can search your bot on bing using search keyword based on category and tag.


Click the Test on Bing , the link to preview a sample of how the bot will appear on Bing on like below 


Related Article:

I have explained about Bot framework Installation, deployment and implementation in the below article

Summary

In this article, you learned how to connect and deploy bots into Bing Search. If you have any questions/feedback/ issues, please write in the comment box.

Introduction:

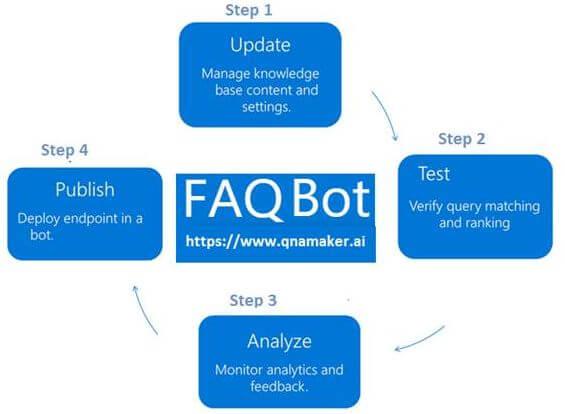
The Bot Application runs inside an application, like Skype, web chat, Facebook, Message, etc. Users can interact with bots by sending them messages, commands, and inline requests. You control your bots using HTTPS requests to the bot API. In this Article, I am going to show how we can connect Facebook messengers’ channel and integrate Bot Application to the messengers App.


Create FAQ Bot Application:

You can refer my previews article to create and build a Xamarin FAQ Bot using Azure Bot Service and deploy it into Azure. I am not using any coding for develop the Bot Application, you can follow the provided steps in the article to create and deploy FAQ Bot.


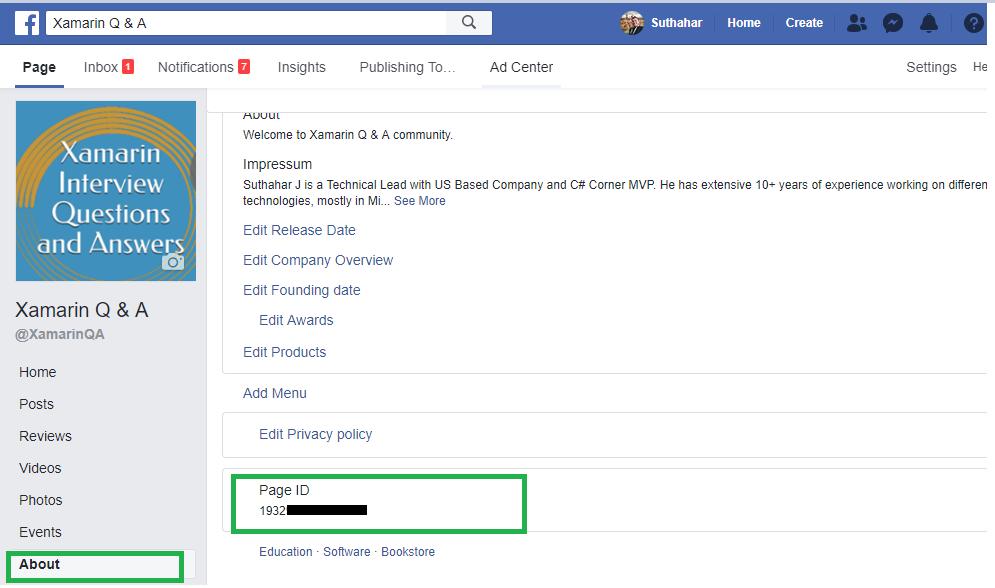
Setup Facebook Page:

We can implement Bot Application to the Facebook page. You can create Facebook page or select existing page and navigate to “About page” for find and copy the Page ID.


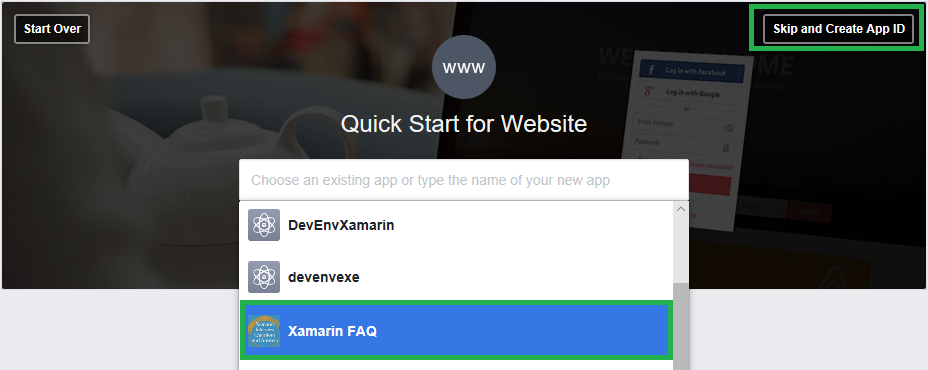
Login to Facebook APP:

Create a new Facebook App (https://bit.ly/1D0BHpg) on the Page and generate an App ID , App Secret and Page Access Token for integrate Bot to the page messenger. You can click on “Skip and Create APP Id” from following screen.
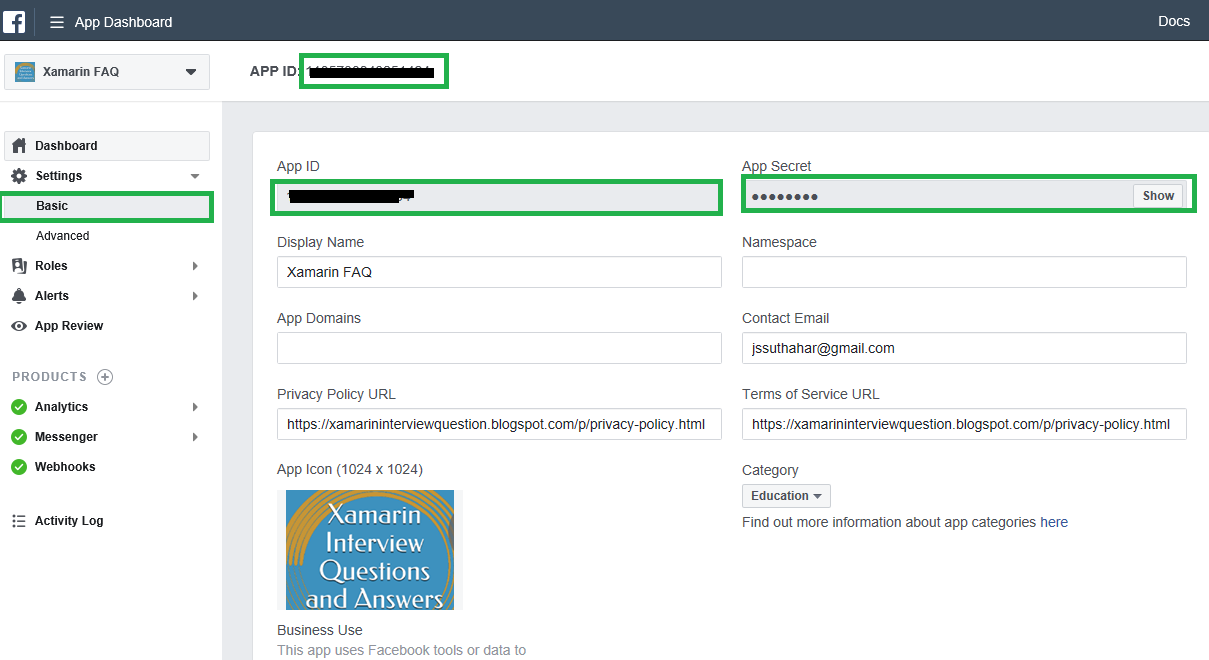

Create New App ID:
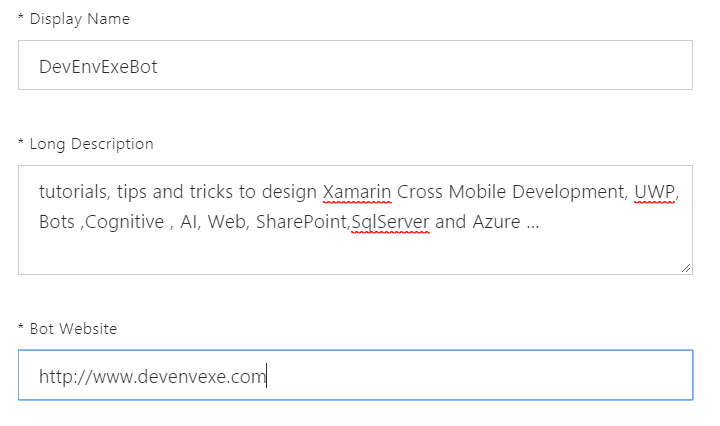
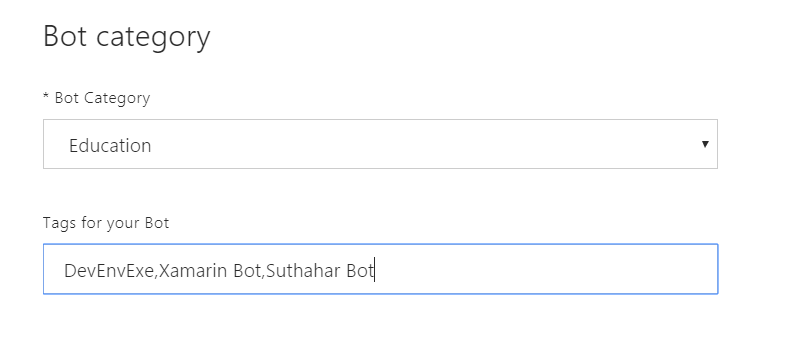
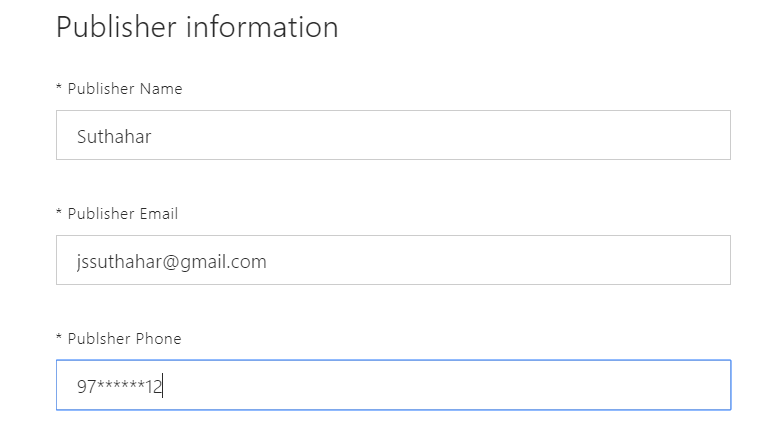
Provide display Name and Contact Email for integrate Bot application and Click on Create.

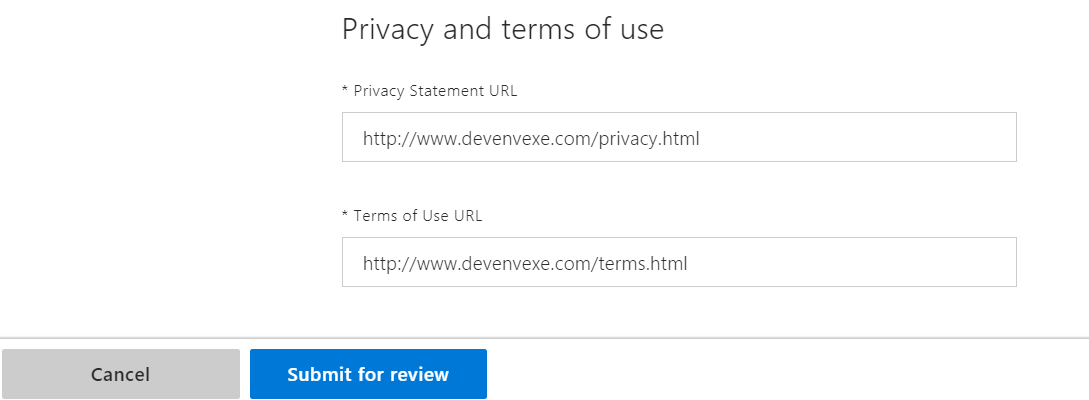
After click on Create button, it will navigate to App dashboard screen. The side navigation menu having Settings > Basic and copy the APPID and APP Secret. Provide the Privacy URL, Terms of Service URL, App icon and Select Category.


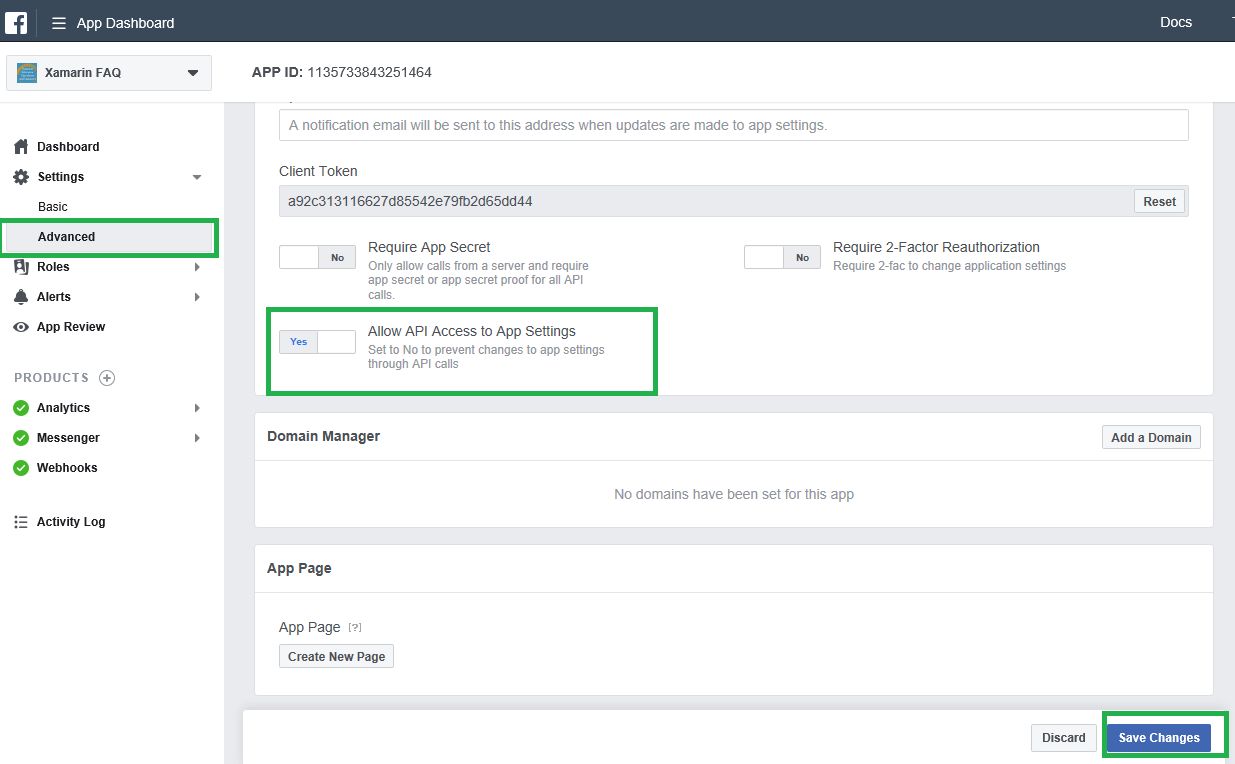
I have shown the following screen to Select Setting > Advanced and Set the "Allow API Access to App Settings slider to "Yes" and click on Save Changes.

Setup Message:

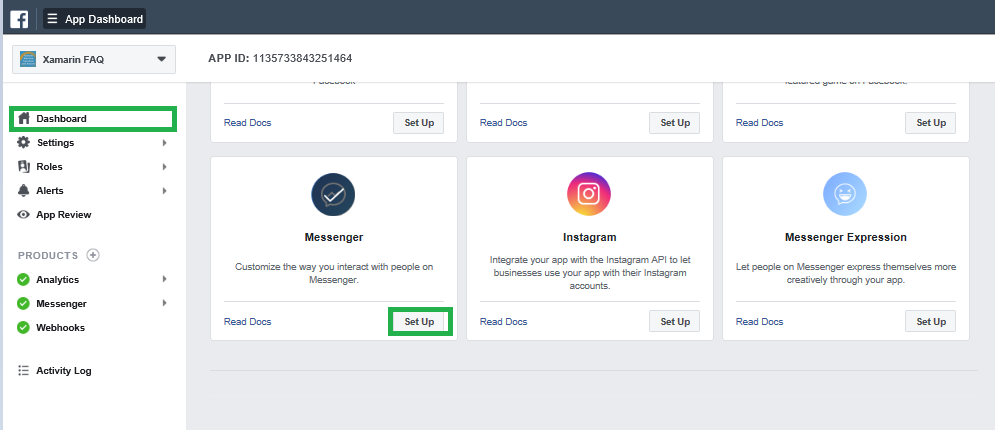
Select Dashboard and Click on Setup button from messenger group


Create Page Access Token:

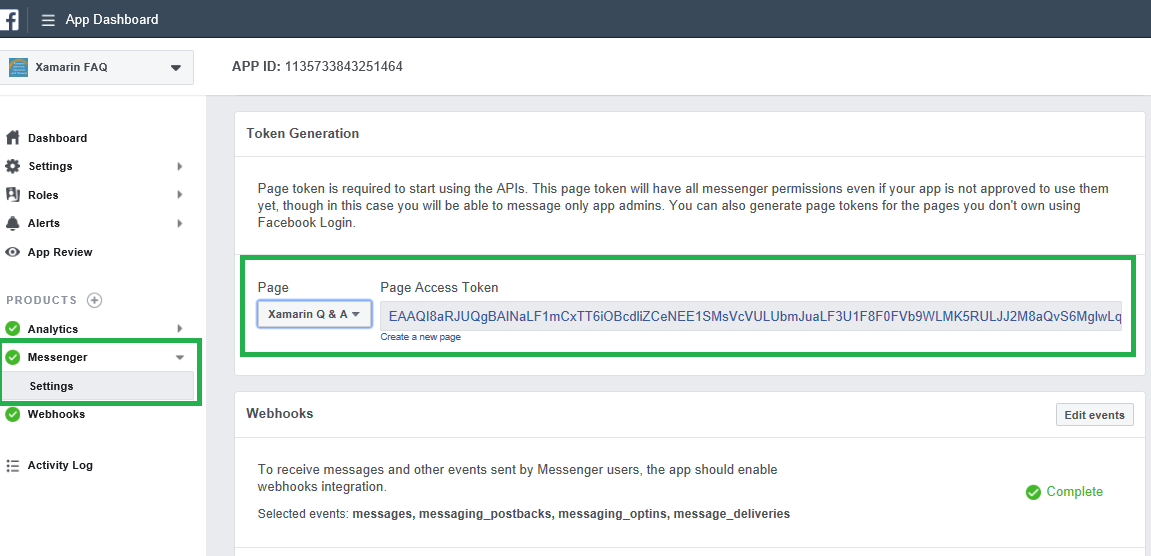
Select Setting from messenger side navigation menu to generate token, you can select the Page and generate access token and copy the page access token.

Setup Webhooks:

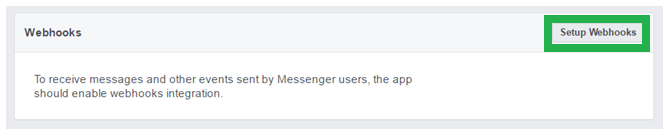
Click Set up Webhooks to forward messaging events from Facebook Messenger to the bot.


Provide following callback URL and Verify token to the webhooks setup page and select the message, message_postbacks, messaging_optins and message_deliveries subscription fields. The following Steps 2, will show how to generate Callback URL and verify token from Azure portal.


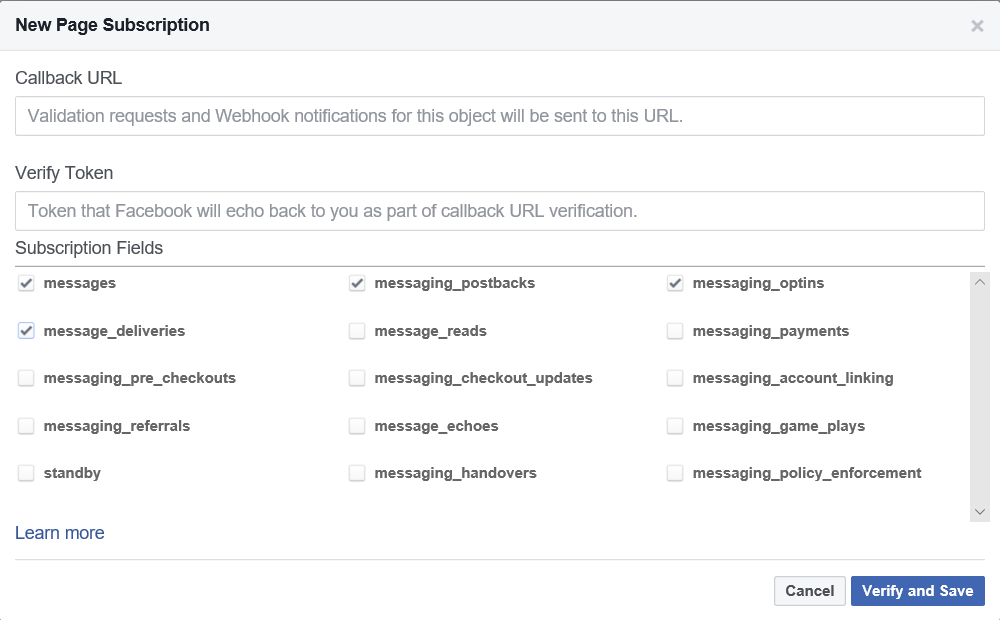
You can click on “Verify and Save “and select the Facebook page to Subscribe the webhook to the Facebook page.

Connect Facebook Channel:

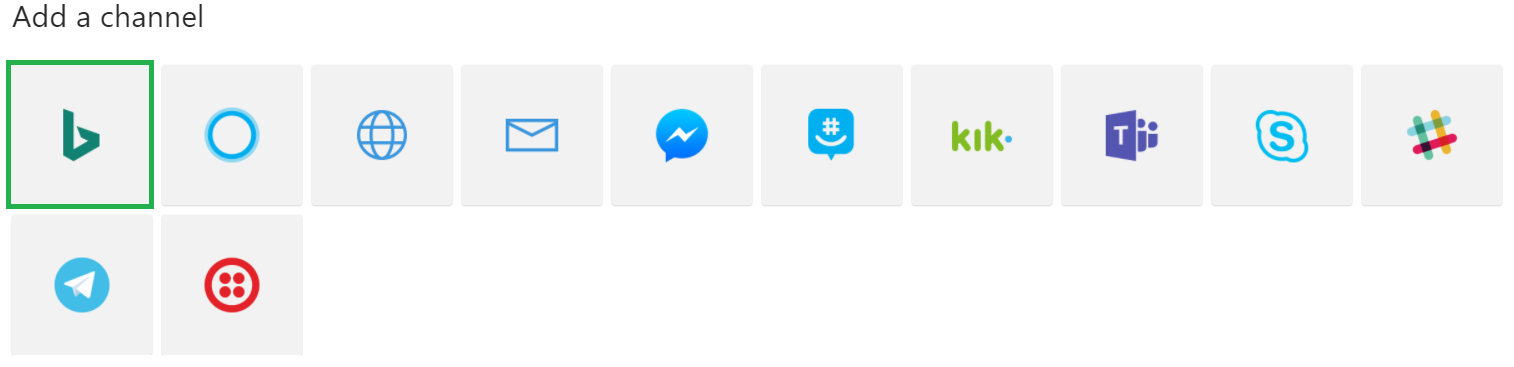
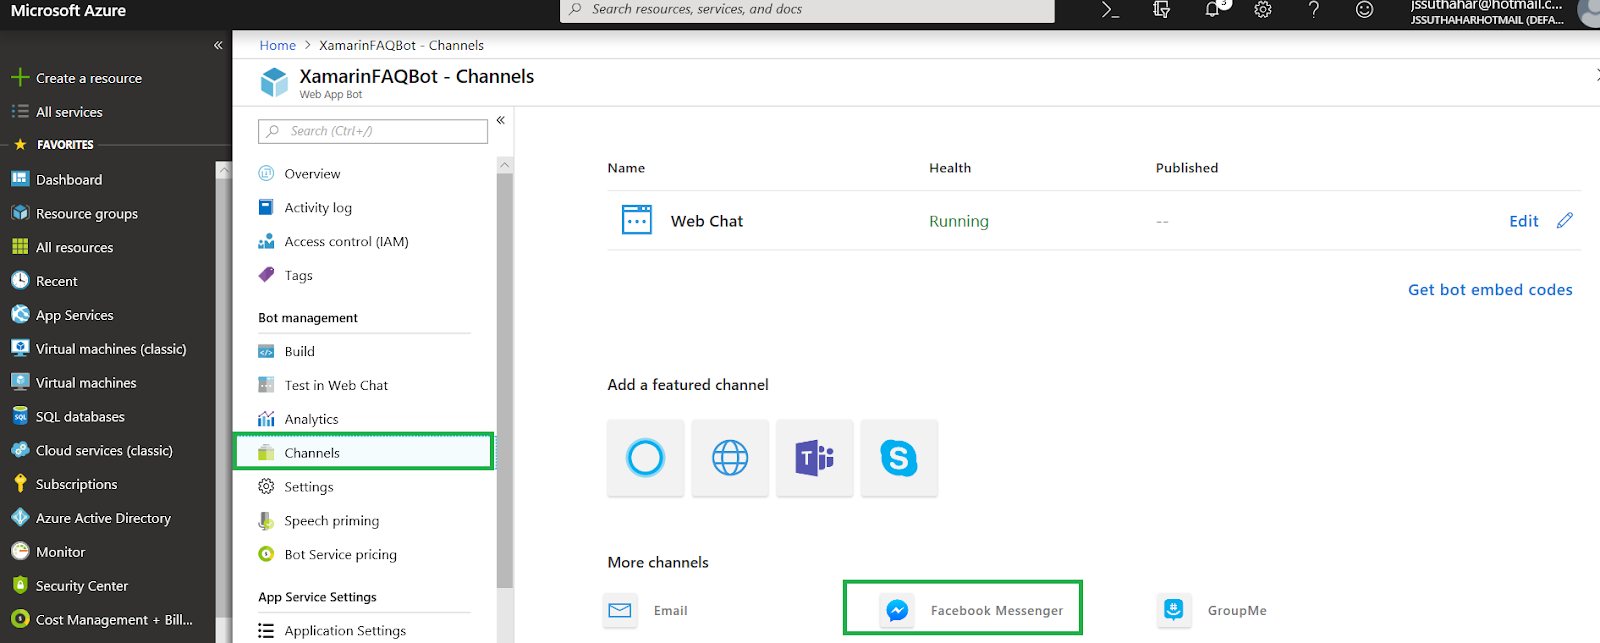
Step 1: Login to Azure portal > Select the “All Resources” > Select Channels > Select Facebook Messengers, let we start configure “Facebook Messengers “Channel and follow below steps, the end of this article you can able to deploy Bot into the Facebook messenger
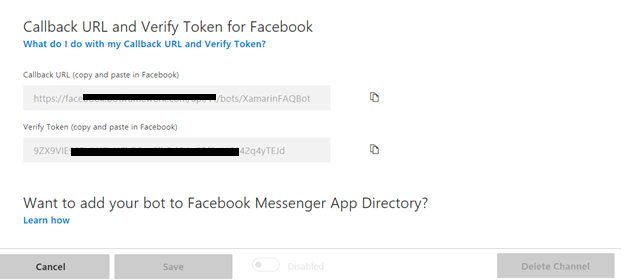


Step 2:

The Azure Facebook configuration channel will generate following Callback URL and verify token, You can copy those information and Past to the Facebook webhook setup screen. (Return to the Facebook messenger setup screen).
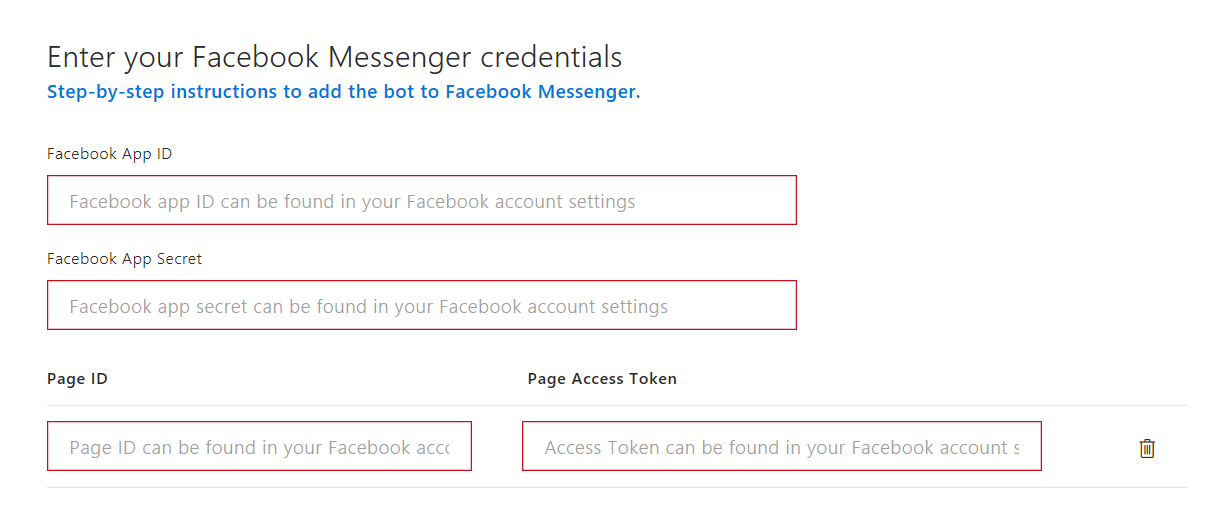


Step 3:

You can paste the Facebook App ID, Facebook App Secret, Page ID,and Page Access Token values copied from Facebook Messenger previously. You can use the same bot on multiple facebook pages by adding additional page ids and access tokens.


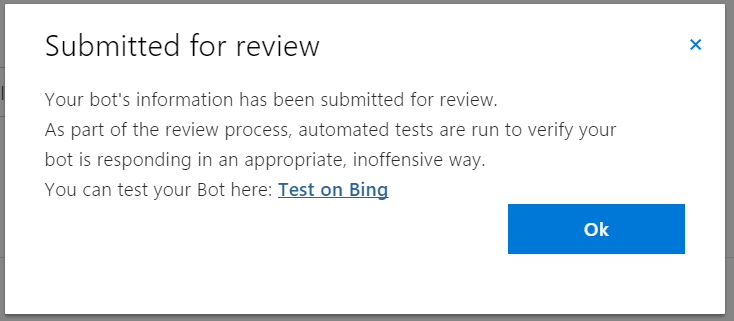
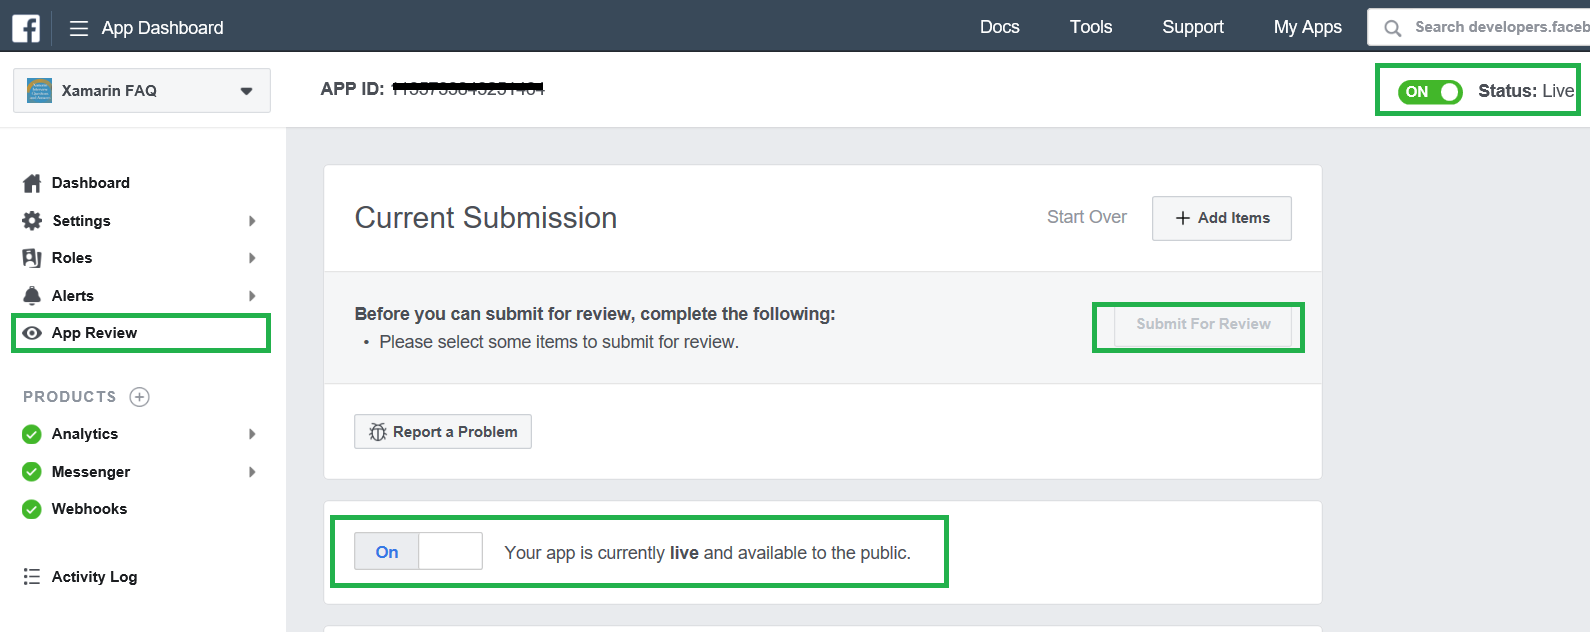
Submit for Facebook Review:

Select Ap preview and Click and Submit for review after submit will take some time for the facebook team testing to the messenger bot and you can mark your app live available to the public , then you can test messenger from the Facebook page .


Facebook Team review and Testing:

You can verify Facebook team testing progress, navigate to your Facebook page and Click on Inbox and verify, if anything problem to the messenger bot, the Team will update the bug list from App review screen.

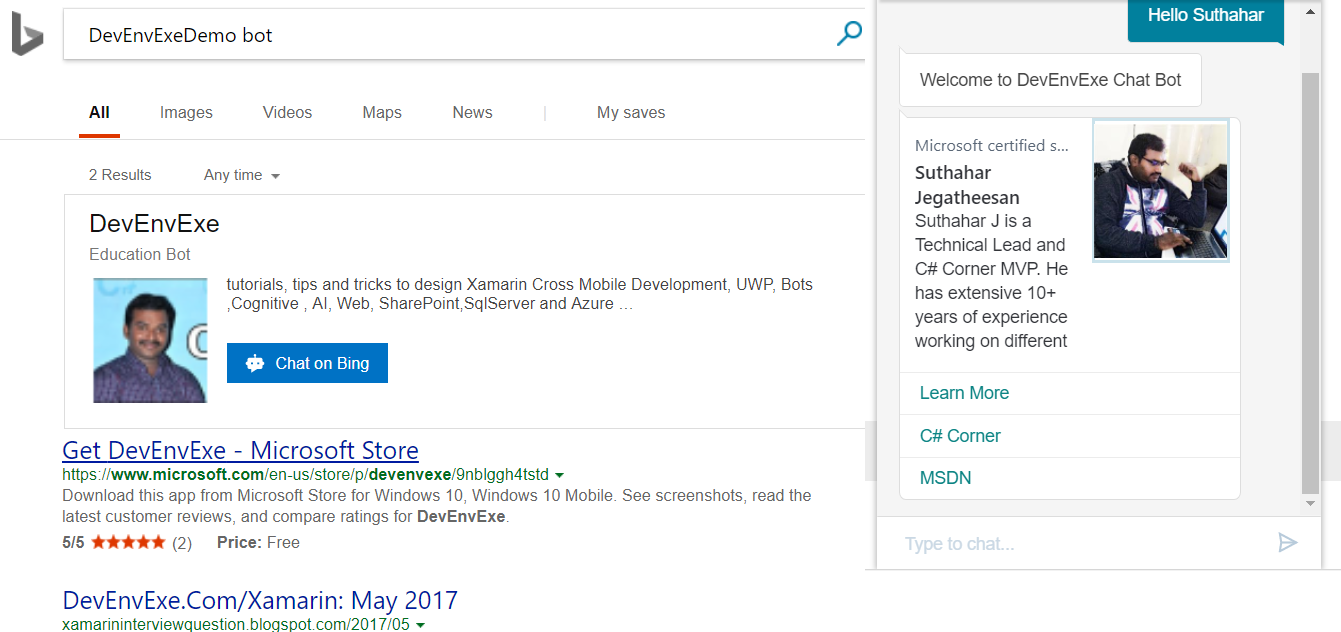
Xamarin FAQ Messengers testing:

You can select your Facebook page and test your bot application. I have trained 7000+ more questions to the Facebook messengers bot from Xamarin Q & A Page,if you want to look the xamarin FAQ demo. Navigate to Xamarin Q & A Facebook page and ask your xamairn related question.


Summary:

In this article, you have learned how to integrate bot application right into your Facebook Page via Azure Microsoft AI. If you have any questions/feedback/issues, please write in the comment box.
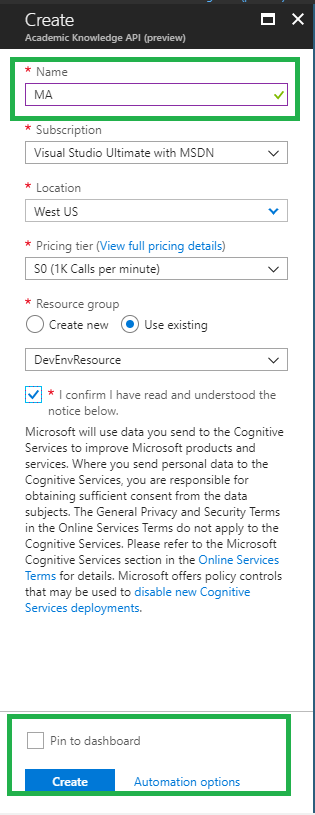
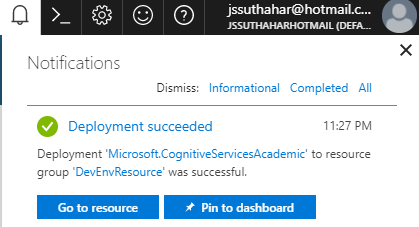


Agenda:

  • Introduction to Microsoft Bot Framework
  • Design and Develop,Test /Debug Bot Application with Demo
  • Getting Started With Azure Bot Service.
  • Deploy /Publish Intelligent Bots using Bot Builder SDK (.Net) with Demo
  • Embed a bot in a Xamarin Mobile Application
Free Registration : https://goo.gl/KSPzgv


Introduction:

Microsoft introduced the public preview of Video Indexer as a part of Cognitive Service. Previously, we used Video API but now it's replaced with Video Indexer. Video Indexer automatically extracts the metadata and builds intelligent innovative AI applications based on Video and Audio.

In this article, I will show how to integrate Video Indexer embeddable widgets into the mobile application.

Create Video Indexer Account:

The implementing Video Indexer into the application, you must have to create account and upload your video using my previous article as a reference .
Video Indexer supports embedding two types of widgets into your Mobile application
Cognitive Insights – its Includes all visual insights that were extracted from video indexer.
Player -its enable you to stream the video.
Embedding Video:
I will show below steps for how to get embedding source from video indexer portal

Step 1: 

Login to Video Indexer Portal using Microsoft, google or Azure Active directory account

Step 2: 

Select your video, whichever need to integrate to the application.

Step 3: 

Click the "embed" button that appears below the video.


Step 4: 

After click on “embed” button, Select the widget you want to embed with the desired options. (player/insights)


Step 6: 

You can copy the embed codes from embed popups and start implement into your application for Public videos. If you want to embed a Private video, you have to pass an access token in the iframe src attribute as a query string .

Create Xamarin / Web Application:

Let's start with creating a new Xamarin Forms Project using Visual Studio. Open Run - Type “Devenev.Exe” and enter - New Project (Ctrl+Shift+N) - select Blank Xaml App (Xamarin.Forms) template.


It will automatically create multiple projects, like .NET Standard, Android, iOS, and UWP.

Implement Cognitive Insights Widget:

Cognitive insights widget contains all the visual insights that were extracted from the video after the indexing process such as people appearances, top keywords, sentiment analysis, transcript, translate, and search.
Let we start implement into the Xamarin Application.
You can add webview control inside the content page as per below xaml design

<?xml version="1.0" encoding="utf-8" ?>
<ContentPage xmlns="http://xamarin.com/schemas/2014/forms"
xmlns:x="http://schemas.microsoft.com/winfx/2009/xaml"
xmlns:local="clr-namespace:VideoIndexer"
:Class="VideoIndexer.MainPage">
<WebView x:Name="browser" WidthRequest="1280" HeightRequest="780"></WebView>
</ContentPage>

You can use your cognitive insights widget code from c# code as a htmlwebviewsource . You can specify the query string for whatever widgets need to display ( <url>?widgets=people&title=myInsights)


public MainPage()
{
InitializeComponent();
// var browser = new WebView();
var htmlSource = new HtmlWebViewSource();
htmlSource.Html = @"<html><head><script src='https://breakdown.blob.core.windows.net/public/vb.widgets.mediator.js'></script></head>
<body><iframe width='580' height='780' src='https://www.videoindexer.ai/embed/insights/9123e16b12' frameborder='0' allowfullscreen></iframe>
</body></html> ";
browser.Source = htmlSource;
}

You can deploy the application, the output look like below


Implement Video Insights Widget:

The video player widget is a customized Media Player that except of providing video streaming, contains extra features such as playback speed and closed captions. Refer below code for video insight wedge implementation 

public MainPage()
{
InitializeComponent();
// var browser = new WebView();
var htmlSource = new HtmlWebViewSource();
htmlSource.Html = @"<html><head><script src='https://breakdown.blob.core.windows.net/public/vb.widgets.mediator.js'></script></head>
<body><iframe width='1280' height='720' src='https://www.videoindexer.ai/embed/player/9123e16b12' frameborder='0' allowfullscreen></iframe>
</body></html> ";
browser.Source = htmlSource;
}

Implement Video and Cognitive Insights Widget:

Copy the player and cognitive insights embed code and also include javascript communication file for communicate with each other widget

var htmlSource = new HtmlWebViewSource();
htmlSource.Html = @"<html><head><script src='https://breakdown.blob.core.windows.net/public/vb.widgets.mediator.js'></script></head>
<body><iframe width='1280' height='720' src='https://www.videoindexer.ai/embed/player/9123e16b12' frameborder='0' allowfullscreen></iframe>
<iframe width = '1280' height = '780' src = 'https://www.videoindexer.ai/embed/insights/9123e16b12/?widgets=people&title=myInsights' frameborder = '0' allowfullscreen ></iframe >
</body></html> ";
browser.Source = htmlSource;

Summary

In this article, we learned how to sign in to Video Indexer and integrate Video Indexer embeddable widgets into the mobile cross platform application. If you have any questions/feedback/ issues, please write in the comments box.


MSDN Source Code


Introduction:

Microsoft introduced the public preview of Video Indexer as a part of Cognitive Service. Previously, we used Video API but now it's replaced with Video Indexer. Video Indexer automatically extracts the metadata and builds intelligent innovative AI applications based on Video and Audio.


In this article, I will show how to integrate Video Indexer embeddable widgets into the mobile application.

Create Video Indexer Account:

The implementing Video Indexer into the application, you must have to create account and upload your video
using my previous article as a reference .

Video Indexer supports embedding two types of widgets into your Mobile application

Cognitive Insights – its Includes all visual insights that were extracted from video indexer.

Player -its enable you to stream the video.

Embedding Video:

I will show below steps for how to get embedding source from video indexer portal 

Step 1: 

Login to Video Indexer Portal using Microsoft, google or Azure Active directory account

Step 2: 

Select your video, whichever need to integrate to the application.

Step 3:

 Click the "embed" button that appears below the video.


Step 4:

 After click on “embed” button, Select the widget you want to embed with the desired options.
(player/insights)


Step 6: 

You can copy the embed codes from embed popups and start implement into your application for 
Public videos. If you want to embed a Private video, you have to pass an access token in the iframe src attribute as a query string .

Create Xamarin / Web Application:

Let's start with creating a new Xamarin Forms Project using Visual Studio. Open Run - Type “Devenev.Exe” and enter - New Project (Ctrl+Shift+N) - select Blank Xaml App (Xamarin.Forms) template.


It will automatically create multiple projects, like .NET Standard, Android, iOS, and UWP.

Implement Cognitive Insights Widget:

Cognitive insights widget contains all the visual insights that were extracted from the video after the indexing process such as people appearances, top keywords, sentiment analysis, transcript, translate, and search.

Let we start implement into the Xamarin Application.

You can add webview control inside the content page as per below xaml design 

<?xml version="1.0" encoding="utf-8" ?>
<ContentPage xmlns="http://xamarin.com/schemas/2014/forms"
xmlns:x="http://schemas.microsoft.com/winfx/2009/xaml"
xmlns:local="clr-namespace:VideoIndexer"
:Class="VideoIndexer.MainPage">
<WebView x:Name="browser" WidthRequest="1280" HeightRequest="780"></WebView>
</ContentPage>

You can use your cognitive insights widget code from c# code as a htmlwebviewsource . 

You can specify the query string for whatever widgets need to display ( <url>?widgets=people&title=myInsights)

public MainPage()
{
InitializeComponent();
// var browser = new WebView();
var htmlSource = new HtmlWebViewSource();
htmlSource.Html = @"<html><head><script src='https://breakdown.blob.
core.windows.net/public/vb.widgets.mediator.js'></script></head>
<body><iframe width='580' height='780' src='https://www.videoindexer.ai/embed/
insights/9123e16b12' frameborder='0' allowfullscreen></iframe>
</body></html> ";
browser.Source = htmlSource;
}

You can deploy the application, the output look like below


Implement Video Insights Widget:

The video player widget is a customized Media Player that except of providing video streaming,
contains extra features such as playback speed and closed captions. Refer below code for video insight wedge implementation

public MainPage()
{
InitializeComponent();
// var browser = new WebView();
var htmlSource = new HtmlWebViewSource();
htmlSource.Html = @"<html><head><script src='https://breakdown.blob.
core.windows.net/public/
vb.widgets.mediator.js'></script></head>
<body><iframe width='1280' height='720' src='https://www.videoindexer.ai/embed/
player/9123e16b12'
frameborder='0' allowfullscreen></iframe>
</body></html> ";
browser.Source = htmlSource;
}

Implement Video and Cognitive Insights Widget:

Copy the player and cognitive insights embed code and also include javascript communication file
for communicate with each other widget

var htmlSource = new HtmlWebViewSource();
htmlSource.Html = @"<html><head><script src='https://breakdown.
blob.core.windows.net/public/
vb.widgets.mediator.js'></script></head>
<body><iframe width='1280' height='720' src='https://www.videoindexer.
ai/embed/player/9123e16b12'
frameborder='0' allowfullscreen></iframe>
<iframe width = '1280' height = '780' src = 'https://www.videoindexer.
ai/embed/insights/9123e16b12/?
widgets=people&title=myInsights' frameborder = '0' allowfullscreen ></iframe >
</body></html> ";
browser.Source = htmlSource;

Summary

In this article, we learned how to sign in to Video Indexer and integrate Video Indexer embeddable
widgets into the mobile cross-platform application. If you have any questions/feedback/ issues,
please write in the comments box.


MSDN Source Code

Introduction:

Microsoft introduced the public preview of video indexer as part of cognitive service. previously its Video API now its replaced into Video Indexer. Video Indexer automatically extract metadata and build intelligent innovative application based Video and audio.


In this article, I will share how to sign in to video Indexer and upload your video and extracting the meta data and translation.

Create Account:

The developing video indexer application, you must login or create account using any of one below account Azure active directory, Microsoft Scholl account, LinkedIn, google or Facebook to Microsoft VI.

Upload Video:

We need to upload video into MS video Indexer portal, after login, select Upload and Drag drop your video file or provide video web URL for upload to the portal Provide basic details about video file name, language and privacy setting and click on upload button .


After uploaded video to the portal, Microsoft VI will do process for analyzing and indexing the video.


Once video indexer is done the analyze, you will get email notification with link of video, short description and people face detection.


You can edit the privacy setting from the portal and Microsoft cognitive service will return following analyze report.

Face identification:

Microsoft AI will help detection of faces in a Video. The faces are matched against a celebrity, it will identify the matched name or user can also edit label faces that do not match the celebrity.


Speech to Text:

The Microsoft Video Indexer has speech to text functionality, this will help user to transcript to spoken language .it will support Tamil, English, Hindi, etc. and also you can edit the text . Video Indexer has the ability to map and understand which speaker spoke which words and when.


Identify Objects:

Video Indexer identify the pre-defined 2000 objects based on video background.
 

Keyword Extractions:

The meta keyword will help for search the video into the large library. Video Indexer extracts keywords based on the transcript of the spoken words and text recognized by visual text recognizer.


Sentiment analysis:

Video Indexer performs sentiment analysis on the text extracted using speech-to-text and optical character recognition, and provide that information in the form of positive, negative of neutral sentiments, along with timecodes.


Translation:

Video Indexer has the ability to translate the audio transcript from one language to another. Video Indexer will supported following multiple language like Tamil, English, Spanish, etc.. 


Once Video Indexer is done the processing and analyzing video , you can review , edit ,delete and publish the video into the Microsoft VI Portal .


Summary

In this article, you learned how to sign in to video Indexer and upload the video and extracting the meta data and translation. If you have any questions/feedback/ issues, please write in the comment box.

Featured Post

Improving C# Performance by Using AsSpan and Avoiding Substring

During development and everyday use, Substring is often the go-to choice for string manipulation. However, there are cases where Substring c...

MSDEVBUILD - English Channel

MSDEVBUILD - Tamil Channel

Popular Posts