Introduction:

OAuth is an Authorization framework that enable application to obtain limited access to user accounts on HTTP service in Facebook, google and Microsoft etc. Nowadays no need to create registration logic alternatively you can choose to use identity provider login. In this case a person signs up for the app using identity provider Login, an account is created for them, and the authentication step is taken care of by identity provider.
In this article I will explain how to implement below oAuth identity provider in xamarin Forms and manage the authentication process in a xamarin Forms application
GOOGLE
FACEBOOK
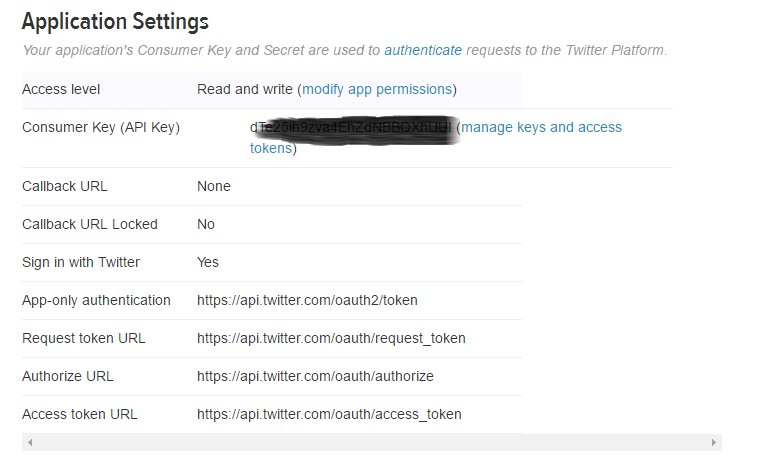
TWITTER
MICROSOFT
LINKEDIN
GITHUB
FLICKER
YAHOO
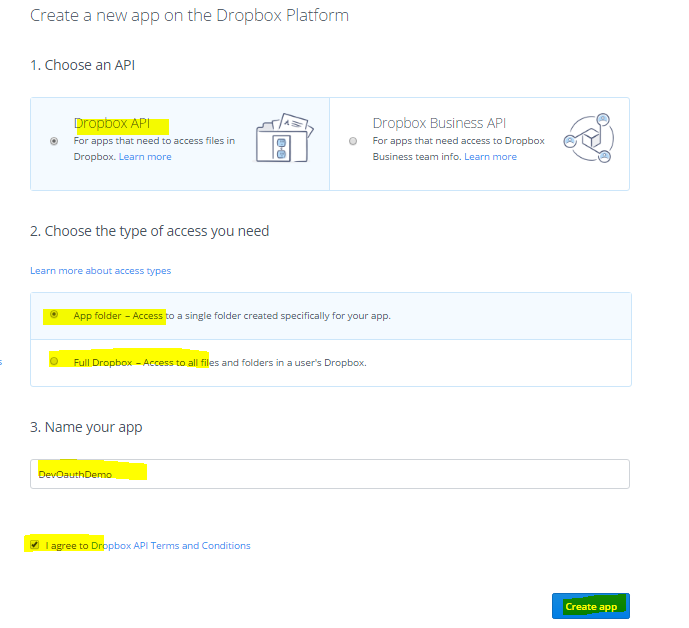
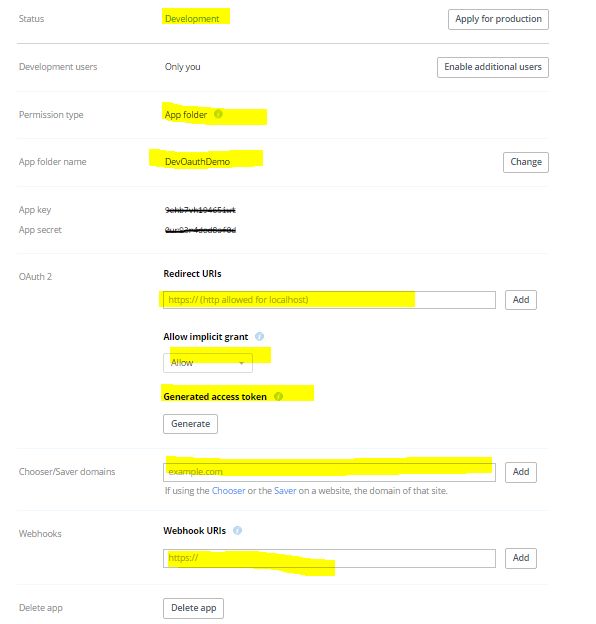
DROPBOX
Register Mobile App with Identity Provider:
You can find my previous article for register mobile app with identity provider from
here
Step 1: Create New Xamarin.Forms Project:
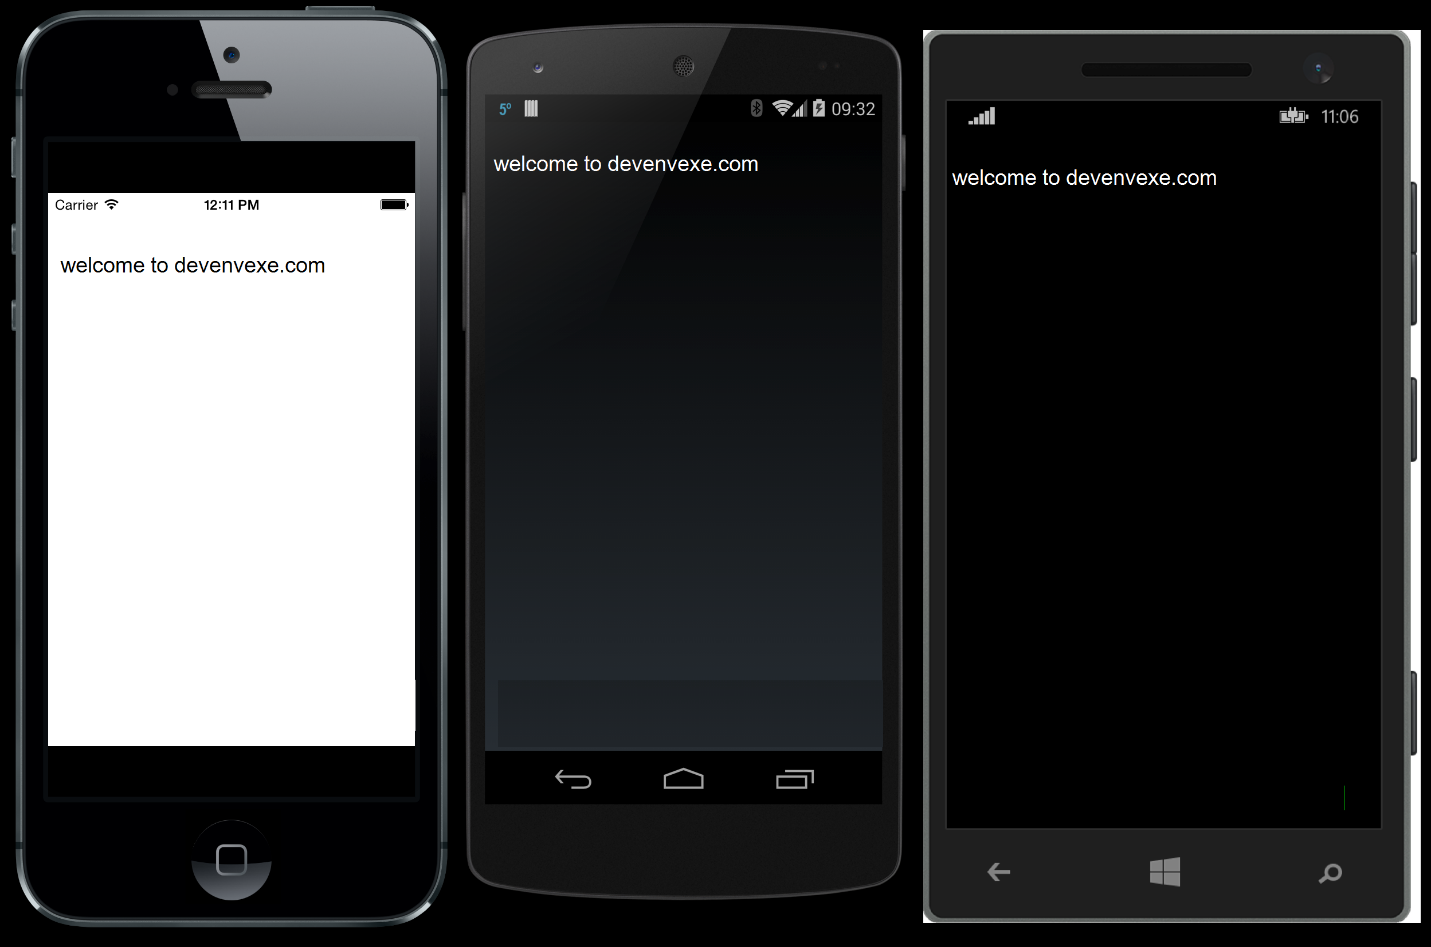
Let Start create new Xamarin Forms Project in Visual studio
Open Run ➔ Type Devenev.Exe and enter ➔ New Project (Ctrl+Shift+N)➔ select Blank Xamarin.Forms Portable template

It will automatically create multiple project like Portable, Android, iOS, UWP but Here, I will be targeting only Android, as iOS and UWP implementation is similar.
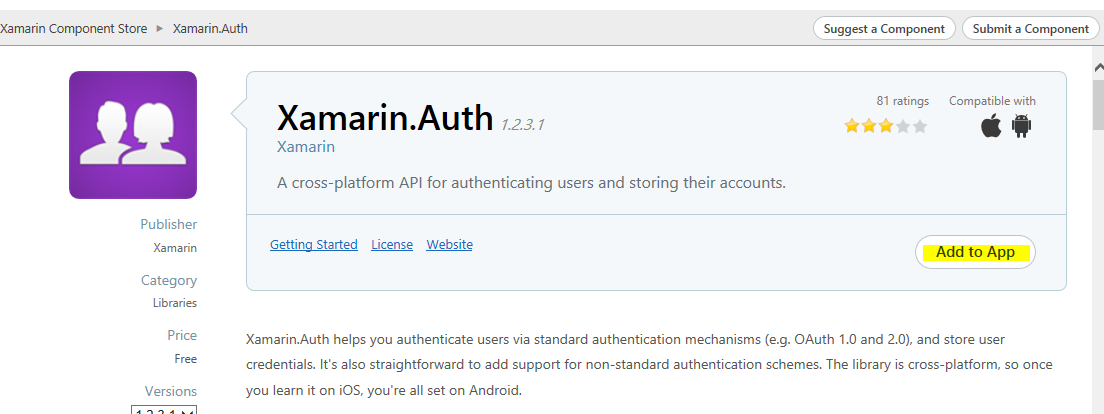
Step 2: Install OAuth Client Components
Xamarin.Auth is a cross-platform SDK for authenticating users and storing their accounts. It includes OAuth authenticators that provide support for consuming identity providers.
Let's add the Xamarin.Auth component for OAuth. We will have to add this in all platform specific projects separately.
Go to Any project (DevEnVExeLogin.Droid) ➔ Components ➔ Right Click Get More Components
If you are not login already, it will show login page.
Next, Search and double-click on Xamarin.Auth
component and click on Add to App
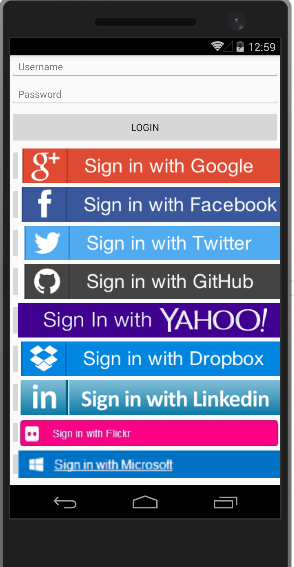
Step 3: Create Base Login Page (LoginPage.Xaml)
I have created quick and simple login screen .You can modify as per your requirement
Right Click Portable Class Library ➔ Add New Item ➔ Select Xaml Page(Login Page)
LoginPage.Xaml
<?xml version="1.0" encoding="utf-8" ?>
<ContentPage xmlns="http://xamarin.com/schemas/2014/forms"
xmlns:x="http://schemas.microsoft.com/winfx/2009/xaml"
xmlns:local="clr-namespace:DevEnvExeLogin"
x:Class="DevEnvExeLogin.LoginPage">
<StackLayout>
<Entry Placeholder="Username" />
<Entry IsPassword="true" Placeholder="Password" />
<Button Text="Login" HeightRequest="50" />
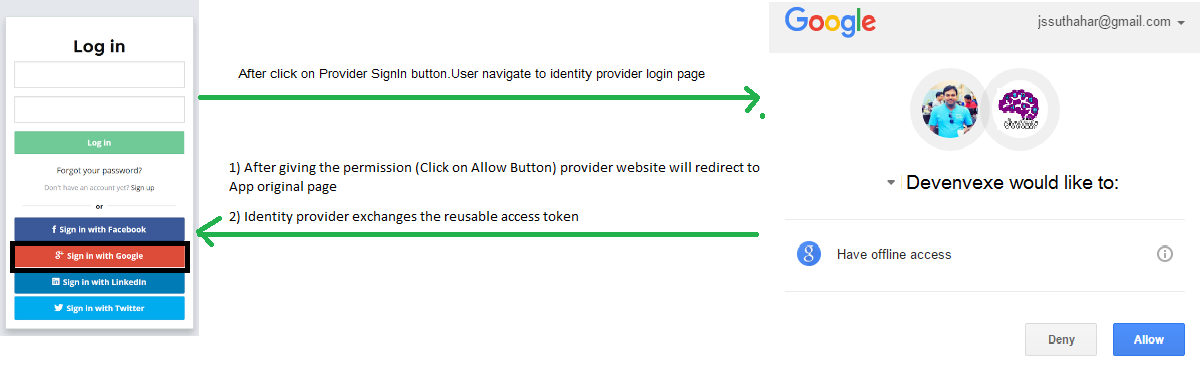
<Button Text="Google" Clicked="LoginClick" Image="GOOGLE.png" HeightRequest="50"/>
<Button Text="FaceBook" Clicked="LoginClick" Image="FACEBOOK.png" HeightRequest="50"/>
<Button Text="Twitter" Clicked="LoginClick" Image="TWITTER.png" HeightRequest="50"/>
<Button Text="Github" Clicked="LoginClick" Image="GITHUB.png" HeightRequest="50"/>
<Button Text="Yahoo" Clicked="LoginClick" Image="YAHOO.png" HeightRequest="50"/>
<Button Text="DropBox" Clicked="LoginClick" Image="DROPBOX.png" HeightRequest="50"/>
<Button Text="LinkedIn" Clicked="LoginClick" Image="LINKEDIN.png" HeightRequest="50"/>
<Button Text="Flicker" Clicked="LoginClick" Image="FLICKER.png" HeightRequest="40"/>
<Button Text="Twitter" Clicked="LoginClick" Image="MICROSOFT.png" HeightRequest="40"/>
</StackLayout>
</ContentPage>
LoginPage.Xaml.CS
Add LoginClick event in login page code behind file and sender object will return button text name (eg:Facebook,Twitter..etc)
using System;
using Xamarin.Forms;
namespace DevEnvExeLogin
{
public partial class LoginPage : ContentPage
{
public LoginPage()
{
InitializeComponent();
}
void LoginClick(object sender, EventArgs args)
{
Button btncontrol = (Button)sender;
string providername = btncontrol.Text;
if (OAuthConfig.User == null)
{
Navigation.PushModalAsync(new ProviderLoginPage(providername));
//Need to create ProviderLoginPage so follow Step 4 and Step 5
}
}
}
}
Step 4: Create Identity Provider Login Page
As we will be having platform specific LoginPage implementation of Xamarin.Auth, we don't need any specific implementation in the portable project.
We do need to add an empty ProviderLoginPage which will be resolved at runtime and substituted by actual implementation regarding this will explain on step 5
Right Click Portable Project ➔ Add New Item ➔Select Xaml page (ProviderLoginPage.Xaml )
using Xamarin.Forms;
namespace DevEnvExeLogin
{
public partial class ProviderLoginPage : ContentPage
{
//we will refer providename from renderer page
public string ProviderName { get; set; }
public ProviderLoginPage(string _providername)
{
InitializeComponent();
ProviderName = _providername;
}
}
}
** In Xaml page no Changes
Step 5: Create Platform Specific Login Renderer:
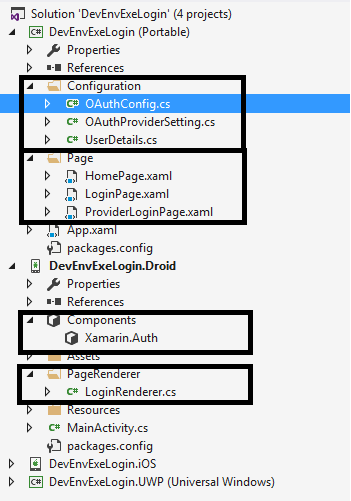
We need to create platform specific LoginRenderer Page so you can create platform specific Login page (loginRenderer.CS) to iOS, Android and UWP project.
We need to add LoginPageRenderer which will be used by Xamarin.Auth to display web view for OAuth Login Page
Code Snippet Explanation:
The below code is Xamarin.Forms DependencyService which maps ProviderLoginPage to LoginRenderer.
[assembly: ExportRenderer(typeof(ProviderLoginPage), typeof(LoginRenderer))]
Get Identity ProviderName from Providerloginpage
var loginPage = Element as ProviderLoginPage;
string providername = loginPage.ProviderName;
Create OauthProviderSetting class from Portable Class Library with Oauth Implementation, regarding this I have explained in Step 6.
//Create OauthProviderSetting class with Oauth Implementation .Refer Step 6
OAuthProviderSetting oauth = new OAuthProviderSetting();
var auth = oauth.LoginWithProvider(providername);
Create Oauth event for provider login completed and canceled.
auth.Completed += (sender, eventArgs) =>
{
if (eventArgs.IsAuthenticated)
{ //Login Success }
else
{
// The user cancelled
}
};
If you want get and save user info. You can create UserEntity from Portable library and refer below code
namespace DevEnvExeLogin
{
public class UserDetails
{
public string TwitterId { get; set; }
public string Name { get; set; }
public string ScreenName { get; set; }
public string Token { get; set; }
public string TokenSecret { get; set; }
public bool IsAuthenticated
{
get
{
return !string.IsNullOrWhiteSpace(Token);
}
}
}
}
LoginRenderer.CS
using Android.App;
using Xamarin.Forms.Platform.Android;
using DevEnvExeLogin;
using Xamarin.Forms;
using DevEnvExeLogin.Droid.PageRender;
[assembly: ExportRenderer(typeof(ProviderLoginPage), typeof(LoginRenderer))]
namespace DevEnvExeLogin.Droid.PageRender
{
public class LoginRenderer : PageRenderer
{
bool showLogin = true;
protected override void OnElementChanged(ElementChangedEventArgs<Page> e)
{
base.OnElementChanged(e);
//Get and Assign ProviderName from ProviderLoginPage
var loginPage = Element as ProviderLoginPage;
string providername = loginPage.ProviderName;
var activity = this.Context as Activity;
if (showLogin && OAuthConfig.User == null)
{
showLogin = false;
//Create OauthProviderSetting class with Oauth Implementation .Refer Step 6
OAuthProviderSetting oauth = new OAuthProviderSetting();
var auth = oauth.LoginWithProvider(providername);
// After facebook,google and all identity provider login completed
auth.Completed += (sender, eventArgs) =>
{
if (eventArgs.IsAuthenticated)
{
OAuthConfig.User = new UserDetails();
// Get and Save User Details
OAuthConfig.User.Token = eventArgs.Account.Properties["oauth_token"];
OAuthConfig.User.TokenSecret = eventArgs.Account.Properties["oauth_token_secret"];
OAuthConfig.User.TwitterId = eventArgs.Account.Properties["user_id"];
OAuthConfig.User.ScreenName = eventArgs.Account.Properties["screen_name"];
OAuthConfig.SuccessfulLoginAction.Invoke();
}
else
{
// The user cancelled
}
};
activity.StartActivity(auth.GetUI(activity));
}
}
}
}
Step 7: OAuth Implementation
The OAuth2Authenticator class is responsible for managing the user interface and communicating with authentication services. It will support all the identity provider
But In Twitter Oauth Authentication will support only on OAuth1Authenticator so you can use OAuth1Authenticator instead of OAuth2Authenticator.
The OAuth2Authenticator and OAuth1Authenticator class requires a number of parameters, as shown in the following list
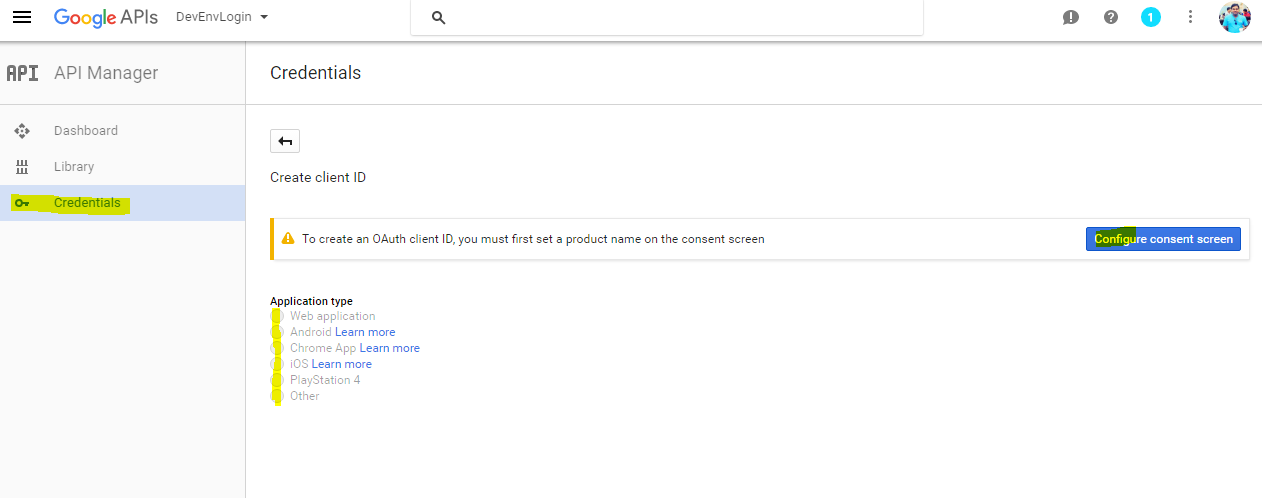
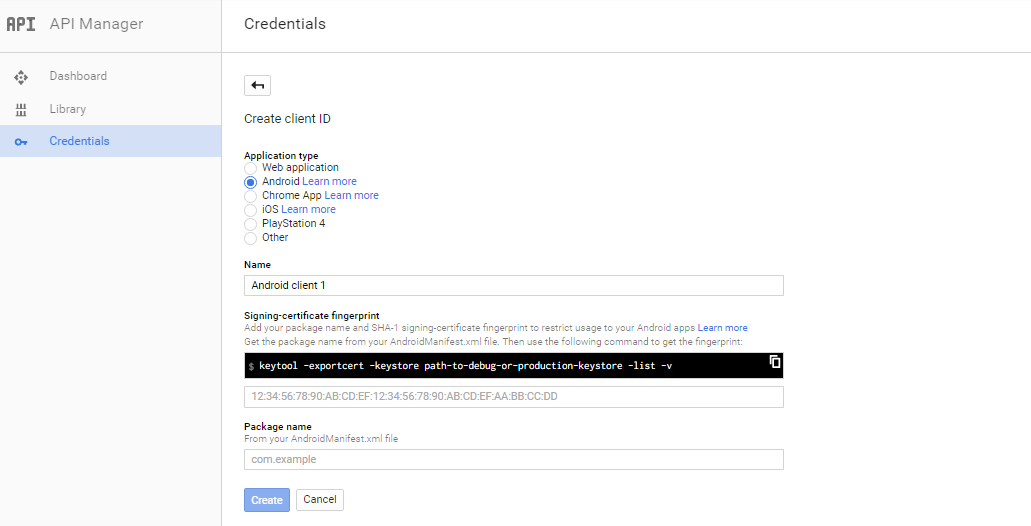
Client ID – Identity provider client ID, while register app you will unique client ID.
Client Secret –identifies the client that is making the request. while register app you will unique client secret
Scope – this identifies the API access being requested by the application, and the value informs the consent screen
that is shown to the user. For more information about scopes,
Authorize URL – this identifies the URL where the authorization code will be obtained from.
Redirect URL – this identifies the URL where the response will be sent. The value of this parameter must match
one of the values that appears in the Credentials page for the project.
AccessToken Url — this identifies the URL used to request access tokens after an authorization code is obtained.
Step 7.1: Access GOOGLE Account:
var googleauth = new OAuth2Authenticator(
// For Google login, for configure refer http://jsdotnetsupport.blogspot.in/2016/08/register-identity-provider-for-new.html
"ClientId",
"ClientSecret",
// Below values do not need changing
"https://www.googleapis.com/auth/userinfo.email",
new Uri("https://accounts.google.com/o/oauth2/auth"),
new Uri("http://www.devenvexe.com"),// Set this property to the location the user will be redirected too after successfully authenticating
new Uri("https://accounts.google.com/o/oauth2/token")
);
Step 7.2: Access FACEBOOK Account:
var OauthFacebook = new OAuth2Authenticator(
clientId: "MyAppId", // For Facebook login, for configure refer http://jsdotnetsupport.blogspot.in/2016/08/register-identity-provider-for-new.html
scope: "",
authorizeUrl: new Uri("https://m.facebook.com/dialog/oauth/"), // These values do not need changing
redirectUrl: new Uri("http://www.facebook.com/connect/login_success.html")// These values do not need changing
);
Step 7.3: Access TWITTER Account:
OAuth1Authenticator auth = new OAuth1Authenticator(
consumerKey: "*****", // For Twitter login, for configure refer http://jsdotnetsupport.blogspot.in/2016/08/register-identity-provider-for-new.html
consumerSecret: "****", // For Twitter login, for configure refer http://jsdotnetsupport.blogspot.in/2016/08/register-identity-provider-for-new.html
requestTokenUrl: new Uri("https://api.twitter.com/oauth/request_token"), // These values do not need changing
authorizeUrl: new Uri("https://api.twitter.com/oauth/authorize"), // These values do not need changing
accessTokenUrl: new Uri("https://api.twitter.com/oauth/access_token"), // These values do not need changing
callbackUrl: new Uri("http://www.devenvexe.com") // Set this property to the location the user will be redirected too after successfully authenticating
Step 7.4 Access Microsoft Account:
var OauthMicrosoft = new OAuth2Authenticator(
clientId: "MY ID", // For Micrsoft login, for configure refer http://jsdotnetsupport.blogspot.in/2016/08/register-identity-provider-for-new.html
scope: "bingads.manage",
authorizeUrl: new Uri("https://login.live.com/oauth20_authorize.srf?client_id=myid&scope=bingads.manage&response_type=token&redirect_uri=https://login.live.com/oauth20_desktop.srf"),
redirectUrl: new Uri("https://adult-wicareerpathways-dev.azurewebsites.net/Account/ExternalLoginCallback")
);
Step 7.5 Access LINKEDIN Account:
var authLinkediN = new OAuth2Authenticator(
clientId: "**",// For LinkedIN login, for configure refer http://jsdotnetsupport.blogspot.in/2016/08/register-identity-provider-for-new.html
clientSecret: "**",
scope: "",
authorizeUrl: new Uri("https://www.linkedin.com/uas/oauth2/authorization"),
redirectUrl: new Uri("http://devenvexe.com/"),
accessTokenUrl: new Uri("https://www.linkedin.com/uas/oauth2/accessToken")
Step 7.6 Access GITHUB Account:
auth = new OAuth2Authenticator(
// For GITHUB login, for configure refer http://jsdotnetsupport.blogspot.in/2016/08/register-identity-provider-for-new.html
"ClientId",
"ClientSecret",
// Below values do not need changing
"",
new Uri("https://github.com/login/oauth/authorize"),
new Uri("http://www.devenvexe.com"),// Set this property to the location the user will be redirected too after successfully authenticating
new Uri("https://github.com/login/oauth/access_token")
);
Step 7.7 Access FLICKER Account:
auth = new OAuth2Authenticator(
// For Flicker login, for configure refer http://jsdotnetsupport.blogspot.in/2016/08/register-identity-provider-for-new.html
"ClientId",
"ClientSecret",
// Below values do not need changing
"",
new Uri("https://www.flickr.com/services/oauth/request_token"),
new Uri("http://www.devenvexe.com"),// Set this property to the location the user will be redirected too after successfully authenticating
new Uri("http://www.flickr.com/services/oauth/access_token"));
Step 7.8 Access YAHOO Account:
auth = new OAuth2Authenticator(
// For Yahoo login, for configure refer http://jsdotnetsupport.blogspot.in/2016/08/register-identity-provider-for-new.html
"ClientId",
"ClientSecret",
// Below values do not need changing
"",
new Uri("https://api.login.yahoo.com/oauth2/request_auth"),
new Uri("http://www.devenvexe.com"),// Set this property to the location the user will be redirected too after successfully authenticating
new Uri("https://api.login.yahoo.com/oauth2/get_token")
);
You can
download source and replace client ID or AppID and Client secret


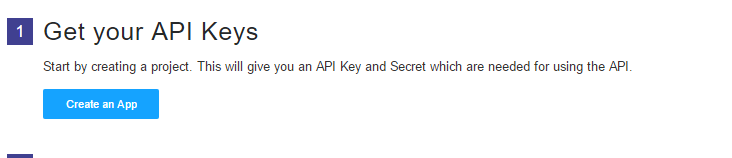
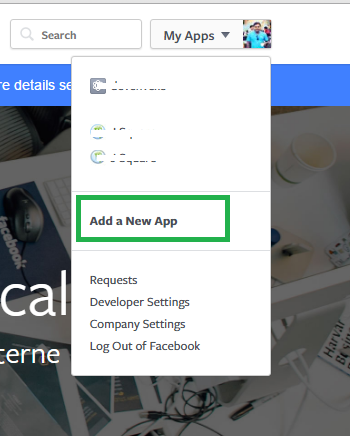
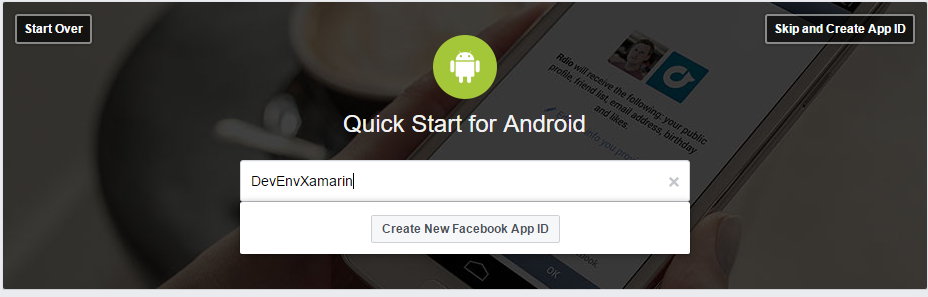
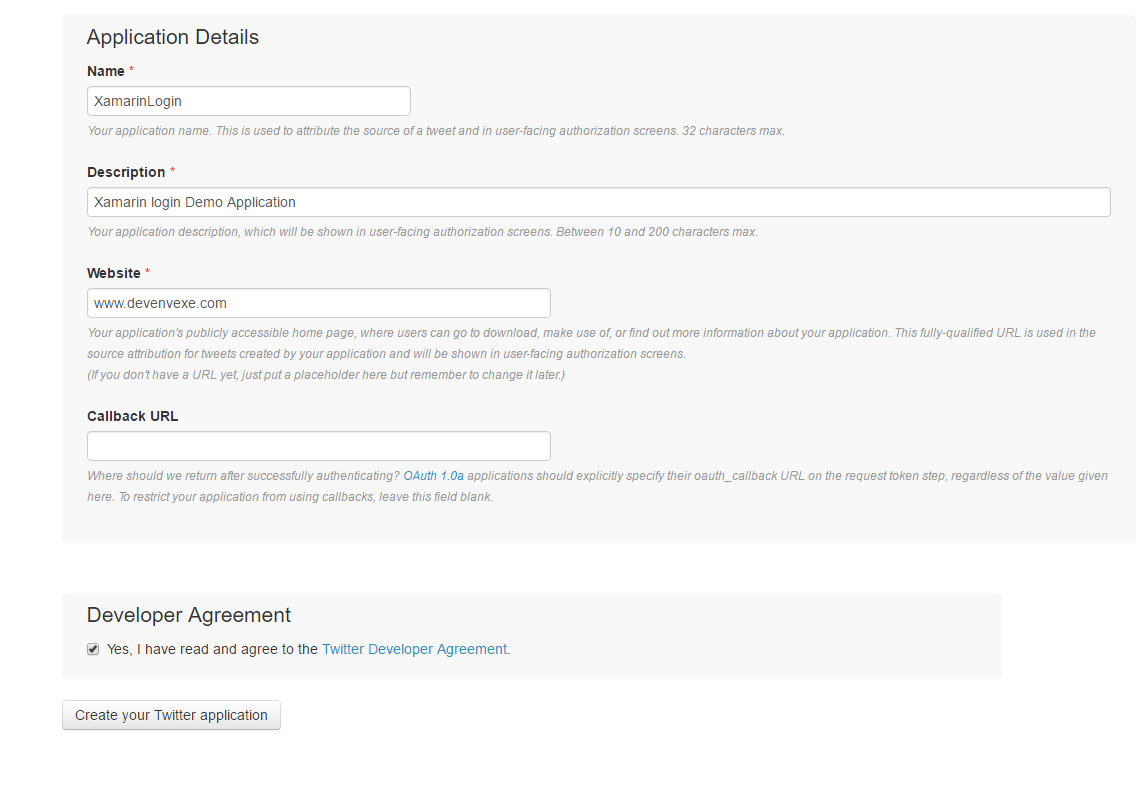
 Register New OAuth Applications:
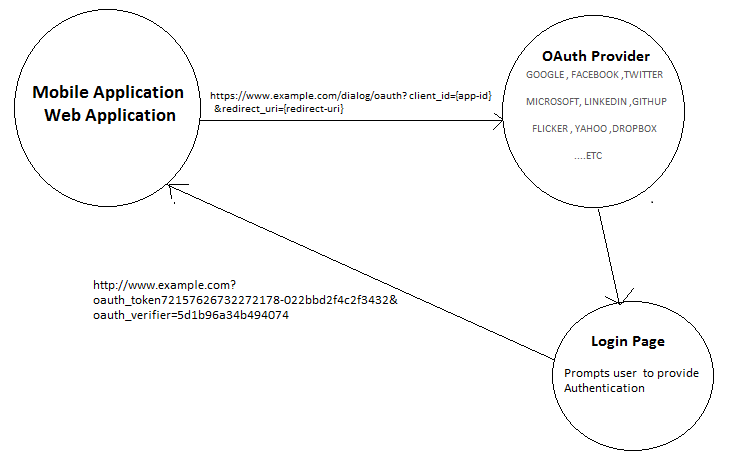


 Configure Microsoft OAuth:
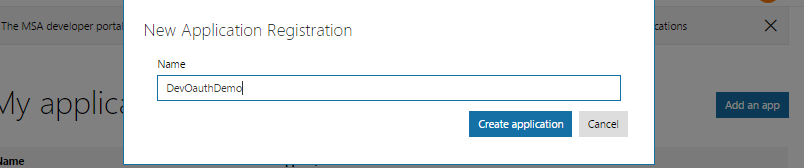

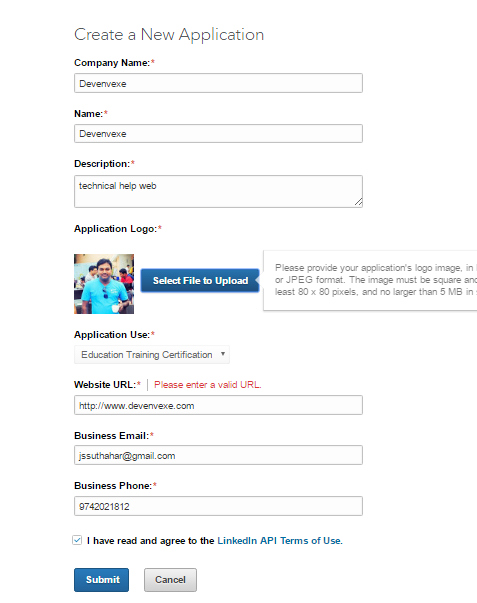

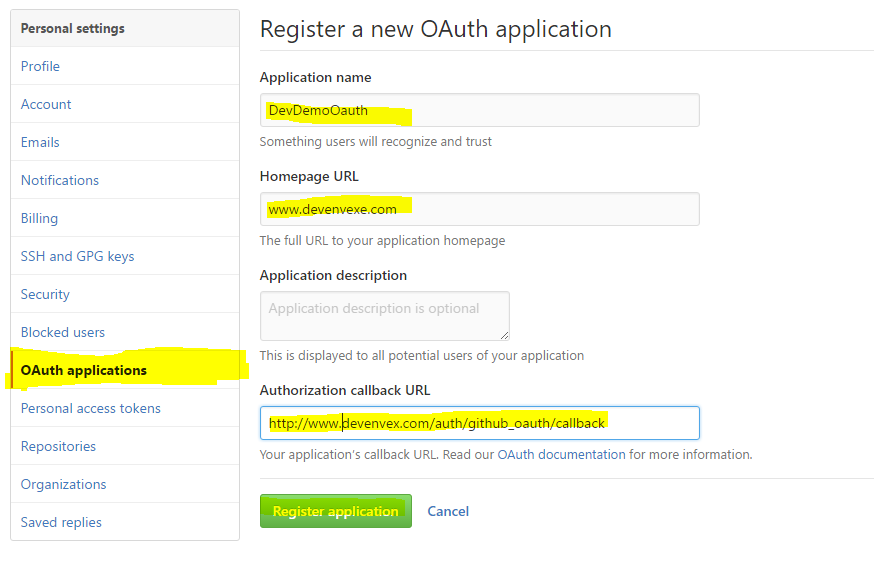 Copy the Client ID and Client Secret from the screen and use into your application