Azure Functions is a solution for easily running small pieces of code in the cloud. We can create, execute, and test our custom logic function without creating a VM or web applications and also without needing to install any software or infrastructure to run the function. In this article, you will learn about create and test azure functions using azure Portal

Steps to Create Azure Functions:

Step 1

Navigate to https://functions.azure.com and click on “Login in to your account".


Step 2:

We should be following two ways to create Azure Functions

Navigate to https://functions.azure.com and Provide Azure Functions details and create the Azure Functions.


Navigate to https://portal.azure.com , Click on New from Azure portal > Web + Mobile >Click on see All or Search > Function App


Step 3: Create Azure Functions App:

Provide the functions App Name and following details for create new functions
App Name – Provide your Unique functions name

Subscriptions – Select your subscription Free or any type

Resource Group -create or select existing resource group name.

Hosting Plan – You can Select default hosting plan as consumption plan, you have to pay only for the time functions code runs.

Location – Select Your nearest location (eg. South Central US).

Storage Account – You can Select or existing storage account.


Step 4:

Click on create and wait for a few minutes to deploy the new Azure Function app. Expand your new function app and click the + button next to Functions.


Step 5:

After clicking on + button, you will get the following screen, select WebHook + API, choose a language for your function, and click on Create this function.


Step 6: Azure Functions Editor

The .csx file format allows you to write a C# function. Include any assembly references and namespaces at the beginning of the file as usual in C# and write your logic in Run method, just like below.


Step 7:

Run and Test Azure Functions:

You can provide JSON string like the following in the request body and Click on the Run button for test the Azure Functions


Testing in Web Browser:

The web browser is a simple way to trigger functions via HTTP. You can use a browser for GET requests that do not require a body payload, and that use only query string parameters.

To test the function we defined earlier, copy the Function Url from the Azure function portal like below


Append the name parameter to the query string. Use an actual name for the <Enter a name here> placeholder.

https://<Your Function App>.azurewebsites.net/api/<Your Function Name>?code=<your access code>&name=<Enter a name here>, Paste the URL into your browser, and you should get a response similar to the following.


Related Article:

Getting Started with Azure Functions Using Azure Free Trial Account

Summary:

In this article, you learned about Azure Functions, how to create and test Azure Functions in Azure Portal.

If you have any questions/ feedback/ issues, please write in the comment box.
Azure Function is a solution for easily running small pieces of code in the cloud. Create, Execute and test your custom logic function without creating a VM, Web Applications, and no need install any software and infrastructure to run the function. You can use development language of as per your choice below
  • C#
  • F#
  • Node.js
  • Python
  • PHP
Pay only for the time your code runs and trust Azure to scale as needed. Azure Functions let you develop server less applications on Microsoft Azure. In this Article, you will learn how to create azure Functions without create Azure account.

How to create an Azure Functions:

Step 1: Navigate to https://functions.azure.com and click on try it For Free


Step 2: Create Azure Premade function.

Choose the functions scenario (WebAPI/timer/Processing),

Free trail will allow only two language (c# and JavaScript), Select your Language and click on Create the Function.


Step 3: Login with any of following provider without creating azure account.


Step 3: Azure Function Editor


Azure functions Edit was following feature

Microsoft Azure free trial Functions edit will give access only 60 Minutes .

You can edit c# azure function in Run.csx file as per your requirement

Save the changes

Run the Functions

Get Function URL button will provide the public functions url

View File button for list of file will display

Test button for Test the function

View File Window.

You can Add and upload file using File explore window and system will generate two files functions.json for configuration and run.csx file for create c# custom method .


Run.csx File

The .csx file format allows you to writing a C# function. Include any assembly references and namespaces at the beginning of the file as usual in c# and write your logic in Run method as like below


Function.Json File

The function.json file defines the function bindings and other configuration settings. how to pass data into and return data from function execution. The name that is used for the bound data in the function. For C#, this is an argument name; for JavaScript, it's the key in a key/value list.

You can refer the following is an example function.json file.


Test the Function

You can test Azure functions on multiple way, Here I will explain on two ways to Run /test from an Azure Function editor and test with the Browser

You can use to do testing with click on a test button and provide the request body a JSON string similar to the following in the request body field and click on the Run button


Test with a Browser

The web browser is a simple way to trigger functions via HTTP. You can use a browser for GET requests that do not require a body payload, and that use only query string parameters.

To test the function, we defined earlier, copy the Function Url from the Azure function portal like below


Append the name parameter to the query string. Use an actual name for the <Enter a name here> placeholder.

https://<Your Function App>.azurewebsites.net/api/<Your Function Name>?code=<your access code>&name=<Enter a name here>

Paste the URL into your browser, and you should get a response similar to the following.


The Chrome browser will have returned string in XML. Other browsers display just the string value.

Summary

In this article, you learned about Azure functions, how to create Azure functions with create Azure account and test Azure functions

If you have any questions/ feedback/ issues, please write in the comment box.

Visual Studio provide the many inbuilt templates for create a project, In this article we can create a new project template as per your client or product requirement and use the your project template on multiple developer. Visual Studio provides wizards to help you generate templates from projects that are open in the integrated development environment (IDE).

Project template will allow a developer to create new projects based on your exported project. The developer will be able to utilize your template for the new project dialog box


Create New Project:

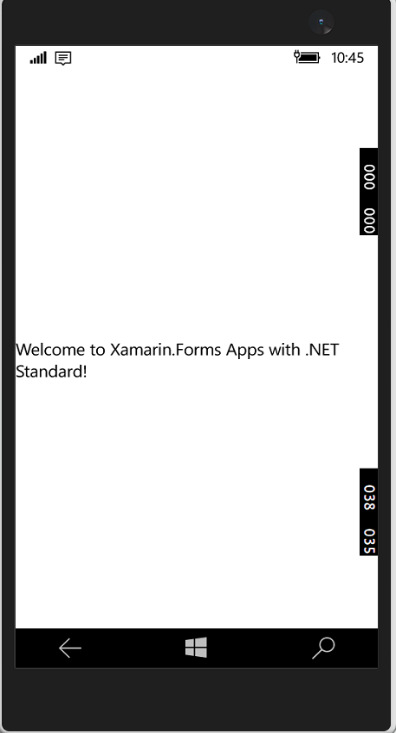
Let start with creating a new Xamarin or any Project using visual studio 2017.

Open Run > Type Devenev.Exe and press Enter > New Project (Ctrl+Shift+N) -> Select any project Template and customize the project as per your requirement.


Click on Ok and edit the project until it is ready to be exported as a template.

Export Project Template:

In this article, we are export only one project. If you have more than one project in your current solution, I will explain in my next article.

Edit the project as per your requirement > Select the project menu from Visual Studio > Select on Export Template.


Choose template Type:

Choose the project template and select your project and click on Next


Export Template Wizard:

Fill out the template options as you want and click on Finish

Provide Template Name is Project template display name .

Provide Template Description is a detailed description about your template

Provide Icon Image and icon image will display near to the project Template name

Provide preview image and preview image will display near to describe.

Check the checkbox for auto import the template into visual studio or after export, will generate zip file and you can move the zip file to following location C:\Users\<username>\Documents\Visual Studio 2017\Templates\ProjectTemplates


Edit Template:

The file explorer should pop up with My Exported Templates where your newly exported project is packed into a .zip file.


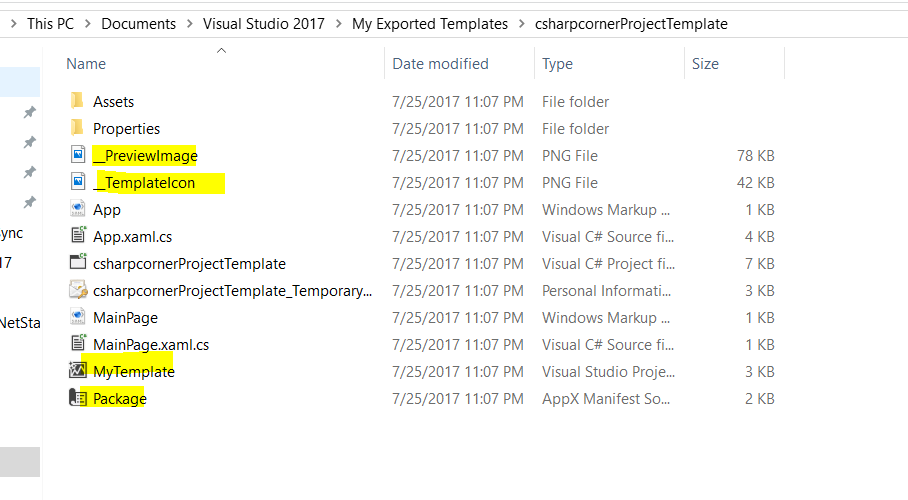
You can extract the template and if you want to edit the template, edit form MyTemplate.vstemplate file .

<VSTemplate Version="3.0.0" xmlns="http://schemas.microsoft.com/developer/vstemplate/2005" Type="Project">
<TemplateData>
<Name>csharpcornerProjectTemplate</Name>
<Description>csharpcornerProjectTemplate</Description>
<ProjectType>CSharp</ProjectType>
<ProjectSubType>
</ProjectSubType>
<SortOrder>1000</SortOrder>
<CreateNewFolder>true</CreateNewFolder>
<DefaultName>csharpcornerProjectTemplate</DefaultName>
<ProvideDefaultName>true</ProvideDefaultName>
<LocationField>Enabled</LocationField>
<EnableLocationBrowseButton>true</EnableLocationBrowseButton>
<Icon>__TemplateIcon.png</Icon>
<PreviewImage>__PreviewImage.png</PreviewImage>
</TemplateData>
<TemplateContent>
<Project TargetFileName="csharpcornerProjectTemplate.csproj" File="csharpcornerProjectTemplate.csproj" ReplaceParameters="true">
<ProjectItem ReplaceParameters="true" TargetFileName="App.xaml">App.xaml</ProjectItem>
<ProjectItem ReplaceParameters="true" TargetFileName="App.xaml.cs">App.xaml.cs</ProjectItem>
<Folder Name="Assets" TargetFolderName="Assets">
<ProjectItem ReplaceParameters="false" TargetFileName="LockScreenLogo.scale-200.png">LockScreenLogo.scale-200.png</ProjectItem>
<ProjectItem ReplaceParameters="false" TargetFileName="SplashScreen.scale-200.png">SplashScreen.scale-200.png</ProjectItem>
<ProjectItem ReplaceParameters="false" TargetFileName="Square150x150Logo.scale-200.png">Square150x150Logo.scale-200.png</ProjectItem>
<ProjectItem ReplaceParameters="false" TargetFileName="Square44x44Logo.scale-200.png">Square44x44Logo.scale-200.png</ProjectItem>
<ProjectItem ReplaceParameters="false" TargetFileName="Square44x44Logo.targetsize-24_altform-unplated.png">Square44x44Logo.targetsize-24_altform-unplated.png</ProjectItem>
<ProjectItem ReplaceParameters="false" TargetFileName="StoreLogo.png">StoreLogo.png</ProjectItem>
<ProjectItem ReplaceParameters="false" TargetFileName="Wide310x150Logo.scale-200.png">Wide310x150Logo.scale-200.png</ProjectItem>
</Folder>
<ProjectItem ReplaceParameters="false" TargetFileName="csharpcornerProjectTemplate_TemporaryKey.pfx">csharpcornerProjectTemplate_TemporaryKey.pfx</ProjectItem>
<ProjectItem ReplaceParameters="true" TargetFileName="MainPage.xaml">MainPage.xaml</ProjectItem>
<ProjectItem ReplaceParameters="true" TargetFileName="MainPage.xaml.cs">MainPage.xaml.cs</ProjectItem>
<ProjectItem ReplaceParameters="false" TargetFileName="Package.appxmanifest">Package.appxmanifest</ProjectItem>
<Folder Name="Properties" TargetFolderName="Properties">
<ProjectItem ReplaceParameters="true" TargetFileName="AssemblyInfo.cs">AssemblyInfo.cs</ProjectItem>
<ProjectItem ReplaceParameters="true" TargetFileName="Default.rd.xml">Default.rd.xml</ProjectItem>
</Folder>
</Project>
</TemplateContent>
</VSTemplate>

Custom Visual Studio template:

You can now restart Visual studio and go to New Project in Visual Studio and find the Project template like below

After click on Ok , project will automatically create new project with your default functionality .


Summary:

In this article, you learned how to create a project template using visual studio

If you have any questions/ feedback/ issues, please write in the comment box.


The .NET Standard Library is a formal specification of .NET APIs that are intended to be available on all .NET runtimes. You can understand another way its expanded, Portable Class Library. It is a single library with a uniform API for all .NET Platforms including .NET Core. You just create a single .NET Standard Library and use it from any runtime that supports .NET Standard Platform.

You can refer following table lists all the versions of .NET Standard and the platforms supported


In this article, you will learn how to create mobile cross platform application using Xamarin Forms with .NET Standard libraries and maximize code sharing.

Create New Xamarin Forms:

Let’s start create new Xamarin Forms application, In Windows machine > Go to Run (Windows key +R) > type Devenv.exe for open Visual Studio and select New project from File menu > New Project (ctrl +Shift+N) or click More project template from VS Start screen.


Click on Ok > You will get following screen. Select Blank App > Select Xamarin Forms UI Technology > Select Code sharing as PCL or Share Project and click on Ok


After click on Ok, VS will automatically create PCL,iOS,Android ,UWP projects .

Create .Net Standard Class library

You can follow below steps for create .Net Standard library,

Right Click on solutions > Add new project > Create Class library (.Net Standard) that targets .net Standard and click on Ok


Install Xamarin Forms in .Net Standard library:

The Xamarin.Forms 2.3.5-prerelease will support with .NET Standard. Right Click on .net Standard library > Select on Manage Nuget package


Select on Browse tab > Search text ‘ Xamarin.Forms ‘ > Select Include prerelease and select Xamarin Forms and click on Install


Customize the Application:

You can follow below steps for customize the platform specific project and .net standard library.

Step 1: 

 Right Click on .Net Standard library > Click on Add Item > Select Cross -Platform >Forms Blank Content Page Xaml > Provide name as MainPage.xaml


Step 2: 

You can add UI design as per your requirement in MainPage.xaml .

<?xml version="1.0" encoding="utf-8" ?>
<ContentPage xmlns="http://xamarin.com/schemas/2014/forms"
xmlns:x="http://schemas.microsoft.com/winfx/2009/xaml"
x:Class="DotNetStandard.MainPage">
<Label Text="Welcome to Xamarin.Forms Apps with .NET Standard!"
VerticalOptions="Center"
HorizontalOptions="Center" />
</ContentPage>

Step 3:

 Copy App.cs and App.xaml from PCL or Shared project and past into .net Standard library and change the namespace from xaml and c# page


Step 4: Remove Shared or PCL Project and Remove PCl project reference from all iOS,Android,UWP project. Now solution look like below


Step 5: 

Add your .Net Standard class library reference to iOS,Android,UWP project.

Step 6:

 Change namespace from following project

In UWP project, updated the namespace from mainPage.cs

LoadApplication(new DotNetStandard.App());

In Android Project , Update the namespace from Main Activity

LoadApplication(new DotNetStandard.App());

In iOS Project , Update the namespace from Appdelegate

LoadApplication(new DotNetStandard .App());

Step 6:

 If you get following error while build the project


You can follow below for resolution Right Click on Xaml page > Select property and Build Action Should be Embedded Resource


Run the Application:

You can run the application (iOS,Android ,Windows) to all the platform


Summary

In this article, you learned how to create mobile cross platform application using Xamarin Forms with .NET Standard libraries.

If you have any questions/ feedback/ issues, please write in the comment box.


Introduction:

Microsoft Cognitive Services awesome APIs and services for developers to create more intelligent applications. You can add more interesting feature like people emotion and video detection, facial, speech and vision recognition and speech and language understanding into our all the application. The following sample image showing for emotion and face detection using cognitive service.


In this article, you will get understand how to Create a Cognitive Services APIs account in the Azure Portal.

Prerequisites:

Create a free trial Azure subscription from Azure portal.
If you are looking paid version, Click here for detail


Create a Cognitive Services Account in Azure:

You can follow below steps for Create a Cognitive Services APIs account in the Azure Portal.

Step 1: 

 Sign in to the Azure portal.

Step 2: 

Click + NEW and Select AI + Cognitive Services


Step 3: 

You can see the entire list of Cognitive Services APIs. Click on the API of your choice to proceed.


Step 4: 

Select on required API and read about the API and Click on Create


Step 5:

 after click on create button, provide the following information for create cognitive service and click on create.


Name: Name of the account, Microsoft recommend a descriptive name. for example, <common name><APIName>Account.
Subscription: Select the available Azure subscriptions.

Location: Select the service locations.

Pricing tier: you can choose your pricing tier. F0 is free service and S0 paid service. based on your usage you can choose the pricing tier


Select the Resource group > confirm the Microsoft notice and Click on create for create the account

Step 6:

 wait for few second and you will get notification after complete. If Cognitive Services account is successfully deployed, click the notification to view the account information.

You can see and copy the Endpoint URL in the Overview section.


You can also copy keys in the Keys section to start making API calls in our Xamarin or other applications.

Summary:

In this article, you learned about how to Create a Cognitive Services APIs account in the Azure Portal.

We can use these keys and end point URL to the next article with app to communicate intelligent feature in Xamarin application.

If you have any questions/ feedback/ issues, please write in the comment box.

Featured Post

Azure AI Service, Studio, ML & Foundry – Which One Do You Need?

If you have used Microsoft AI tools in the past, you might remember popular services like Cognitive Services and the Bot Framework. These to...

MSDEVBUILD - English Channel

MSDEVBUILD - Tamil Channel

Popular Posts