Introduction:

Microsoft Cognitive Services awesome APIs and services for developers to create more intelligent applications. You can add more interesting feature like people emotion and video detection, facial, speech and vision recognition and speech and language understanding into our all the application. The following sample image showing for emotion and face detection using cognitive service.


In this article, you will get understand how to Create a Cognitive Services APIs account in the Azure Portal.

Prerequisites:

Create a free trial Azure subscription from Azure portal.
If you are looking paid version, Click here for detail


Create a Cognitive Services Account in Azure:
You can follow below steps for Create a Cognitive Services APIs account in the Azure Portal.

Step 1: 

Sign in to the Azure portal.

Step 2: 

Click + NEW and Select AI + Cognitive Services


Step 3:

You can see the entire list of Cognitive Services APIs. Click on the API of your choice to proceed.


Step 4: 

Select on required API and read about the API and Click on Create


Step 5: 

after click on create button, provide the following information for create cognitive service and click on create.


Name: Name of the account, Microsoft recommend a descriptive name. for example, <common name><APIName>Account.

Subscription: Select the available Azure subscriptions.

Location: Select the service locations.

Pricing tier: you can choose your pricing tier. F0 is free service and S0 paid service. based on your usage you can choose the pricing tier


Select the Resource group > confirm the Microsoft notice and Click on create for create the account

Step 6: 

wait for few second and you will get notification after complete. If Cognitive Services account is successfully deployed, click the notification to view the account information.

You can see and copy the Endpoint URL in the Overview section.


You can also copy keys in the Keys section to start making API calls in our Xamarin or other applications.


Summary:

In this article, you learned about how to Create a Cognitive Services APIs account in the Azure Portal.

We can use these keys and end point URL to the next article with app to communicate intelligent feature in Xamarin application.

If you have any questions/ feedback/ issues, please write in the comment box.

Xamarin Forms ChatBot using the Microsoft Bot Framework

Introduction:

The Bots Framework that run inside skype ,web chat , Facebook ,Message ,etc. Users can interact with bots by sending them messages, commands and inline requests. You control your bots using HTTPS requests to our bot API.

In this article, how you can integrate a bot right into your Xamarin.Forms application via the Microsoft Bot Framework Web bots.

Create new bot Application:

You can read my previous article for Getting Started with Bots Using Visual Studio 2019 from here

Publish Bot Application to Azure:

You can read my previous articles for publish bot application to azure from here

Generate Web Chat Code:

After publish you bots into azure, you can generate web Chat html code from bots portal as per below

Step 1

Sign in to the Bot framework Portal - https://dev.botframework.com/

Step 2

Click My Bots

Step 3

Select your bot that you want to generate code

Step 4:

Click on Get bot embed Codes > Click on Web Chat icon > Click on (Click here to open Web Chat configuration page)


Step 5:

It will navigate to new web page for configuration and click on + Add New Site > Provide site or application name > Click on Done


Step 6:

You can copy your secret keys and embed code for integrate to xamarin forms application


Create new Xamarin .Forms Application :

Go to Run (Windows key +R) > type Devenv.exe or select from Windows Application list and select New project from File menu > New Project (ctrl +Shift+N) or click More project template from VS Start screen.


New Project >select Cross -Platform from Template > Cross platform App(Xamarin.Forms or native). It will show the screen, as shown below.


You can find above screen only on VS 2017. Select Blank apps > select Xamarin.Forms > Select PCL and click on Ok .it will generate all the mobile platform project with PC


Open your MainPage.xaml file add webview control with following code for web chat enable
<StackLayout WidthRequest="300" HeightRequest="500" >
<Image Source="profile.png" WidthRequest="200" HeightRequest="200"></Image>
<Label Text="Live Chat with Suthahar via C Sharp corner" FontSize="20" ></Label>
<WebView x:Name="webview" Source="https://webchat.botframework.com/embed/DevEnvExeBot?s=8XGcUROXkAA.cwA.pZo.8pJ-6oQ3sJRpxq0tqIo9uLPji4oxBQuz2pW5qWobw2c"
WidthRequest="300" HeightRequest=" 300"></WebView>
</StackLayout>

Now you can run the application in windows ,Android and iOS


Summary

In this article, your learned how to create a Bot application, publish Bot to Azure and bot implementation to Xamarin Forms using Visual Studio 2019. If you have any questions/ feedback/ issues, please write in the comment box.


Introduction

The Bot Framework enables you to build bots that support different types of interactions with users. You can design conversations in your bot to be freeform. Your bot can also have more guided interactions where it provides the user choices or actions. The conversation can use simple text strings or more complex rich cards that contain text, images, and action buttons. And you can add natural language interactions, which let your users interact with your bots in a natural and expressive way.


In this article, You will get understand deploy a bot application to Azure using visual studio 2019, you can register app in Azure portal and test in Bot Framework Emulator and Webchat Channel.

Setting up the development environment

In order to follow along with this article, you will need the following apps and accounts:
  • Microsoft Account (MSA) – Use your existing account, or click here to create a new account.
  • Visual Studio 2019 IDE – Available for free download here
  • Azure Account – Use your MSA Account to sign-in to the Azure Portal
  • Download the Bot Framework V4 Emulator for your platform from the GitHub releases
  • You can read my previous article for Getting Started with Bots Using Visual Studio 2019 from here

Register Bot Application

After installing and configuring all of the above listed software and accounts, continue to the below steps.

Step 1: 

Create a new bot or register an existing bot with the Azure Bot Service from here


Step 2: 

Click on Sign in button and login with Azure credential

Step 3:

 Click on Create web app Bot

Step 4: 

Start create Web App Bot and click on Create 


Step 5: 

You can provide the following information in Web app bot and create a new Microsoft App Id and password and click on Create


Once its completed, it will generate Application end point url and appID and there are 4 service will create automatically in azure portal as follows 
  • App service
  • APP service plan
  • Web app bot
  • Application insights.
Open your app Service in Azure and copy the Microsoft App Id, Microsoft App Password,LUIS Hostname,Key and AppID values from application settings .


Create Bot Application using Visual Studio 2019.

You can read my previous article for setup Bot development environment in visual studio 2019 and create simple Bot using Visual Studio 2019 from here

Update AppSeting.JSON File

Open appsetting.json file from Visual studio 2019 and past your MicrosoftAppId, apppassword, LUisAppID, LUISApIKey and host name.


Run Bot Application in Local Emulator

Let we start test our bot application in locally using Bot emulator. Open emulator and click configure new Bot and provide local end point URL and Appid and password.


Publish Bot Application into Azure App Service

Once tested your application in locally. Now, we can publish bot application to Azure. Right click on Bot Project > Select on Publish and start publish bot application into azure


Visual Studio Azure publish Wizard

Azure auto created App service while create web app chat, so select on Microsoft Azure App Service > select on Existing and click on publish


Login and Select Service:

Login with Microsoft Azure account and select the app existing app service from your resource group and click on Ok.


Bot Deploy confirmation:

Copy the Destination URL value to the clipboard (you'll need this value later to test the connection to the bot)


The following screen will display web publish activity status and as well as Site Url, once service published, it will redirect and open the browser.


Test Bot Application on Azure Portal

We have completed all the steps for publish the application using VS 2019, You can open your Azure portal and navigate to your web app Chat channel and Click on test in Web App Chat.


Summary

In this article, I hope you well understood about Deploy a bot application to Azure portal using Visual Studio 2019. If you have any questions/ feedback/ issues, please write in the comment box.


Introduction:

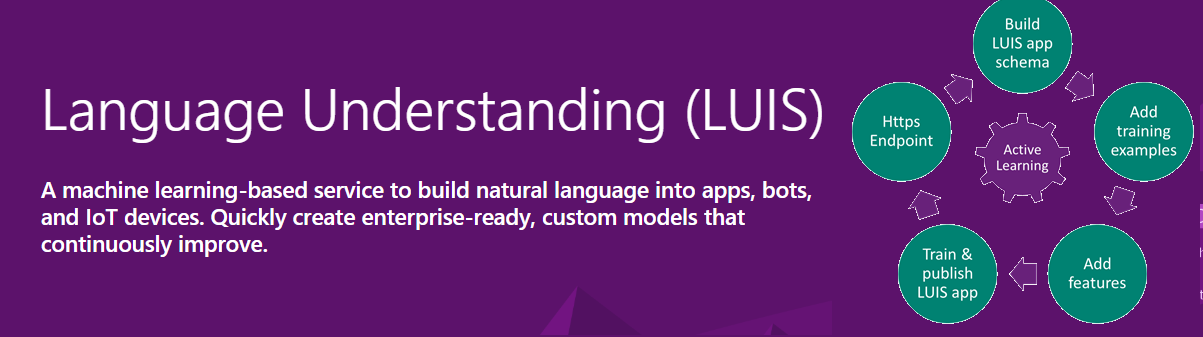
Language Understanding service (LUIS) allows our any application to understand what a person wants in their own words. LUIS can integrate to Windows, Web, Bot and mobile application, which can consume Json response to the application. LUIS uses machine learning to allow developers to build applications that can receive user input in natural language and extract meaning from the user input.

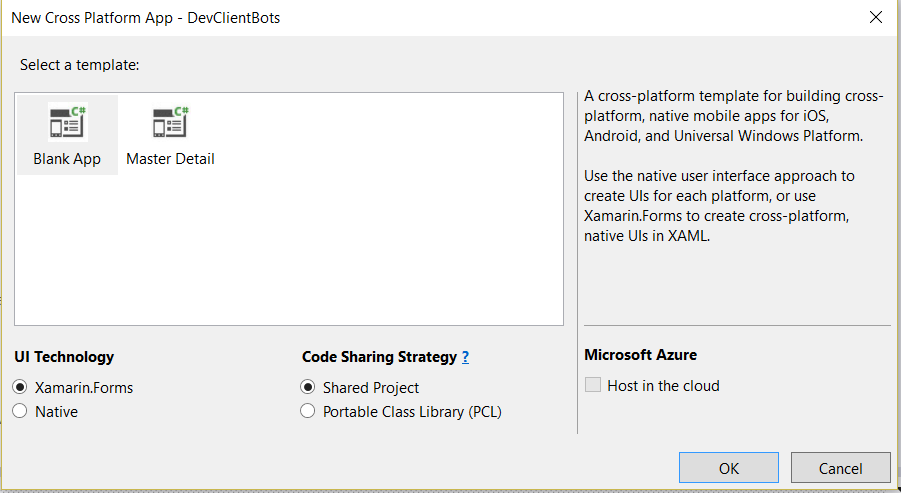
Building an app is a free and doesn't require an Azure subscription, in this article, I will show how to build a new app in the LUIS portal.


Once the LUIS app is published, a client application sends utterances (text) to the LUIS natural language processing endpoint API and receives the results as JSON responses. First you create the basic parts of an app, intents, and entities. Then you test the app by providing a sample user utterance in the interactive test panel to get the predicted intent.


Create LUIS App:

Step 1: 

Navigate to LUIS Portal in a browser and sign in. if you are trying to create first time signing in, you need to create free LUIS account.

Step 2: 

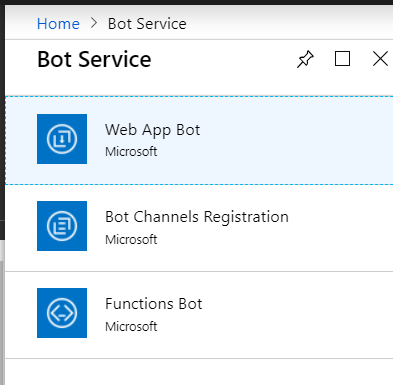
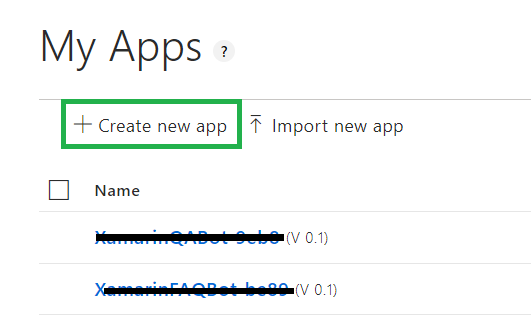
Click on “Create New App” from portal menu options.


Step 3: 

Provide name, culture and description in the following information into the new app screen.

Name - provide the relevant to your application and Unique LUIS app name

Culture – Luis will support multiple language, now we will select as English Language

Description - Provide the Description of app and its optional field


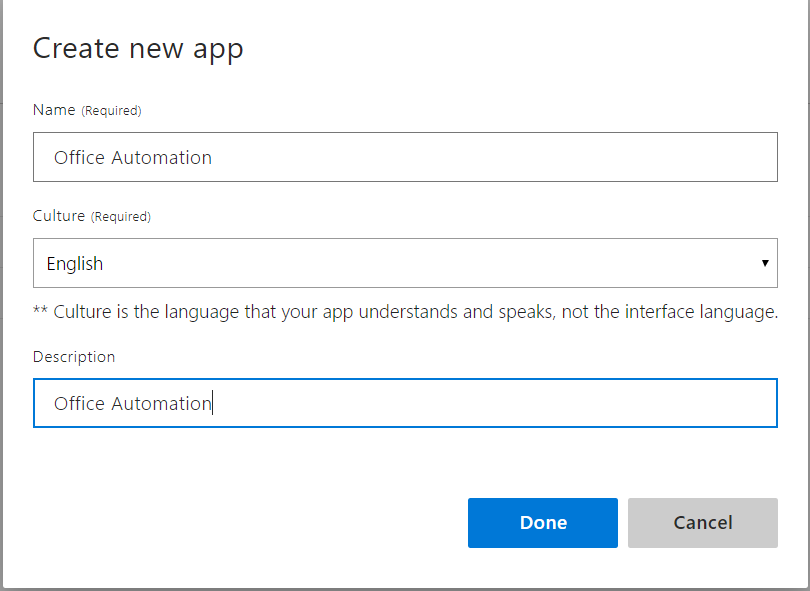
Once completed, Click on Done button and Select “Build” menu from main menu.
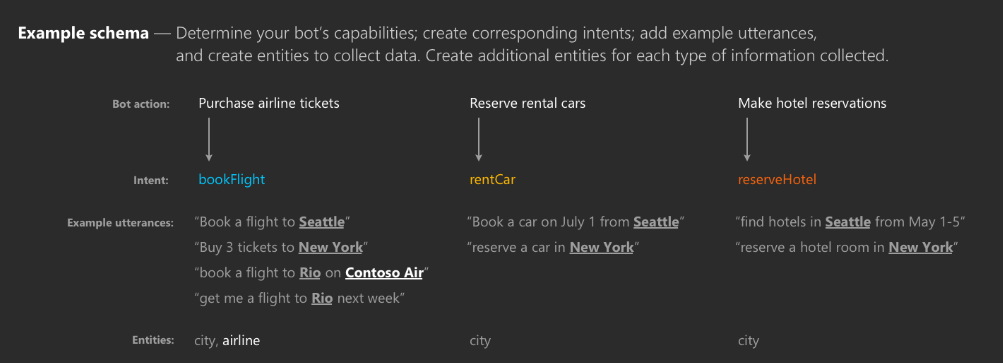

Create Intents:

Intent is an action the user wants to perform. Natural language is extremely flexible. in fact, different languages and cultures make them less or more flexible. But what is the user’s "intention?" It’s the goal the user is trying to achieve. Maybe they want to turn the lights on. Maybe they want to schedule a calendar appointment. Maybe they want to Send Email. Whatever the intent may be, the user can express themselves in a multitude of ways, but it always translates to one intent. LUIS understands utterances and converts them to one or more intents that you specify in our LUIS application. There are two type intent

New Intent – you can create custom intent-based user needs

Add prebuild domain Intent - you can use prebuilt intents from one of the prebuilt domains.

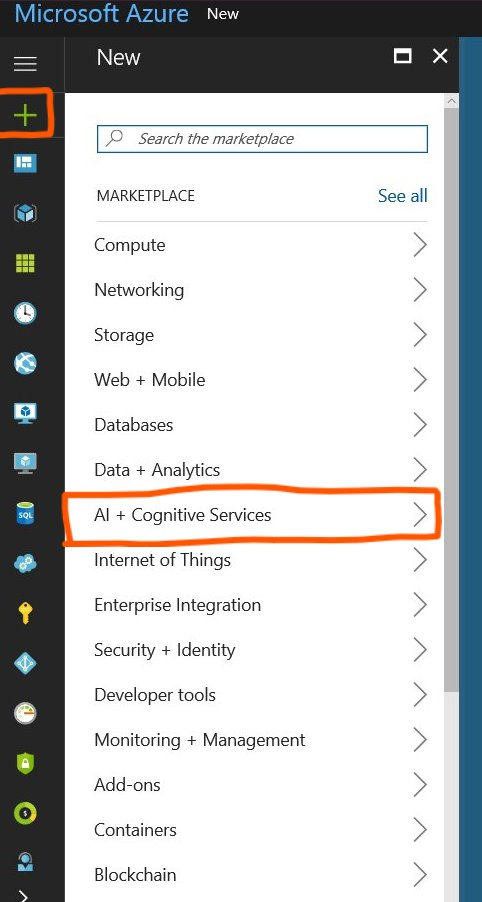
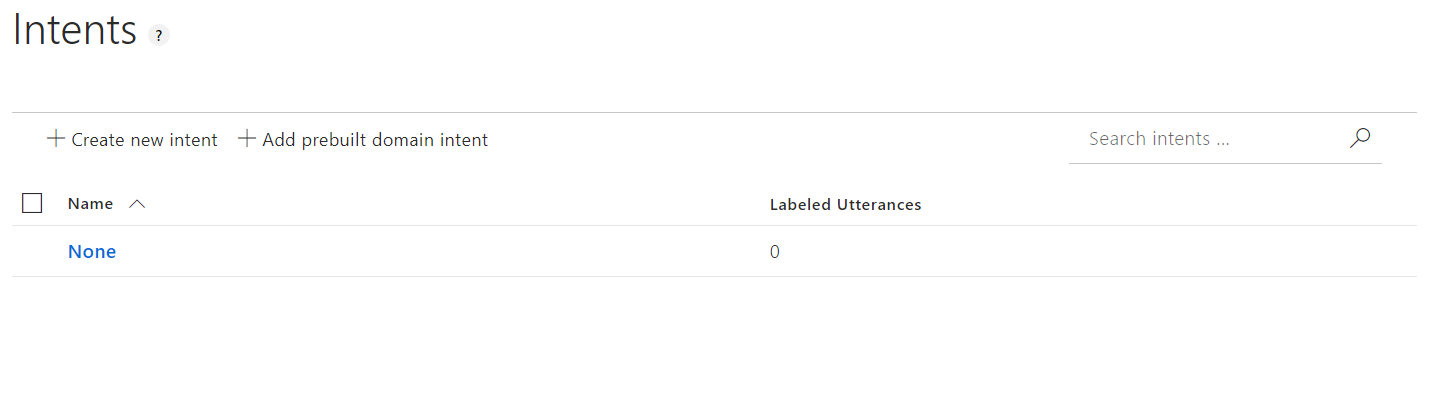
Select Intents > Click on New intent or Add prebuilt domain intent 


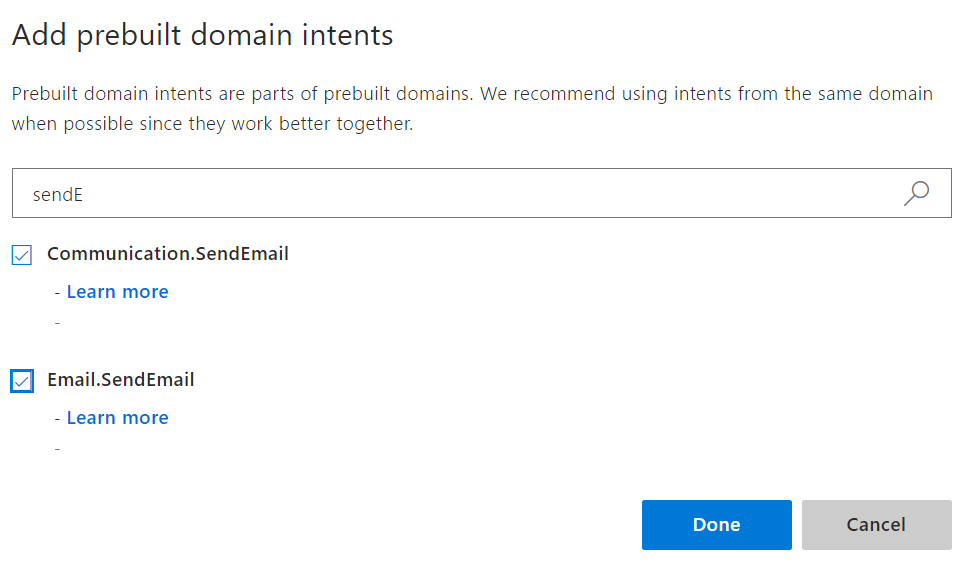
Prebuilt domain intents are parts of prebuilt domains, you can select inbuild category and intents from the list, here, we will select sending email and send email prebuilt domain intents 


Create Entities:

When the user issues a command as an utterance, that utterance is converted into an intent. But hidden inside that utterance is important data that’s needed to complete the action. For example, "turn the lights off" represents an action called "off;" what entity is it working on? It’s working on lights. You need to extract a single entity out of this utterance.

Select Entities > Add the Prebuild domain entity 


LUIS comes with a number of prebuilt domain models with prebuilt entities. Or you can quite easily create a new custom domain model with custom entities. Here we are creating Prebuilt domain entry 


In order to train the model, you’ll see a Train button on the top right-hand corner


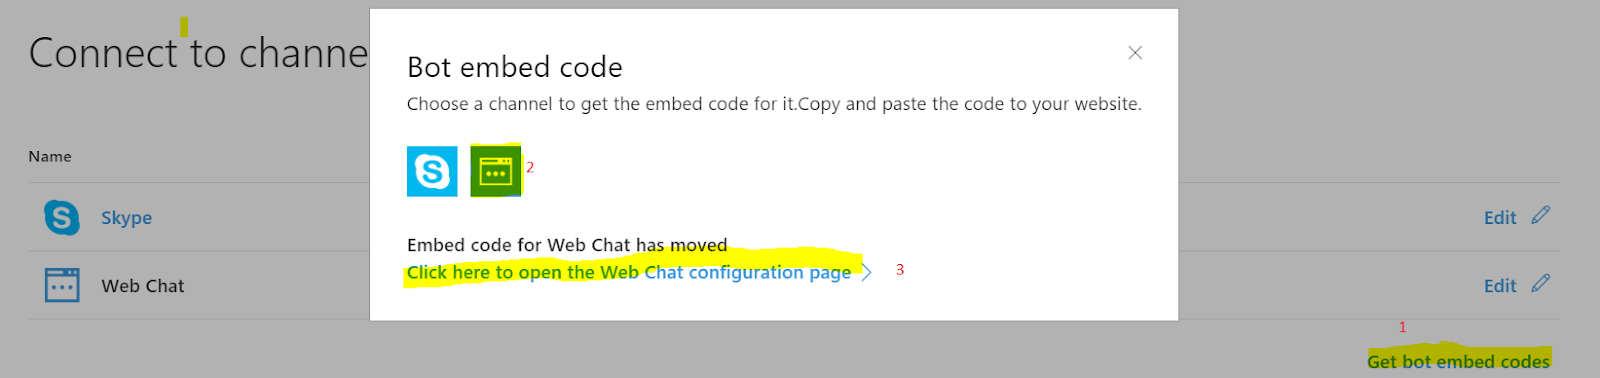
Now you can start publish our LUIS application


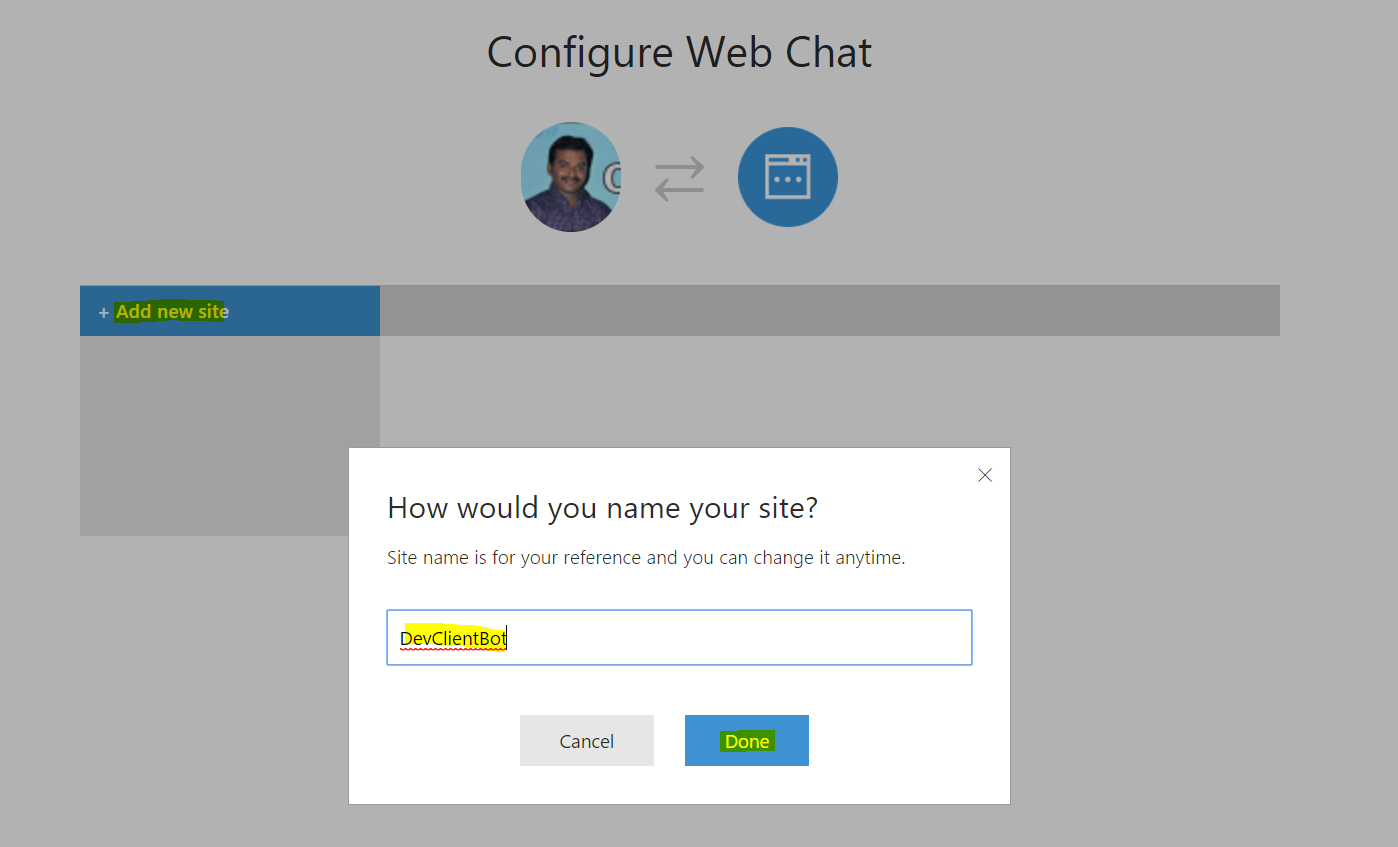
While publish application, will be available multiple environment, let we start “Production” environment and publish


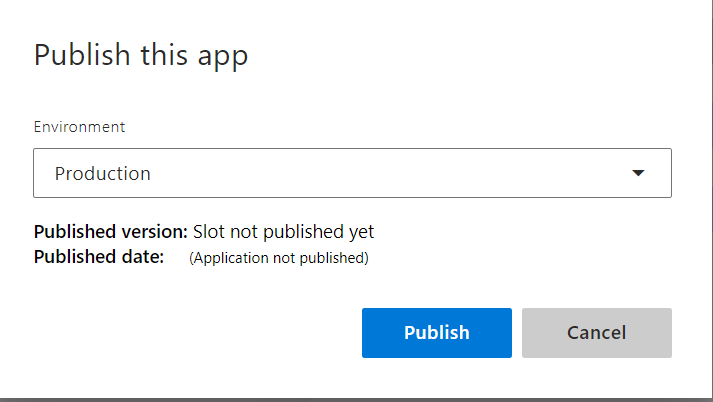
after publish its available in publicly the end point URL


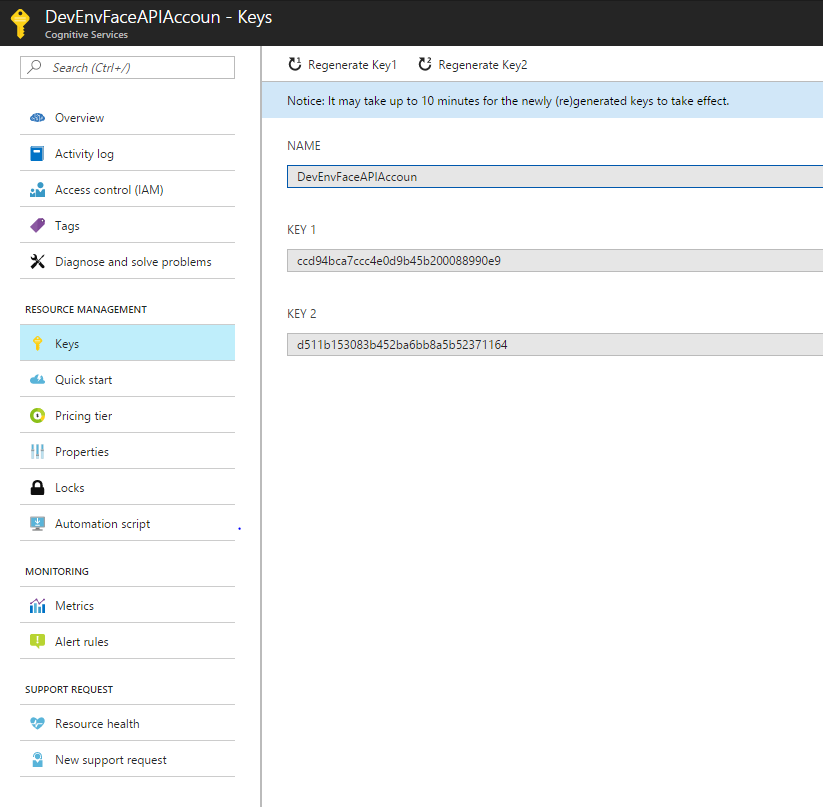
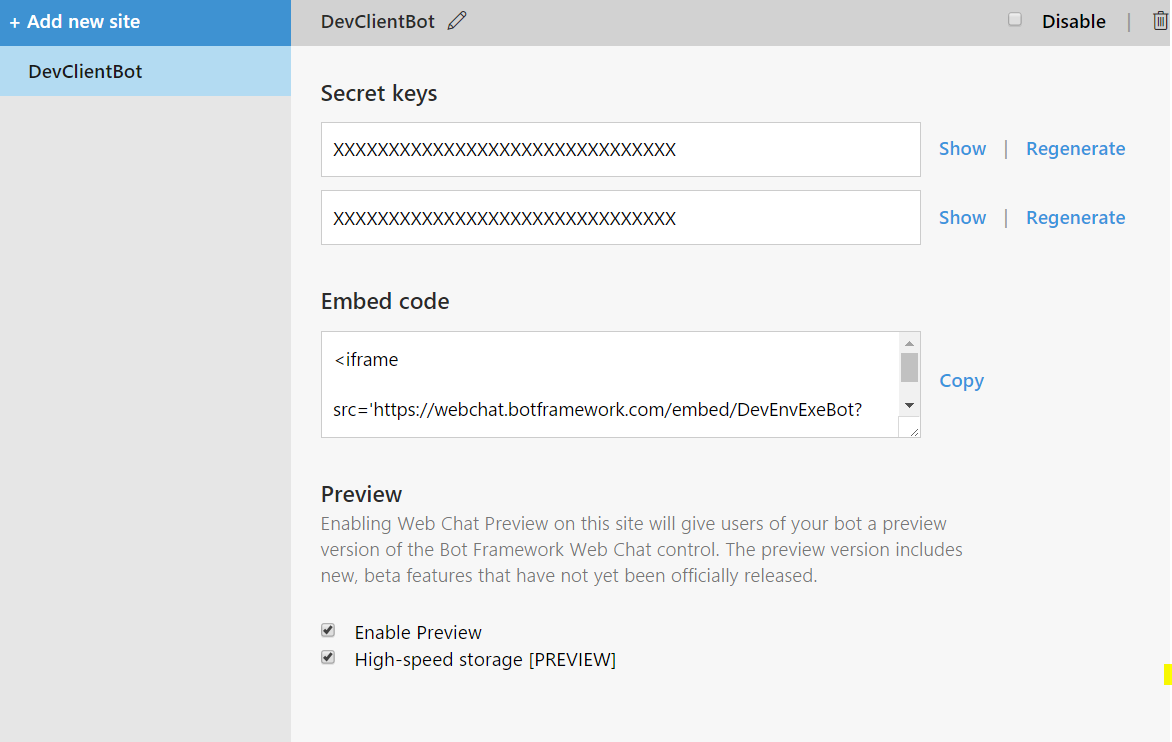
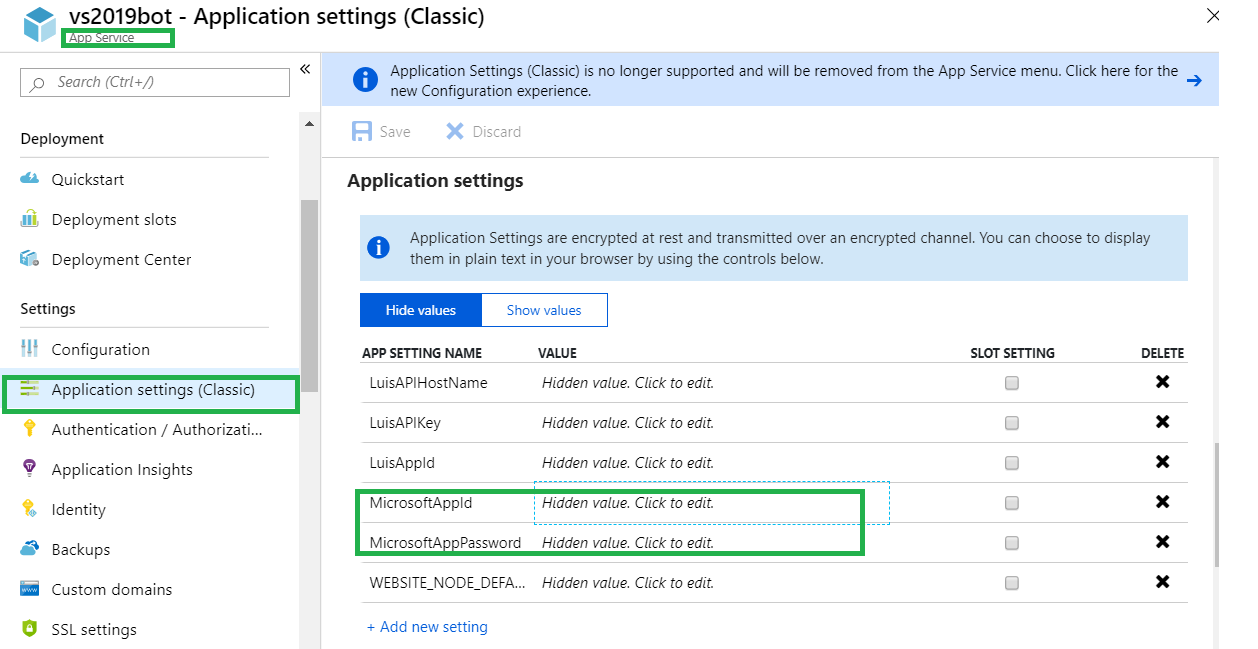
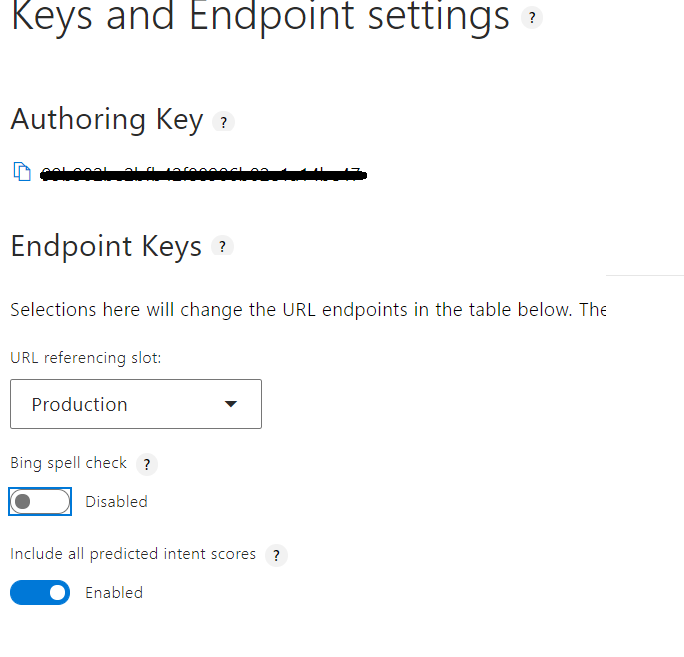
Here you can view your publish settings, as well as your LUIS App ID and Password. You will need these to access your LUIS app from your client applications. Please note that you can also type in queries directly to your production endpoint, and you’ll get a JSON response from LUIS


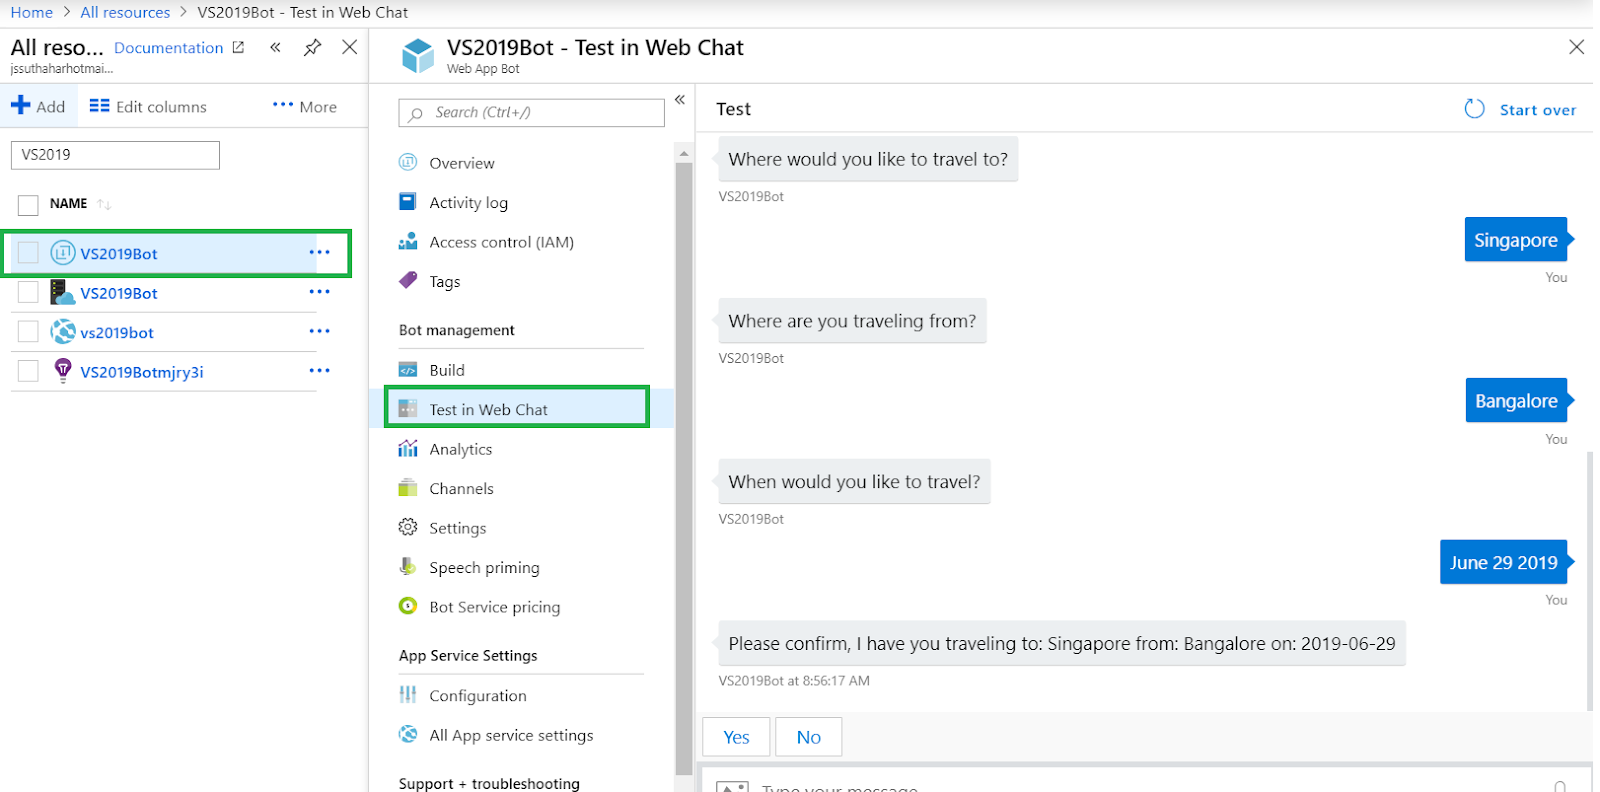
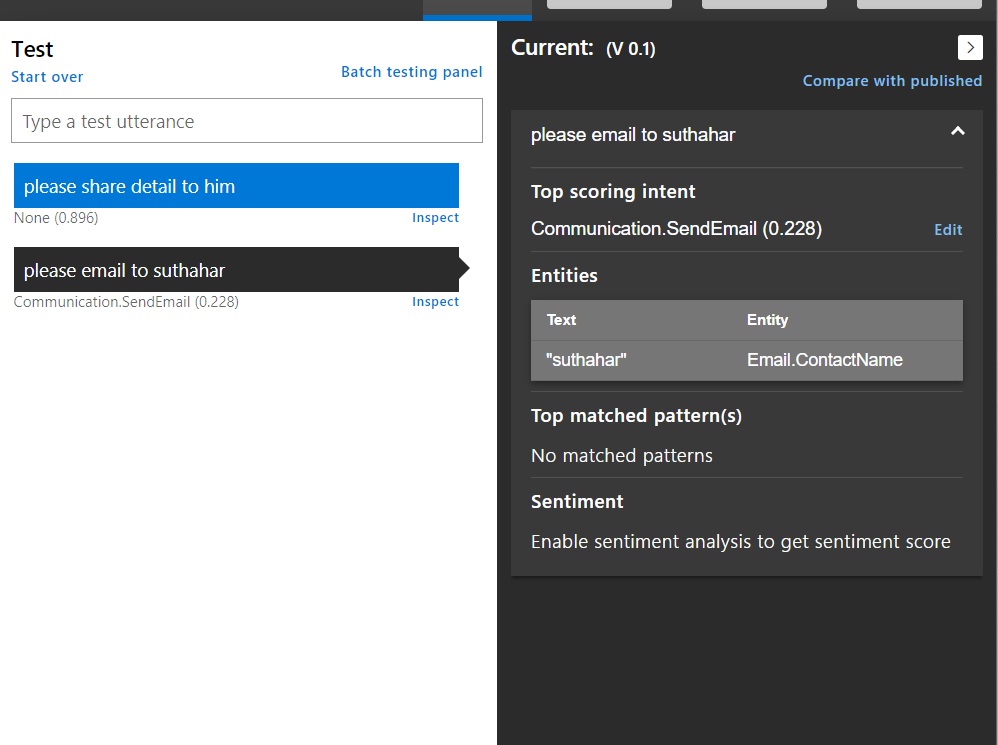
When your model is trained and up-to-date, you can then open the test panel and provide some utterances to your LUIS model


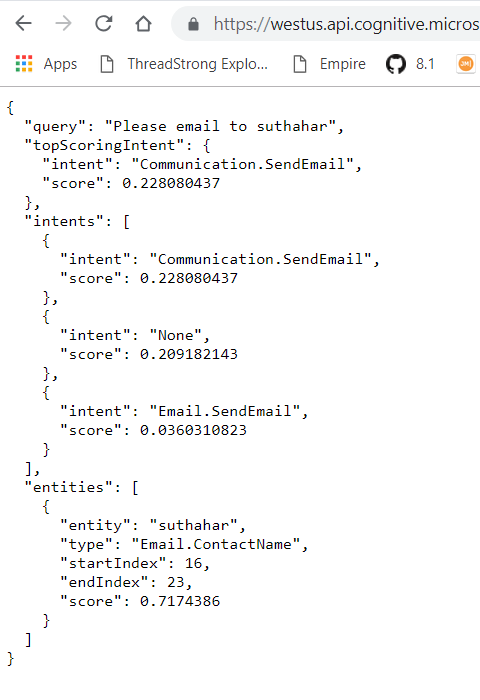
You can copy paste the URL highlighted in key Endpoint setting screen and under the endpoint column (note that the app ID and keys are removed for this image) into an internet browser, and type the query – “Please email to Suthahar”. Below is the full JSON response for the query


Summary

In this article, you learned about how to create Natural Language Understanding app with LUIS .If you have any questions/ feedback/ issues, please write them in the comment box.
Artificial Intelligence continues to gain more traction, now that companies such as Google, Microsoft and others, have released a suite of easy to use tools. It now enables us to create smarter apps, and open up a new range of applications. Xamarin doesn’t have any AI or Machine Learning capabilities itself, but does play a part in gathering data and displaying information from AI systems.


Join With us in #Global Azure Bootcamp on April 27, 2019. It is a full day Free Event with new development technologies - Cloud infrastructure, DevOps, ChatBot, Mobile(Xamarin), AI/ML & IT pro at the location point on

''Tech Mahindra'' SDB3, Elcot SEZ, Sholinganallur. Chennai. Find in map


So, don't miss the opportunity to join in our massive set of event celebrations...If you have not yet registered, Register with us : https://lnkd.in/fXnc7d2


#AIForAll #Xamarin #microsoftai #chatbots #Devenvexe #Dotnet #azureai #GlobalAzure #microsoftevents #Azure #AI #Data #Xamarin #GlobalAzureChennai

Featured Post

AI Evolution Explained: GenAI vs LLMs vs AI Agents vs Agentic AI vs Intelligent AI

Artificial Intelligence (AI) is one of the most exciting technologies in our world today. But the terms that come with it like GenAI, LLMs, ...

MSDEVBUILD - English Channel

MSDEVBUILD - Tamil Channel

Popular Posts