The Bot Framework Composer is a fantastic tool for creating/developing Microsoft bots, as it gives you the ability to sketch out and compose the whole simple and complex Bot applications within a visual interface instead of writing actual code. Composer to create the bot solution’s code and run it immediately to test it in the emulator and deploy it to Azure using the CLI. Bot developers should check out Composer awesome tool, as this will make your Bot development even easier in terms of building smart and engaging bots with ease. Read my previous article to build and setup the bot framework Composer development environment.

The primary goal when creating any bot is to engage your user in a meaningful conversation. One of the best ways to achieve this goal is to ensure that from the moment a user first connects, they understand your bot’s main purpose and capabilities, the reason your bot was created. In this article you will learn more about How you create initial and create greeting messages using bot framework composer.

Send welcome message to users using Bot Framework Composer

Create New Bot Application

In Bot Framework Composer Editor provide different feature for Create a new bot project, You can choice
  1. Create new bot Project from scratch
  2. List of Bot Template
  3. Select very Recent Project
  4. Collection of Recent Project 
Bot Project template contains all the code that's necessary to create the bot, you won't actually need to write any additional code for simple startup. Let we select to create a new bot from scratch with a composer.

Send welcome message to users using Bot Framework Composer

Provide Bot name, Location and description for create Bot application

Send welcome message to users using Bot Framework Composer

Bot Framework Composer Editor 

Step 1: On the right-hand side of the page, select “Greeting”.

Step 2:
Click on “+” Icon and select “Send a response”.

Step 3: Provide a message “what your bot will say for greeting “.

Step 4: Message always starts with “-“.

Response message includes one or more variations of text that must be used for composition and expansion. One of the variations provided will be picked at random. Here is an example of a simple template that includes 2 variations.

Bot Framework Composer Editor

Build Bot Application 

We have added a Greeting message and started building the bot application using the StartBot /Restart Bot button. After building success, you can click on “Test in Emulator “. 

Build Bot Application

Test in Bot Emulator 


Next, Click on “Test in Emulator” after that browser will ask you permission to open the bot emulator, once you confirmed the message, Bot emulator will open and automatically navigate to your Bot service. You can start clicking on “restart conversation”, the welcome message will display randomly.
Send welcome message to users using Bot Framework Composer


Summary 

You have successfully created and run the first bot with a greeting message using Bot framework composer. I hope you have enjoyed learning. If you have any questions/feedback/issues, please write them in the comment box.
You weren't able to attend the Microsoft Ignite or any of the world tour events. Microsoft Shared AI presentations, demo, Video, learning paths and more as a full github repo. It's amazing content that gets started by Microsoft .


Offline Ignite Learning Paths - Developers Guide to Microsoft AI, Machine Learning, DevOps to Data Science


Microsoft Legal Notices Notice saying, The content of this repository is available for you so you can reproduce any demo or learn how to present any session of the Learning Path presented at Microsoft Ignite and during the Microsoft Ignite The Tour, in your local field office, a community user group, or even as a lunch-and-learn event for your company.


Offline Ignite Learning Paths - Developers Guide to Microsoft AI, Machine Learning, DevOps to Data Science
Bot Framework Composer is a fantastic tool for creating/developing Microsoft bots, as it gives you the ability to sketch out and compose the whole simple and complex Bot applications within a visual interface instead of writing actual code. Composer to create the bot solution’s code and run it immediately to test it in the emulator and deploy it to Azure using the CLI. Bot developers should definitely check out this really awesome tool as this will be making your Bot development even easier in terms of building smart and engaging bots with ease. You want to learn more, just read this article for understanding and setup Bot Framework composer.

Bot Framework Composer: Setup and Build a bot

Setup Bot Framework Composer 

The Microsoft Bot Framework Composer is a Microsoft open source GitHub project, you can clone the source code and start contributing to the development as well. It’s a web-based application, you can download and run the web application in a local machine.Bot Framework Composer: Setup and Build a bot

Run Bot Composer web application

You can wait some time for cloning the source code, after cloning the repo open a command prompt and navigate to the Bot Framework Composer folder and run the following commands to start the web application.

Step 1: Build and Run the Composer application yarn software is required. Yarn is a package manager for code. It allows you to use and share code with other developers from around the world.
Bot Framework Composer: Setup and Build a bot
Step 2: Node JS is required for setup the application, download and install the Node JS application.

Bot Framework Composer

Step 3: Build and test application required Dot net core SDK, Install Dotnet core 2.2++

Bot Framework Composer: Setup and Build a bot


Step 4: Download and install Bot emulator for test the application
Bot Framework Composer
Step 5: You can successfully install and all required software, let us start build and test the composer. Open Command prompt and switch to “Composer” folder using cd <folder path>/Composer

learn Bot Framework Composer


Step 6: Install all the dependencies using “yarn install “ in command prompt

learn Bot Framework Composer

Step 7: creating and optimized production build extensions and library using “yarn build “ in command prompt.

learn Bot Framework Composer


Step 8: Start the client and server using “yarn startall” in command prompt.

learn Bot Framework Composer

Step 9: Bot framework Composer hosted successfully, open a browser and navigate to the address(http://localhost:3000) after the message composer runs successfully.

learn Bot Framework Composer


Create New Bot Composer Project

 You can create a new project or Microsoft provided example template with best practices and supporting components. Let us continue and select an existing composer template for demo. learn Bot Framework Composer
Step 1: Click on New or Select Example template and provide the Solutions Location, name and project description and start doing the Visual design.

learn Bot Framework Composer

Step 2: Start look, the visual design and no need to design for now and next article will explain very detail to How to manage and design and modify visual design

learn Bot Framework Composer


Step 3: Click on “Start Bot”, it will take some time to build the solutions

learn Bot Framework Composer

Step 4: You're now ready to start and test your bot. You will then see the Test in Emulator button show up. Click Test in Emulator and Bot Framework Emulator should start.

Bot Framework Composer: Setup and Build a bot

learn Bot Framework Composer


Debug Bot Framework Composer Build issue 


You can easily resolve your build problem, if you are getting error “You intended to execute a .NET Core program, but dotnet-bin/Debug/netcoreapp2.1/BotProject.dll does not exist. * You intended to run a global tool, but a dotnet-prefixed executable with this name could not be found on the PATH.”, the output solution not able to compile.

Go the location of your generated bot (The one you set when creating a new bot, defaults to User Documents > Composer). 

Open command prompt “Run dotnet” build in your bot directory and see the errors.
If you have a visual studio, you can ignore step 2 and Open your project in Visual Studio.
The issue may be ranges of sources for the build not to run. Wrongly configured Nuget sources, misaligned package version, just check and resolve yourself.
Once the build succeeds, launching the bot via Composer again.
You intended to execute a .NET Core program, but dotnet-bin/Debug/netcoreapp2.1/BotProject.dll does not exist

Summary 

You have successfully done the setup and build a bot application in Bot framework composer. I hope you have enjoyed learning. If you have any questions/feedback/issues, please write them in the comment box.
Create Azure article is not a problem, we can take a screenshot and mask using a paint application or other tools, but while doing Live presentation or screen recording is a big challenge, there was a security problem. Subscription ID, email addresses, keys etc are visible on a big screen or visible in the session recordings afterwards. Microsoft shared google chrome and Firefox browser add-on for mask azure secure content.

Azure secrets content mask for presentations and screen recordings

Azure Mask Features 


The following feature available in the Azure mast extensions
  • Blurs Username, Key
  • Blurs GUIDs (such as Subscription IDs)
  • Blurs your account email and Secure content
  • Hides the "Report a Bug" button (if found)

Installing the chrome Extension 

Microsoft currently not published in the Chrome Web Store. You can download release version and add manually into the chrome extension as per below steps.

Step 1: Download Latest .crx file.

Step 2: Go to Chrome browser and select the extensions.

Step 3: Make sure the "Developer mode” is enabled.

Step 4: Drag the .crx file to your Chrome window that has the extensions view open

Step 5: Confirm any prompts 

Azure secrets content mask for presentations and screen recordings


You have successfully added chrome extensions, let we continue and see, How it's working, In the browser near to address bar Azure mask icon will be there, Just do toggle for mask.

Azure secrets content mask for presentations and screen recordings

You can log in to azure Portal and see all the sensitive information is blurred like Subscription IDs and user ID like below.

Azure secrets content mask for presentations and screen recordings

Summary 

I hope this article gave you some value and This is a fantastic tool which saves you a lot of time and makes your presentations more secure. Please leave your feedback/query using the comments box, and if you like this article, please share it with your friends.
The Microsoft Azure, Cloud, MicrosoftAI and Enterprise Symbol / Icon Set is a free download from Microsoft website, the folder included set of symbols/icons as an SVG.


Microsoft Word, PowerPoint, Outlook, and Excel for Office 365 on Windows, Mac, Android and iOS Mobile support inserting and editing, scalable vector graphics (.SVG) files in your documents, presentations, emails, and workbooks. You can open any document and insert Microsoft SVG icon and modify styles, size and arrange, it's more helpful for Prestation preparation, technical architecture design and add into different applications

The Bot Framework supports different types of rich cards, Azure AD authentication and provides a richer interaction experience to the users, I have already shared about message design, login, and deployment in my previous article. In this article, I will share about how to connect and deploy bots into Bing Search.
You can build Bing Bot Application using Bot Framework and connect the application to the Bing channel, whenever user search tag /category text and Bing search output show your Bot along with your website.

Building Chat Bots with Bing search results using Bot Framework

You can follow below give steps for implement your bot application into the Bing Channel.

Setup and Create New Bot Application

You can read my previous article for create a Bots Application Using Visual Studio 2017 from following URL http://www.c-sharpcorner.com/article/getting-started-with-bots-using-visual-studio-2017/
Building Chat Bots with Bing search results using Bot Framework

Deploy Bot to Azure

You can read my previous article for deploy bot application into Azure using Visual Studio 2017 from following URL http://www.c-sharpcorner.com/article/getting-started-deploy-a-bot-to-azure-using-visual-studio-2017/
Building Chat Bots with Bing search results using Bot Framework


Publishing Bot on Bing


Step 1:
Publishing a bot on Bing, you can navigate to Bot Framework Portal https://dev.botframework.com/bots > Login with Microsoft account > Select deployed bot application > click the Channels tab, and then click Bing.

Building Chat Bots with Bing search results using Bot Framework

Step 2: 

Upload Bot png icon within 32kb. Bot Icon will help people to find bot on Bing with image


Step 3

Provide Bot application basic information

Display Name - provide a bot display name. This name will appear in Bing search results.

Long Description – provide about bot application. The bot must operate as described in its bot description.

Website - Link to your website with more information about this bot.


Step 4:
The Category and tags option will help us for search bot , You can select relevant category and provide tag value with comma separated .

Building Chat Bots with Bing search results using Bot Framework

Step 5

You can provide the following publisher information.

  • Publisher Name
  • Publisher Email
  • Publisher Phone

Building Chat Bots with Bing search results using Bot Framework

Step 6:
Provide the privacy and terms url and Click on Submit for Review

Building Chat Bots with Bing search results using Bot Framework

Step 7:
The review process will take a few weeks or days and you will get approved email confirmation. after approval, you can search your bot on bing using search keyword based on category and tag.

Building Chat Bots with Bing search results using Bot Framework

Click the Test on Bing , the link to preview a sample of how the bot will appear on Bing on like below

Building Chat Bots with Bing search results using Bot Framework

Related Article:


 I have explained about Bot framework Installation, deployment and implementation in the below article

Getting Started with Chatbot Using Azure Bot Service
Getting Started with Bots Using Visual Studio 2017
Deploying A Bot to Azure Using Visual Studio 2017
How to Create ChatBot In Xamarin
Getting Started with Dialog Using Microsoft Bot Framework
Getting Started with Prompt Dialog Using Microsoft Bot Framework
Getting Started With Conversational Forms And FormFlow Using Microsoft Bot Framework
Getting Started With Customizing A FormFlow Using Microsoft Bot Framework
Sending Bot Reply Message With Attachment Using Bot Framework
Getting Started With Hero Card Design Using Microsoft Bot Framework
Getting Started With Thumbnail Card Design Using Microsoft Bot Framework
Getting Started With Adaptive Card Design Using Microsoft Bot Framework
Getting Started with Receipt Card Design Using Microsoft Bot Framework
Building Bot Application With Azure AD Login Authentication Using AuthBot

Summary 


In this article, you learned how to connect and deploy bots into Bing Search. If you have any questions/feedback/ issues, please write in the comment box.

The Bot Framework has supported the different type of rich cards and provides a richer interaction experience to the user. In this article, I will share about how to integrate adaptive card UI design in Bot Application. The Adaptive Card can contain any combination of text, speech, images, buttons, and input controls.Adaptive Cards are created using the JSON format specified in Adaptive Cards schema and Microsoft provided Microsoft.AdaptiveCards NuGet package for .Net Developer to building these cards and handles the serialization. 

Getting Started Adaptive Card Design Using Microsoft Bot Framework


Prerequisite: 

Let's create a new bot application using Visual Studio 2017. Open Visual Studio > Select File > Create New Project (Ctrl + Shift +N) > Select Bot application.
Getting Started Adaptive Card Design Using Microsoft Bot Framework

The Bot application template was created with all the components and all required NuGet references installed in the solutions.

Getting Started Adaptive Card Design Using Microsoft Bot Framework

Install AdaptiveCard Nuget package

 The Microsoft.AdaptiveCards library implements classes for building and serializing adaptive card objects and Visual studio intelligent will help us for implement Adaptive card in the bot application.

Right click on Solution > Select Manage NuGet Package for Solution > Search “ Microsoft AdaptiveCards” > select Project and Install the package

Getting Started Adaptive Card Design Using Microsoft Bot Framework

Create New AdaptiveCardDialog Class

Step 1: You can Create new AdaptiveCardDialog class for a show the Adaptive dialog. Right Click on project > Select Add New Item > Create a class that is marked with the [Serializable] attribute (so the dialog can be serialized to state) and implement the IDialog interface.

using System;
using System.Threading.Tasks;
using Microsoft.Bot.Builder.Dialogs;
using Microsoft.Bot.Connector;
using System.IO;
using System.Web;
using System.Collections.Generic;

namespace BotAdaptiveCard.Dialogs
{
[Serializable]

public class AdaptiveCardDialog: IDialog<object>
{


Step 2
 IDialog interface has only StartAsync() method. StartAsync() is called when the dialog becomes active. The method is passed the IDialogContext object, used to manage the conversation.
public async Task StartAsync(IDialogContext context)
{
context.Wait(this.MessageReceivedAsync);
}


Step 3: Create a MessageReceivedAsync method and write following code for the welcome message and show the list of demo options dialog. [Serializable]

public class AdaptiveCardDialog : IDialog<object>
{
public Task StartAsync(IDialogContext context)
{
context.Wait(this.MessageReceivedAsync);
return Task.CompletedTask;
}

private readonly IDictionary<string, string> options = new Dictionary<string, string>
{
{ "1", "1. Show Demo Adaptive Card " },
{ "2", "2. Show Demo for Adaptive Card Design with Column" },
{"3" ,
"3. Input Adaptive card Design" }
};

public async virtual Task MessageReceivedAsync(IDialogContext context, IAwaitable<IMessageActivity> result)
{
var message = await result;
var welcomeMessage = context.MakeMessage();
welcomeMessage.Text = "Welcome to bot Adaptive Card Demo";
await context.PostAsync(welcomeMessage);
this.DisplayOptionsAsync(context);
}


public void DisplayOptionsAsync(IDialogContext context)
{
PromptDialog.Choice<string>(
context,
this.SelectedOptionAsync,
this.options.Keys,
"What Demo / Sample option would you like to see?",
"Please select Valid option 1 to 6",
6,
PromptStyle.PerLine,
this.options.Values);
}

public async Task SelectedOptionAsync(IDialogContext context, IAwaitable<string> argument)
{
var message = await argument;
var replyMessage = context.MakeMessage();
Attachment attachment = null;
switch (message)
{
case "1":
attachment = CreateAdapativecard();
replyMessage.Attachments = new List<Attachment> { attachment };
break;
case "2":
attachment = CreateAdapativecardWithColumn();
replyMessage.Attachments = new List<Attachment> { attachment };
break;
case "3":
replyMessage.Attachments = new List<Attachment> { CreateAdapativecardWithColumn(), CreateAdaptiveCardwithEntry() };
break;
}

await context.PostAsync(replyMessage);
this.DisplayOptionsAsync(context);
}


After user enter the first message, bot will reply welcome message and list of demo option and wait for user input like below

Getting Started Adaptive Card Design Using Microsoft Bot Framework


Step 4: Design Adaptive Card 

The Adaptive Cards are created using JSON, but with the Microsoft.AdaptiveCards NuGet we can create them by composing card objects. We can create AdaptiveCard objects and attach to the attachment and post message to a message
Getting Started Adaptive Card Design Using Microsoft Bot Framework
The following code showing design the welcome message with image, textblock and speech.

public Attachment CreateAdapativecard()
{
AdaptiveCard card = new AdaptiveCard();
// Specify speech for the card.
card.Speak = "Suthahar J is a Technical Lead and C# Corner MVP. He has extensive 10+ years of experience working on different technologies, mostly in Microsoft space. His focus areas are Xamarin Cross Mobile Development ,UWP, SharePoint, Azure,Windows Mobile , Web , AI and Architecture. He writes about technology at his popular blog http://devenvexe.com";
// Body content
card.Body.Add(new Image()
{
Url = "https://i1.social.s-msft.com/profile/u/avatar.jpg?displayname=j%20suthahar&size=extralarge&version=88034ca2-9db8-46cd-b767-95d17658931a",
Size = ImageSize.Small,
Style = ImageStyle.Person,
AltText = "Suthahar Profile"
});

// Add text to the card.
card.Body.Add(new TextBlock()
{
Text = "Technical Lead and C# Corner MVP",
Size = TextSize.Large,
Weight = TextWeight.Bolder
});

// Add text to the card.
card.Body.Add(new TextBlock()
{
Text = "jssutahhar@gmail.com"
});

// Add text to the card.
card.Body.Add(new TextBlock()
{
Text = "97XXXXXX12"
});

// Create the attachment with adapative card.
Attachment attachment = new Attachment()
{
ContentType = AdaptiveCard.ContentType,
Content = card
};
return attachment;
}


The above code will generate adaptive card and reply to the user

Getting Started Adaptive Card Design Using Microsoft Bot Framework

Step 5: Design Adaptive Card with Column 

The Adaptive Cards contain many elements that allow to design UI content in a common and consistent way.
Container - A Container is a CardElement which contains a list of CardElements that are logically grouped.

ColumnSet and Column - The columnSet element adds the ability to have a set of Column objects and align the column object.

FactSet - The FactSet element is displayed row and column like a tabular form.

TextBlock - The TextBlock element allows for the inclusion of text, we can modify font sizes, weight and color.

ImageSet and Image - The ImageSet allows for the inclusion of a collection images like a photo set, and the Image element allows for the inclusion of images.

Getting Started Adaptive Card Design Using Microsoft Bot Framework

The following code showing, adding multiple columns and design the UI Adaptive Card

public Attachment CreateAdapativecardWithColumn()
{
AdaptiveCard card = new AdaptiveCard()
{
Body = new List<CardElement>()
{
// Container
new Container()
{
Speak = "<s>Hello!</s><s>Suthahar J is a Technical Lead and C# Corner MVP. He has extensive 10+ years of experience working on different technologies, mostly in Microsoft space. His focus areas are Xamarin Cross Mobile Development ,UWP, SharePoint, Azure,Windows Mobile , Web , AI and Architecture. He writes about technology at his popular blog http://devenvexe.com</s>",

Items = new List<CardElement>()
{
// first column
new ColumnSet()
{
Columns = new List<Column>()
{
new Column()
{
Size = ColumnSize.Auto,
Items = new List<CardElement>()
{
new Image()
{
Url = "https://i1.social.s-msft.com/profile/u/avatar.jpg?displayname=j%20suthahar&size=extralarge&version=88034ca2-9db8-46cd-b767-95d17658931a",
Size = ImageSize.Small,
Style = ImageStyle.Person
}
}
},
new Column()
{
Size = "300",
Items = new List<CardElement>()
{
new TextBlock()
{
Text = "Suthahar Jegatheesan MCA",
Weight = TextWeight.Bolder,
IsSubtle = true
},
new TextBlock()
{
Text = "jssuthahar@gmail.com",
Weight = TextWeight.Lighter,
IsSubtle = true
},
new TextBlock()
{
Text = "97420XXXX2",
Weight = TextWeight.Lighter,
IsSubtle = true
},
new TextBlock()
{
Text = "http://www.devenvexe.com",
Weight = TextWeight.Lighter,
IsSubtle = true
}
}
}
}
},
// second column
new ColumnSet()
{
Columns = new List<Column>()
{
new Column()
{
Size = ColumnSize.Auto,
Separation =SeparationStyle.Strong,
Items = new List<CardElement>()
{
new TextBlock()
{
Text = "Suthahar J is a Technical Lead and C# Corner MVP. He has extensive 10+ years of experience working on different technologies, mostly in Microsoft space. His focus areas are Xamarin Cross Mobile Development ,UWP, SharePoint, Azure,Windows Mobile , Web , AI and Architecture. He writes about technology at his popular blog http://devenvexe.com",
Wrap = true
}
}
}
}
}
}
}
},
};
Attachment attachment = new Attachment()
{
ContentType = AdaptiveCard.ContentType,
Content = card
};
return attachment;
}
The above code will generate following card design and reply the message


Step 6: Adaptive Card Design with Input Control:

The Adaptive Cards can include input controls for collecting information from the user, it will support following input control is : Text, Date, Time, Number and for selecting options(choiceset) and toggle .

The following sample code included collecting basic information from the users with action button
Input.Text – Collect the text content from the user

Input.Date - Collect a Date from the user

Input.Time - Collect a Time from the user

Input.Number - Collect a Number from the user

Input.ChoiceSet - provide the user a set of choices and have them pick

Input.ToggleChoice - provide the user a single choice between two items and have them pick

public Attachment CreateAdaptiveCardwithEntry()
{
var card = new AdaptiveCard()
{
Body = new List<CardElement>()
{

// Hotels Search form
new TextBlock() { Text = "Please Share your detail for contact:" },
new TextInput()
{
Id = "Your Name",
Speak = "<s>Please Enter Your Name</s>",
Placeholder = "Please Enter Your Name",
Style = TextInputStyle.Text
},
new TextBlock() { Text = "When your Free" },
new DateInput()
{
Id = "Free",
Placeholder ="Your free Date"
},
new TextBlock() { Text = "Your Experence" },
new NumberInput()
{
Id = "No of Year experence",
Min = 1,
Max = 20,
},
new TextBlock() { Text = "Email" },
new TextInput()
{
Id = "Email",
Speak = "<s>Please Enter Your email</s>",
Placeholder = "Please Enter Your email",
Style = TextInputStyle.Text
},
new TextBlock() { Text = "Phone" },
new TextInput()
{
Id = "Phone",
Speak = "<s>Please Enter Your phone</s>",
Placeholder = "Please Enter Your Phone",
Style = TextInputStyle.Text
},
},
Actions = new List<ActionBase>()
{
new SubmitAction()
{
Title = "Contact",
Speak = "<s>Contact</s>",
}
}
};
Attachment attachment = new Attachment()
{
ContentType = AdaptiveCard.ContentType,
Content = card
};
return attachment;
}
The above code will return following adaptive card design


Run Bot Application

The emulator is a desktop application that lets us test and debug our bot on localhost. Now, you can click on "Run the application" in Visual studio and execute in the browser

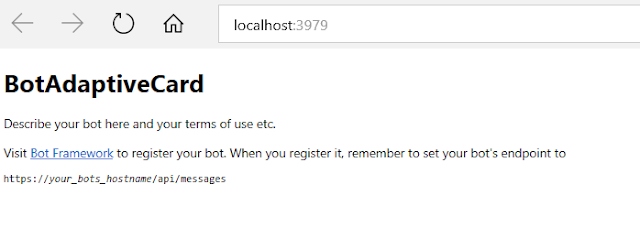
  • Test Application on Bot Emulator
  • You can follow the below steps to test your bot application.
  • Open Bot Emulator.
  • Copy the above localhost url and paste it in emulator e.g. - http://localHost:3979
  • You can append the /api/messages in the above url; e.g. - http://localHost:3979/api/messages.
  • You won't need to specify Microsoft App ID and Microsoft App Password for localhost testing, so click on "Connect".

Summary

In this article, you learned how to create a Bot application using Visual Studio 2017 and create adaptive design and input from using bot framework. If you have any questions/feedback/ issues, please write in the comment box.

Featured Post

Improving C# Performance by Using AsSpan and Avoiding Substring

During development and everyday use, Substring is often the go-to choice for string manipulation. However, there are cases where Substring c...

MSDEVBUILD - English Channel

MSDEVBUILD - Tamil Channel

Popular Posts