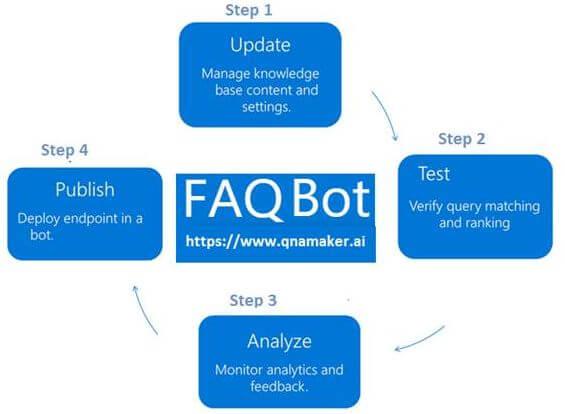
The Bot Application runs in an application, like Skype, web chat, Facebook, Message, etc. Users can interact with bots by sending them messages, commands, and inline requests. You control your bots using HTTPS requests to the bot API.
The better visibility, the higher will be the chance of customers making a purchase. Unlike other bots which are available on business web pages which provide visibility only to the customers visiting their site, a Facebook bot is very easy to find. It is visible to around 1.3 billion users of Facebook. A Facebook bot interacts very well with customers. It can receive and send messages, images and provide clickable buttons like Buy Now. In this article, I am going to show how we can connect Facebook Messenger's channel and integrate Bot Application to the Messenger app.
In this Article, I am going to show how we can connect Facebook messengers’ channel and integrate Bot Application to the messengers App.

Create FAQ Bot Application
You can refer
my previews article to create and build a Xamarin FAQ Bot using the Azure Bot Service and deploy it into Azure. I am not using any coding for developing the Bot Application, you can follow the steps provided in the article to create and deploy FAQ Bot.
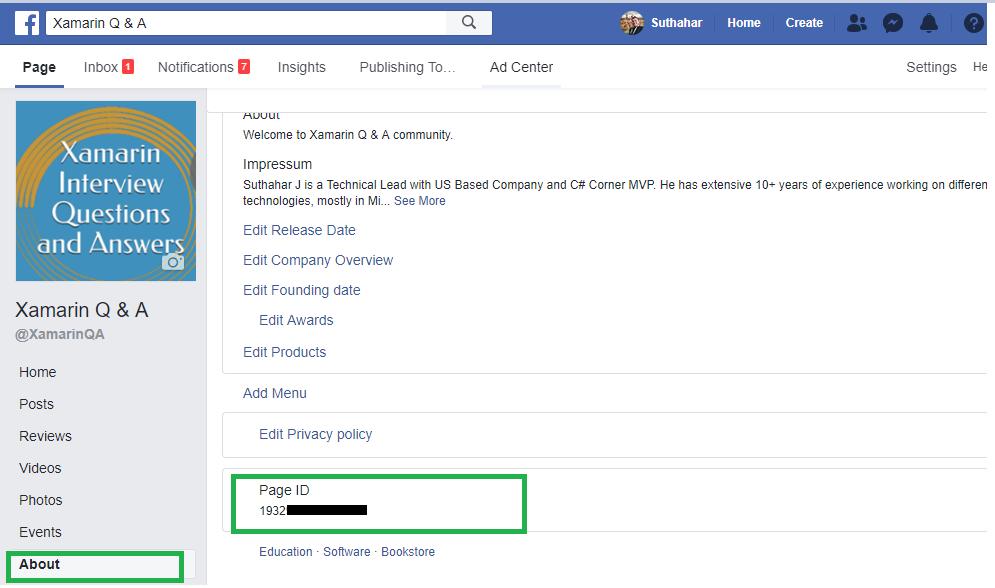
Setup Facebook Page
We can implement Bot Application to the Facebook page. You can
create Facebook page or select existing page and navigate to “About page” for fining and copy the Page ID.
Login to Facebook APP
Create a new Facebook App (
https://bit.ly/1D0BHpg) on the Page and generate an App ID
, App Secret and Page Access Token for integrating Bot to the page messenger. You can click on “Skip and Create APP Id” from following screen.
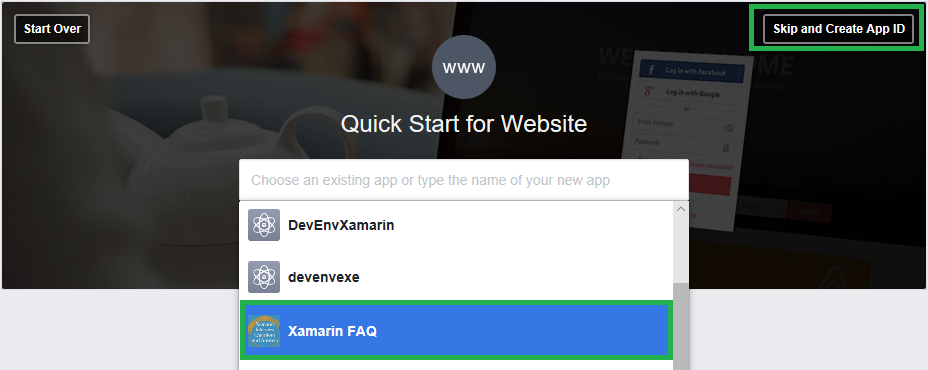
Create New App ID
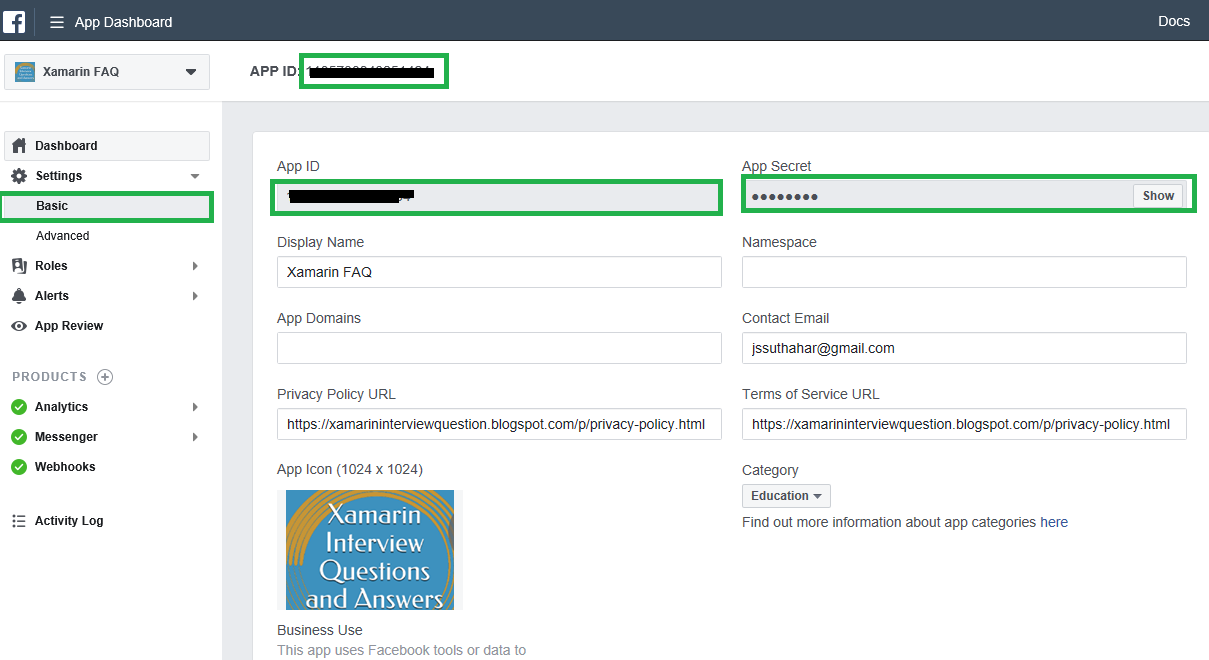
Provide display Name and Contact Email for integrating Bot application and Click on Create.

After Create button, it will navigate to the App dashboard screen. The side navigation menu having Settings > Basic and copy the APPID and APP Secret. Provide the Privacy URL, Terms of Service URL, App icon and Select Category.
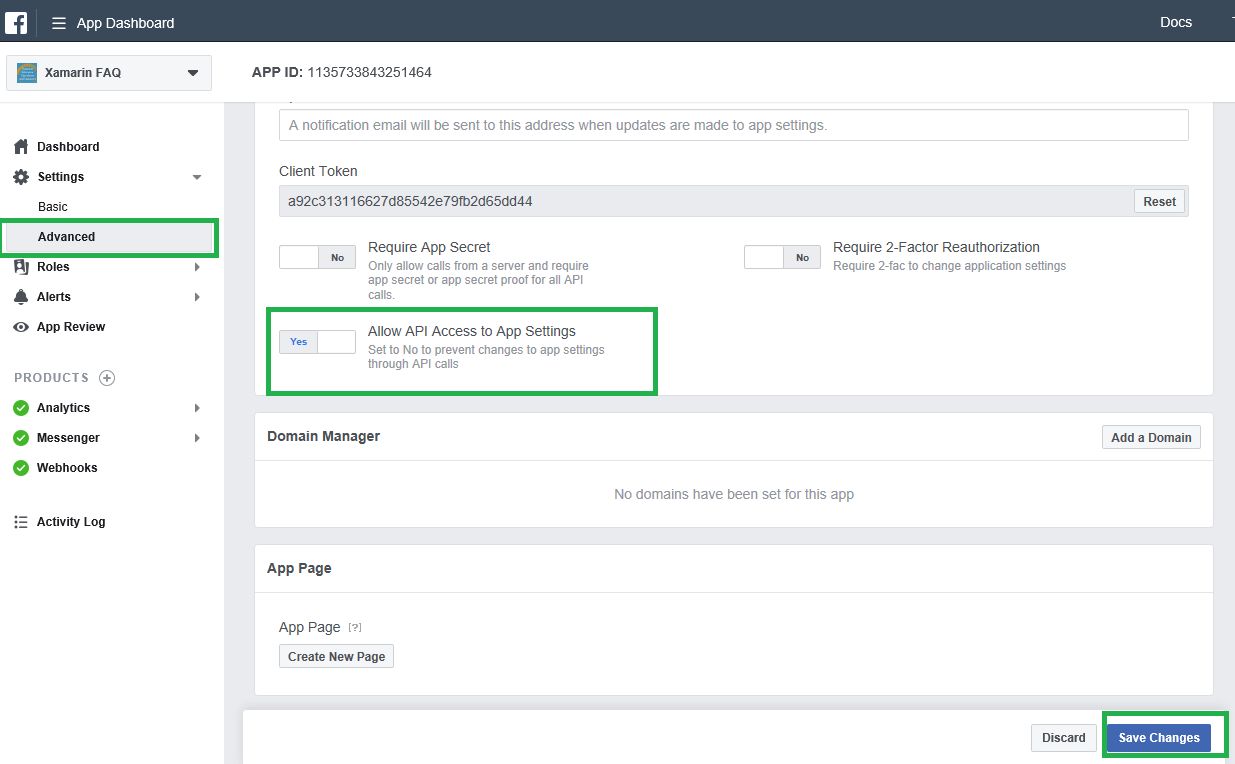
I have shown the following screen to Select Setting > Advanced and Set the "Allow API Access to App Settings slider to "Yes" and click on Save Changes.
Setup Message
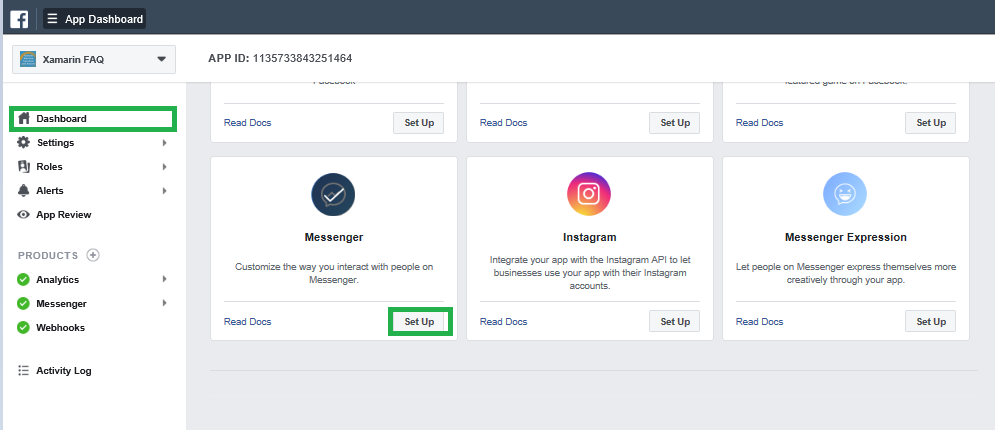
Select Dashboard and Click on Setup button from messenger group
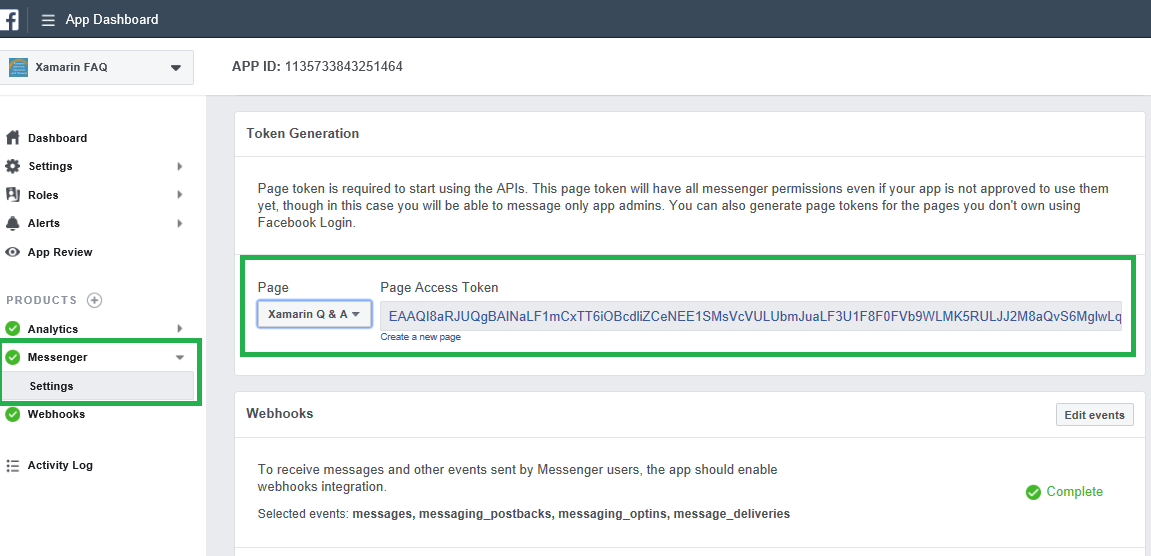
Create Page Access Token
Select Setting from the messenger side navigation menu to generate token, you can select the Page and generate access token and copy the page access token.
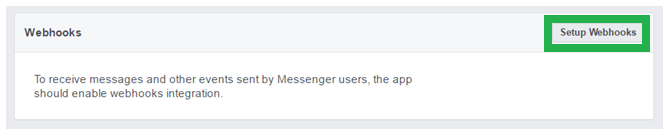
Setup Webhooks
Click Set up Webhooks to forward messaging events from Facebook Messenger to the bot.
Provide following callback URL and Verify
token to the
webhooks setup page and select the message, message_postbacks, messaging_optins and message_deliveries subscription fields. The following Steps 2, will show how to generate Callback URL and verify
token from Azure portal.
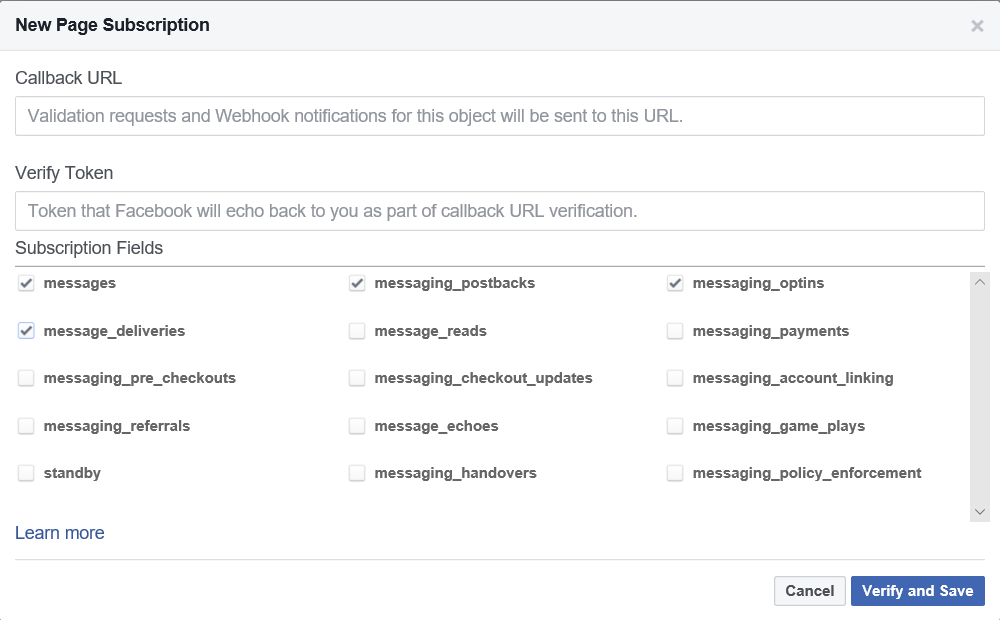
You can click on “Verify and Save “and select the Facebook page to Subscribe the
webhook to the Facebook page.

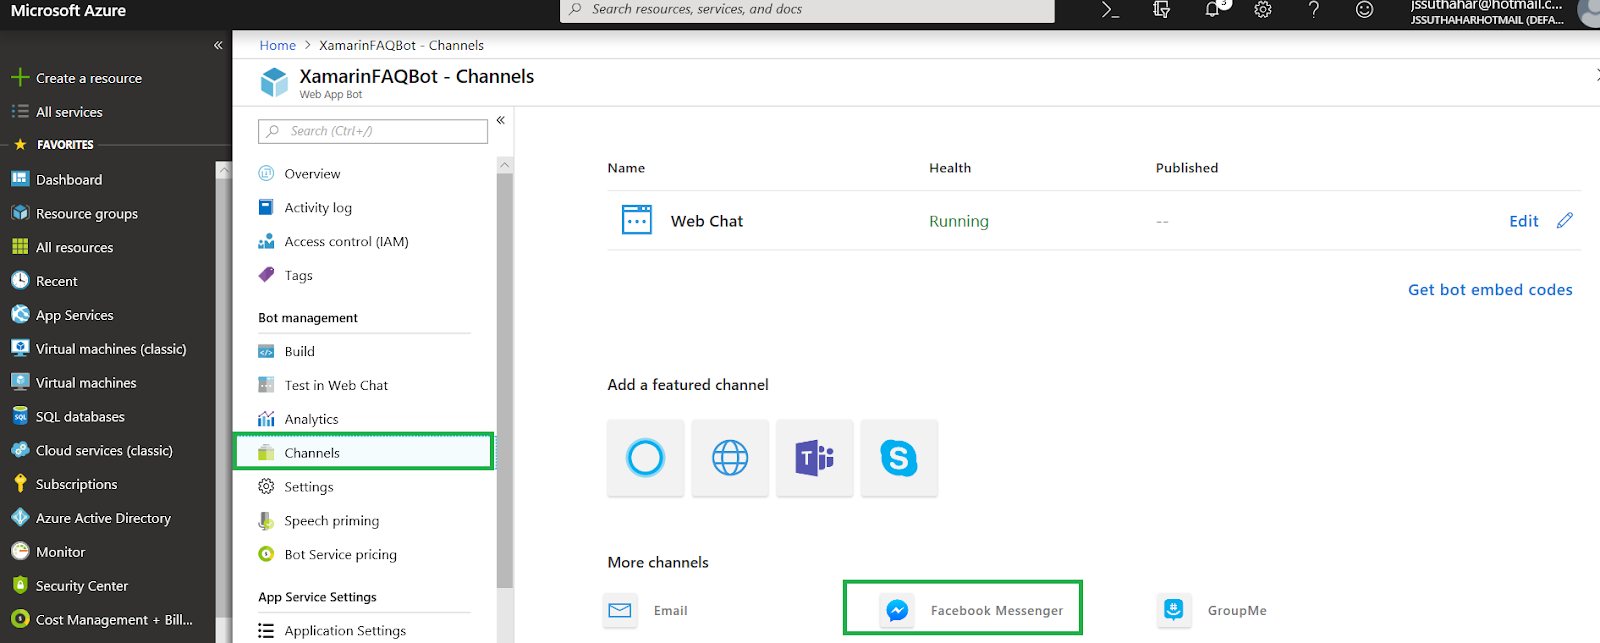
Connect Facebook Channel
Step 1: Login to Azure portal > Select the “All Resources” > Select Channels > Select Facebook Messengers, let
we start configure “Facebook Messengers “Channel and follow below steps, the end of this article you can able to deploy Bot into the Facebook messenger
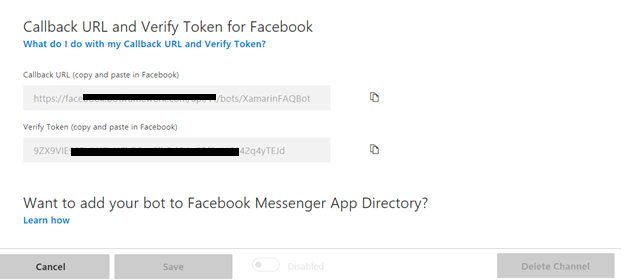
Step 2:The
Azure Facebook configuration channel will generate following Callback URL and verify token, You can copy those information and Past to the Facebook
webhook setup screen.
(Return to the Facebook messenger setup screen).
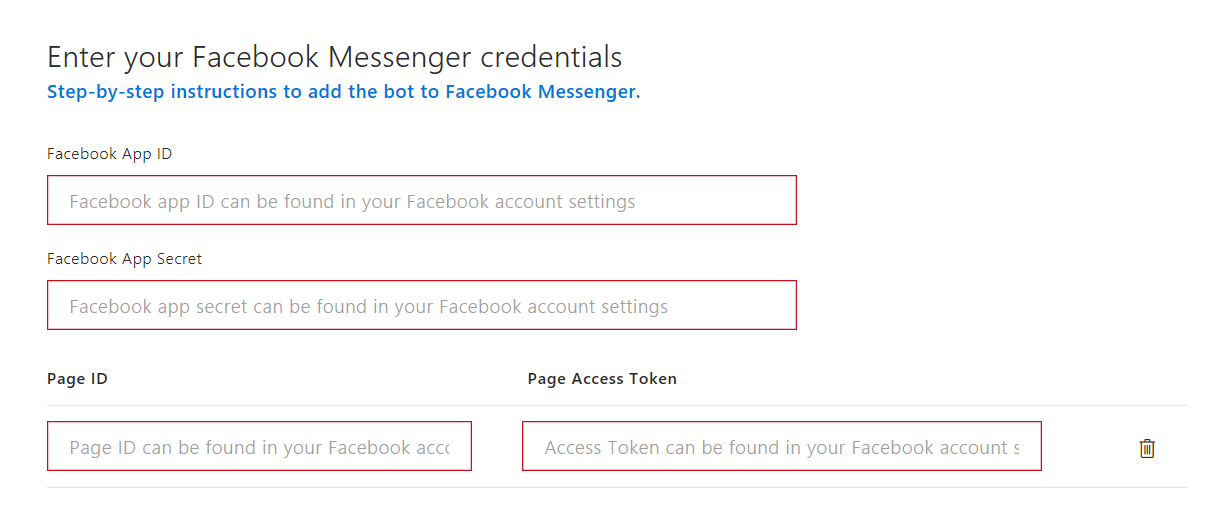
 Step 3
: You can paste the Facebook App ID, Facebook App Secret, Page ID
,and Page Access Token values copied from Facebook Messenger previously. You can use the same bot on multiple
facebook pages by adding additional page ids and access tokens.
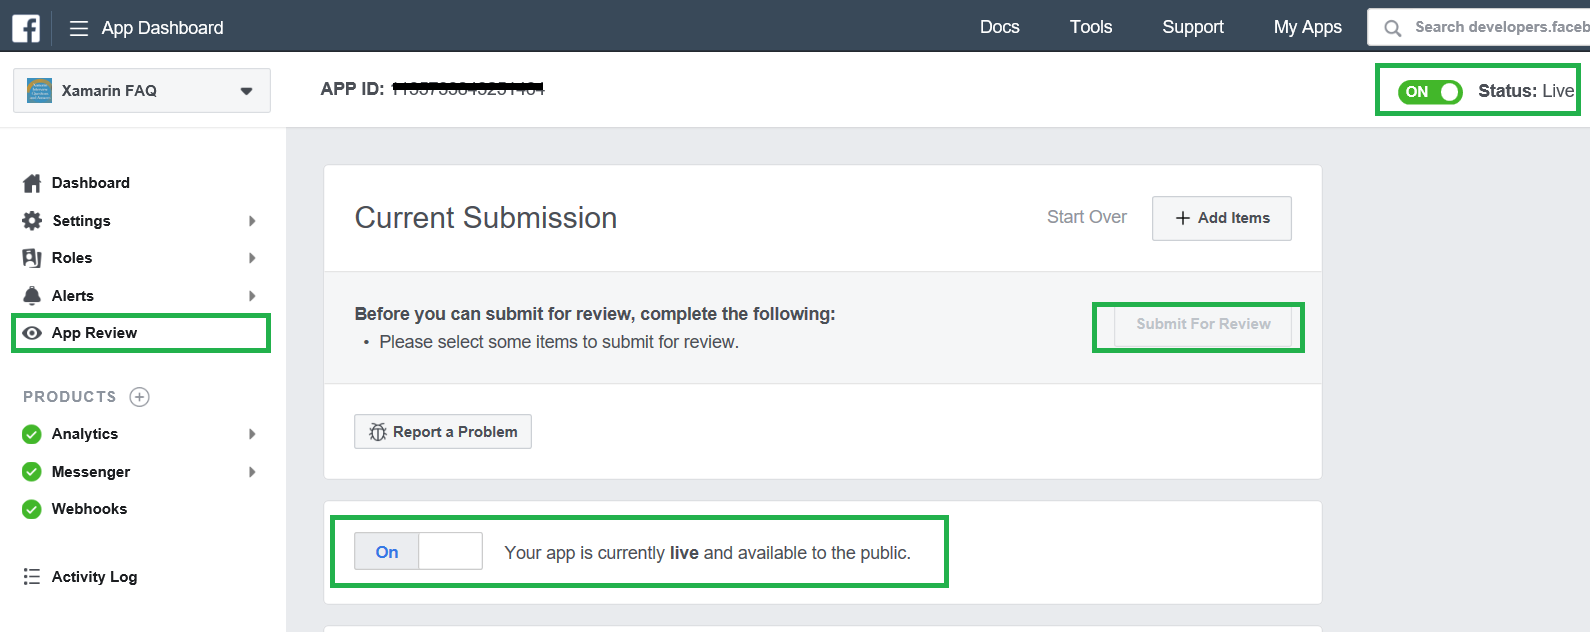
Submit to Facebook Review
Select App preview and Click and Submit for review after submit will take some time for the
facebook team testing to the messenger bot and you can mark your app live available to the public
, then you can test messenger from the Facebook page
.
Facebook Team reviews and Testing
You can verify Facebook team testing progress, navigate to your Facebook page and Click on Inbox and verify, if anything problem
to the messenger bot, the Team will update the bug list from App review screen.

Xamarin FAQ Messengers testing
You can select your Facebook page and test your bot application. I have trained 7000+ more questions to the Facebook messenger bot from Xamarin Q & A Page, If you want to look the
xamarin FAQ demo. Navigate to Xamarin Q & A Facebook page and ask your
xamairn related question.

Summary
In this article, you have learned how to integrate bot application right into your Facebook Page via Azure Microsoft AI. If you have any questions/feedback/issues, please write in the comment box.
Microsoft Cognitive Services offers awesome APIs and services for developers to create more intelligent applications. You can add interesting features, like people's emotions and video detection, face, speech, and vision recognition and speech and language understanding into your application.
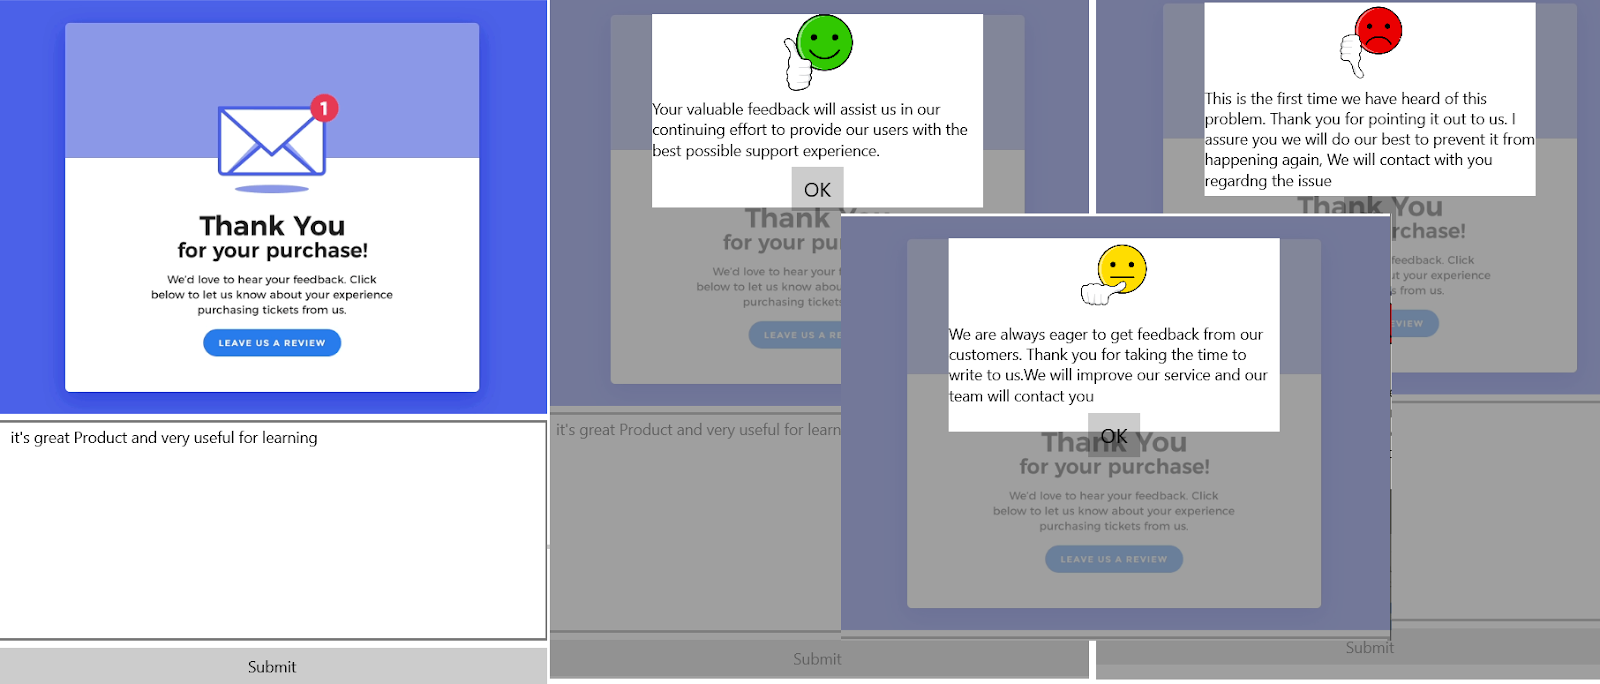
The Emotion API takes a facial expression in an image stream as an input and returns confidence levels across a set of emotions for each face in the image like anger, contempt, disgust, fear, happiness, neutral, sadness, and surprise, in a facial expression

Where to implement
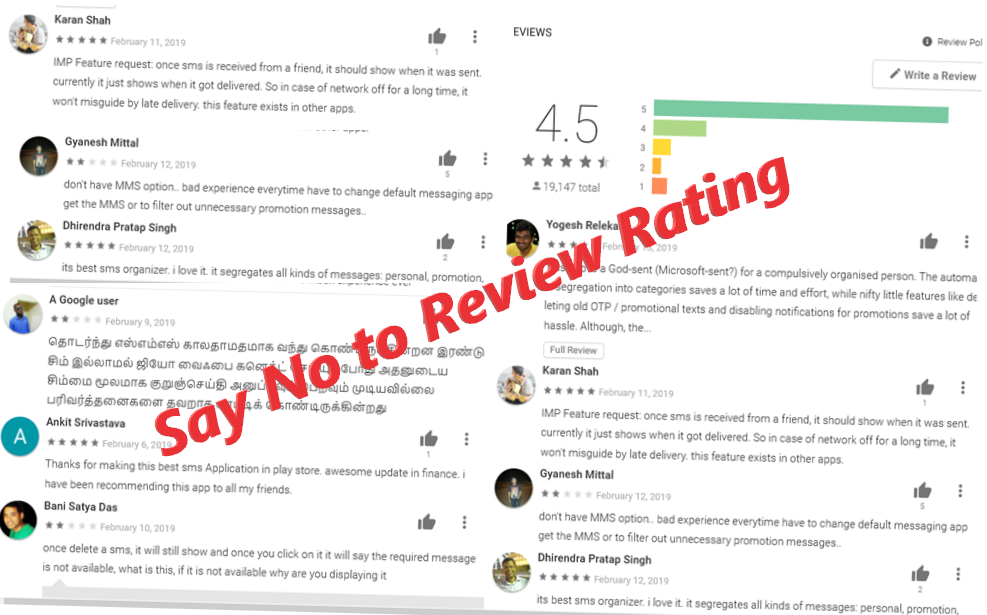
There is no single unifying definition or theory of emotion. Nevertheless, several characteristics of an emotional reaction are frequently mentioned. Nowadays feedback is more important for product promotion and review the article, store, etc. manual entry of emotion maybe wrong so we can automate the feedback and review.

In this blog, we can learn about how to implement Emotion Recognition in Xamarin.Forms with Microsoft Cognitive Services.
Getting Started with the Emotion API
The Emotion API can detect anger, contempt, disgust, fear, happiness, neutral, sadness, and surprise, in a facial expression. As well as returning an emotion result for a facial expression, the Emotion API also returns a bounding box for detected faces using the Face API. If a user has already called the Face API, they can submit the face rectangle as an optional input. Note that an API key must be obtained to use the Emotion API. You can follow below steps for obtained at free API key on Microsoft.com
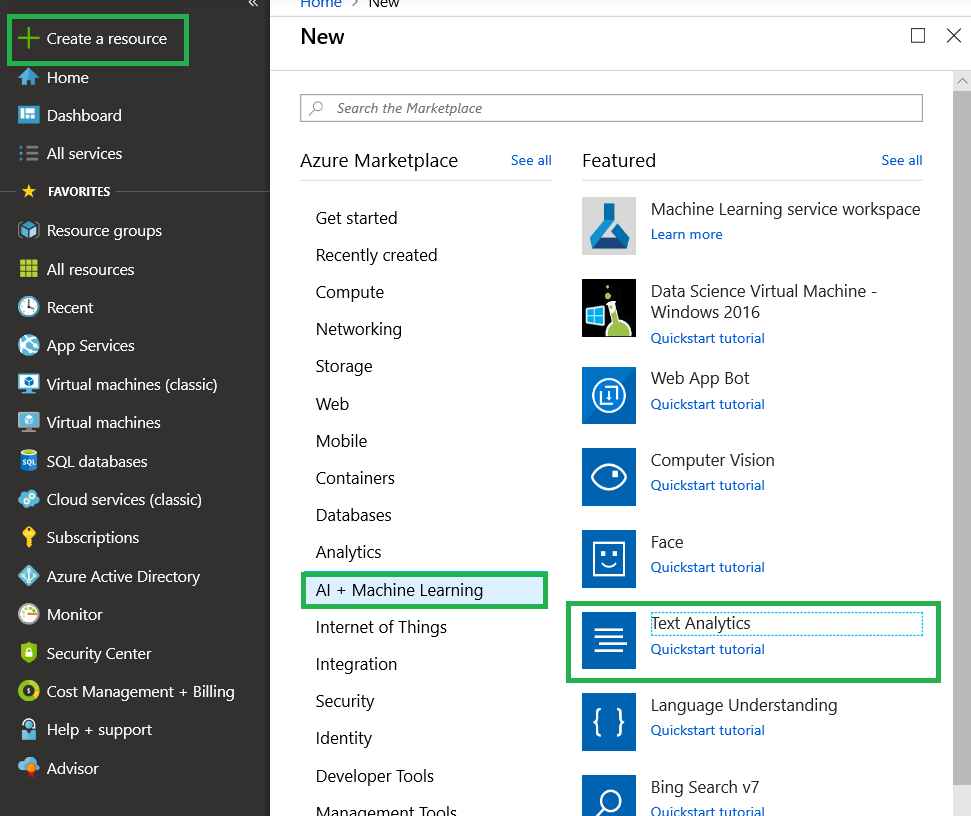
Step 1: Click
here for Generate Subscriber Key and Click on Create

Step 2: You can agree the terms and Microsoft privacy statement > select the country and click on Next

Step 3: Login with Microsoft /LinkedIn /Facebook /Github for create your API

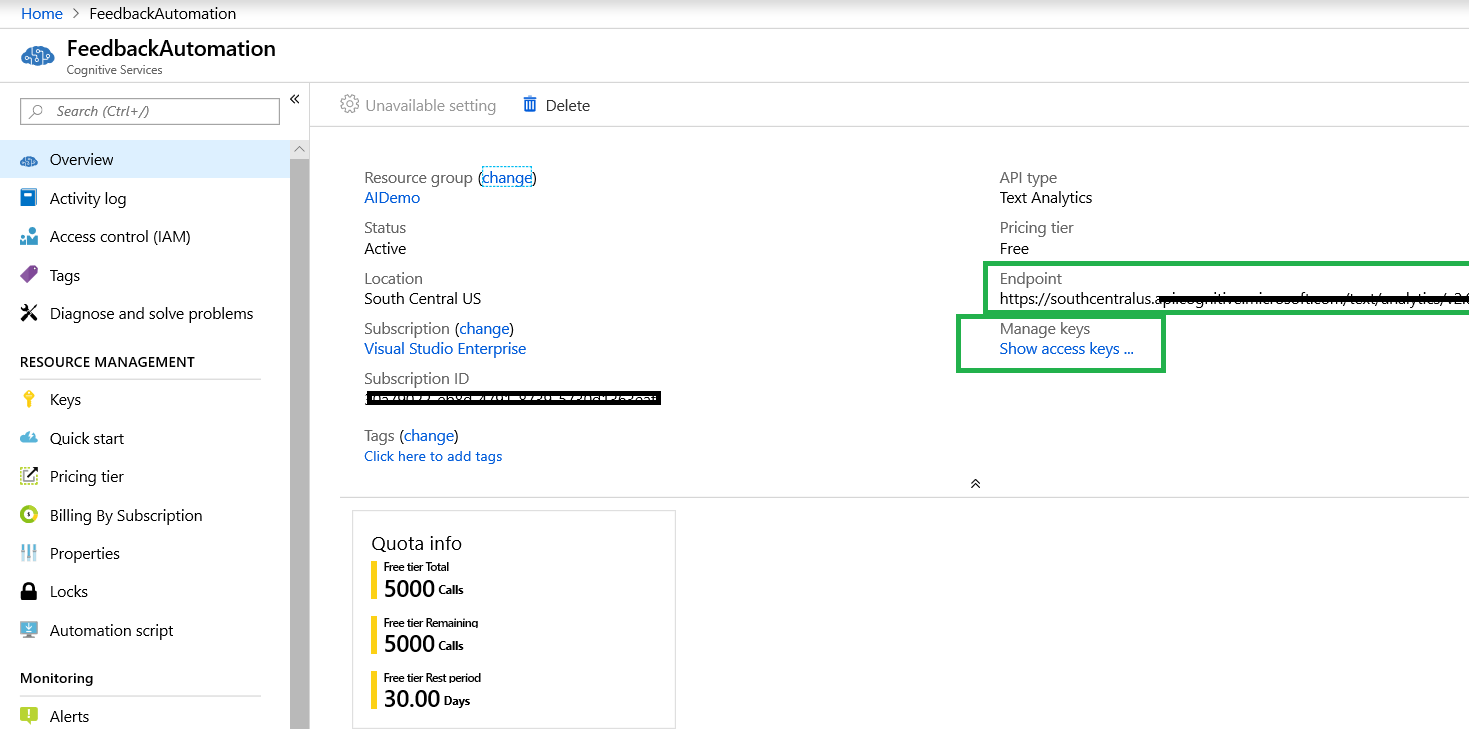
Step 4: You login and subscribe you should see the keys and the below information on available your subscriptions

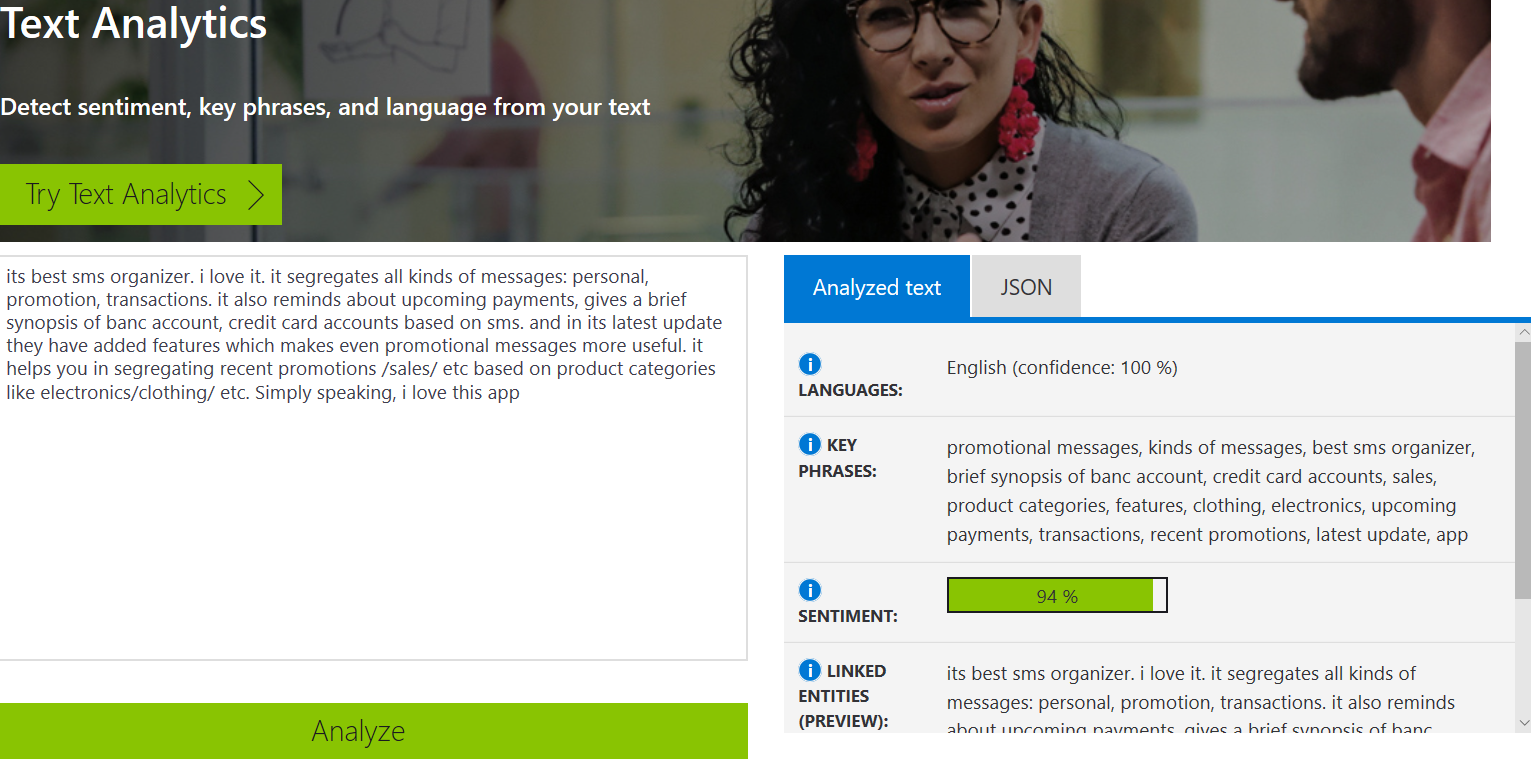
We will use emotion API key in the following Xamarin application. before that we can test the API key
Test on Your Emotion Key
You can navigate emotion API
online console application and provide the subscription key and image url . If your provide valid key and input the image, you will get it JSon data as output or relevant error

Create New Xamarin Forms Application
You can refer
my previous article for setup and create new Xamarin forms application.
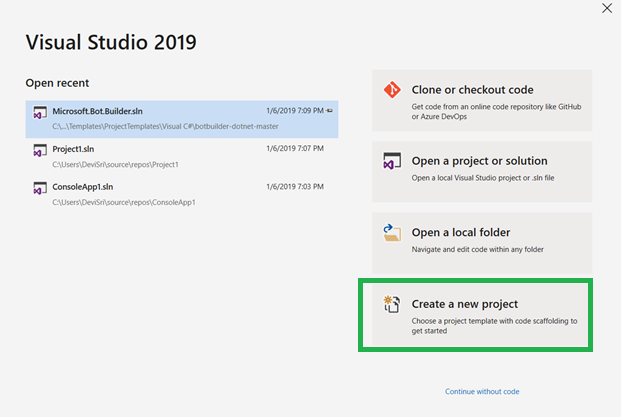
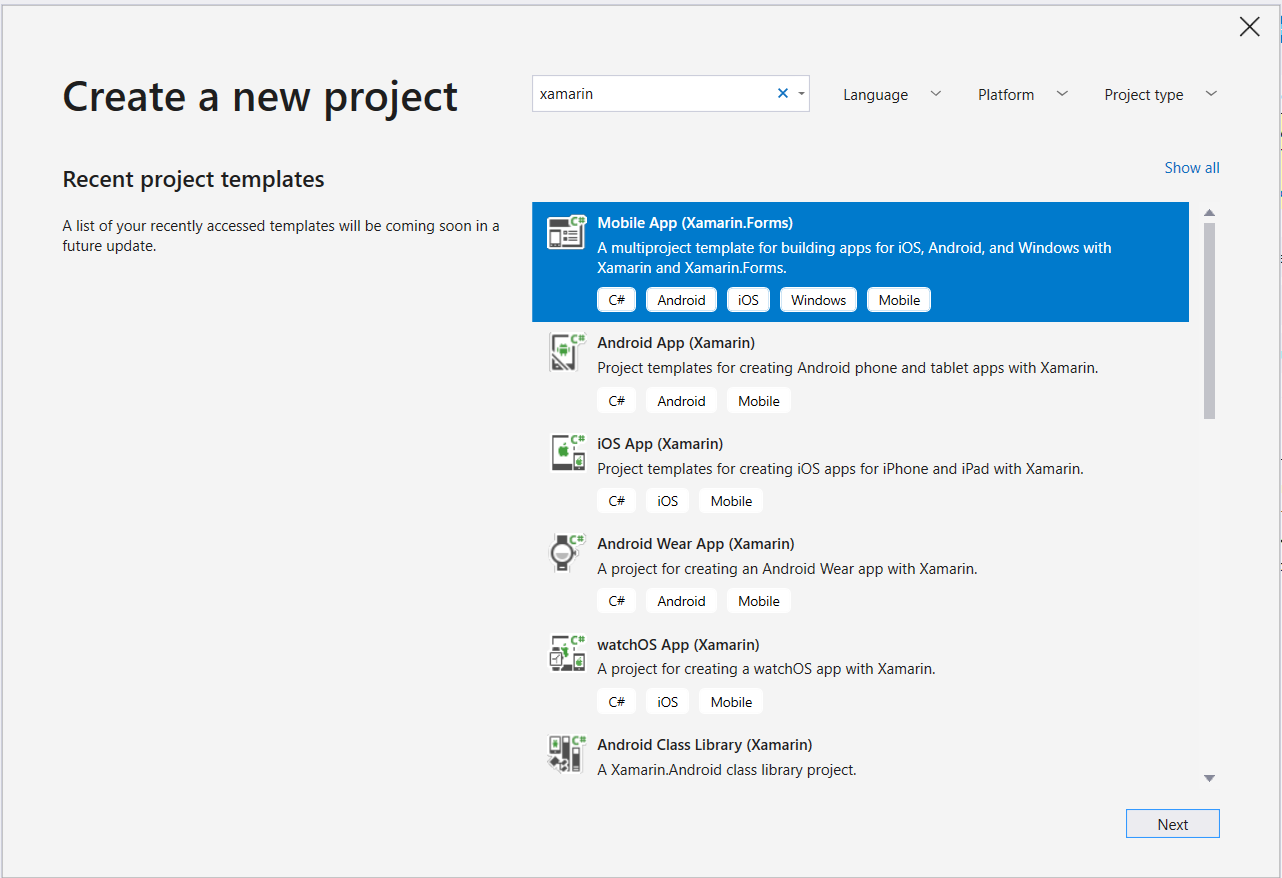
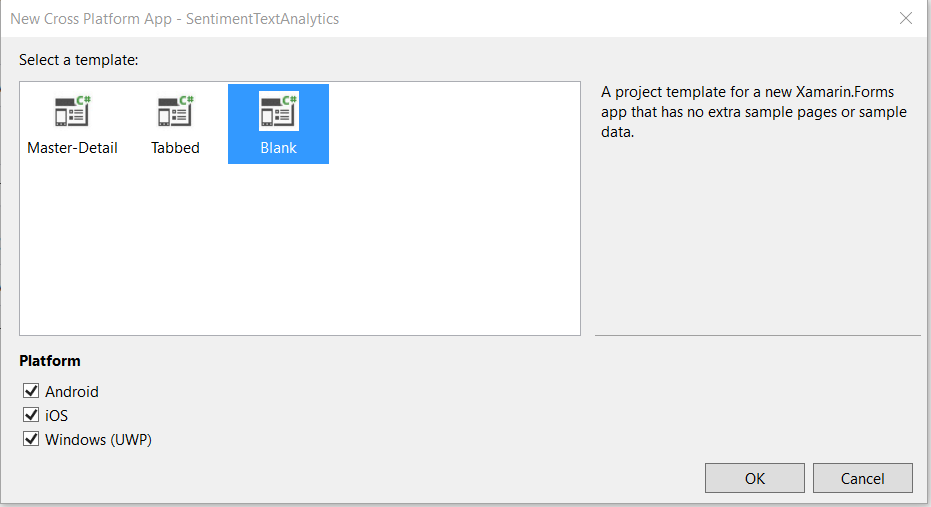
If you already installed VS on your machine, Open Visual Studio > Create New Xamarin Forms application like below

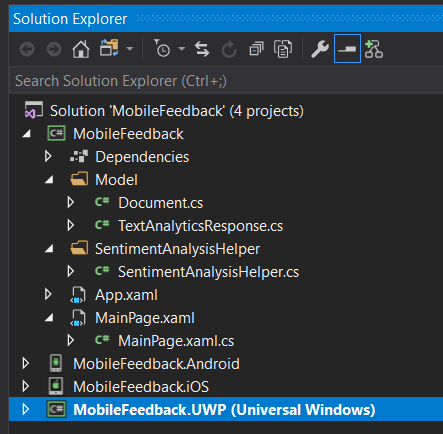
Solution will create with all the platform and PCL project

In this solution, we are going to create demo application for Article review automate based on the emotion.
Camera in Xamarin. Forms
We can use Media.Plugin Nuget package for Capture image or select image gallery from all the mobile platform (iOS,Android,Windows)
Right Click on Solution > Type “xam.plugin” in the search box > Select all the project (PCL, iOS, Android and UWP) > Click on Install

Emotion Nuget Package
This client library is a thin C# client wrapper for the Microsoft Emotion API.The easiest way to use this client library is to get microsoft.projectoxford.emotion package from nuget .
Right Click on Solution > Type “Microsoft Emotion” in the search box > Select all the project (PCL, iOS, Android and UWP) > Click on Install

UI Design
After successfully install above two nuget package. Let start UI design from PCL project In Dotnet Standard Project > Open MainPage.Xaml page and design following xaml code
<?xml version="1.0" encoding="utf-8" ?>
<ContentPage xmlns="http://xamarin.com/schemas/2014/forms"
xmlns:x="http://schemas.microsoft.com/winfx/2009/xaml"
xmlns:local="clr-namespace:DevEnvExeEmotion"
x:Class="DevEnvExeEmotion.MainPage">
<StackLayout Margin="20">
<StackLayout Orientation="Horizontal" Padding="30" HorizontalOptions="CenterAndExpand" >
<StackLayout x:Name="emotion">
<Label Text="Reader is :" FontSize="Large"/>
<Label x:Name="emotionResultLabel" FontSize="Large" />
</StackLayout>
<Button Text="Share Your FeedBack" Clicked="OnFeedBackClicked"></Button>
</StackLayout>
<Image x:Name="image" Source="article.png" />
<ActivityIndicator x:Name="activityIndicator" />
</StackLayout>
</ContentPage>
In mainPage.xaml.cs file add your logic.
public partial class MainPage : ContentPage
{
EmotionServiceClient emotionClient;
MediaFile photo;
public MainPage()
{
InitializeComponent();
emotion.IsVisible = false;
emotionClient = new EmotionServiceClient("7f495be5faf643adbeead444d5b79a13");
}
For capture image, write the following code
public async Task CaptureImage()
{
await CrossMedia.Current.Initialize();
emotion.IsVisible = false;
// Take photo
if (CrossMedia.Current.IsCameraAvailable || CrossMedia.Current.IsTakePhotoSupported)
{
photo = await CrossMedia.Current.TakePhotoAsync(new StoreCameraMediaOptions
{
SaveToAlbum = false
});
}
else
{
await DisplayAlert("No Camera", "Camera unavailable.", "OK");
}
}
For Recognize emotion, write the following code
public async Task Recognizeemotion()
{
try
{
if (photo != null)
{
using (var photoStream = photo.GetStream())
{
Emotion[] emotionResult = await emotionClient.RecognizeAsync(photoStream);
if (emotionResult.Any())
{
// Emotions detected are happiness, sadness, surprise, anger, fear, contempt, disgust, or neutral.
emotionResultLabel.Text = emotionResult.FirstOrDefault().Scores.ToRankedList().FirstOrDefault().Key;
emotion.IsVisible = true;
}
photo.Dispose();
}
}
}
catch (Exception ex)
{
Debug.WriteLine(ex.Message);
}
}
While click on Feedback button, call the above two methods
async void OnFeedBackClicked(object sender, EventArgs e)
{
//capture image
await CaptureImage();
((Button)sender).IsEnabled = false;
// Recognize emotion
await Recognizeemotion();
((Button)sender).IsEnabled = true;
}
Run the Application
Select the iOS /Android /Windows and install into the device and click on ‘Share your Feedback ‘button

The device should be camera so after click on the button, capture your face for Recognize emotion.
Summary
In this article, you learned about how to generate emotion API key and implement Emotion Recognition in Xamarin.Forms with Microsoft Cognitive Services.If you have any questions/ feedback/ issues, please write in the comment box.
or reload the browserDisable in this text fieldEditEdit in GingerEdit in Ginger