
Create Azure Mobile Apps Service
Azure Mobile App Service is easy to rapidly build engaging cross-platform and native apps for iOS, Android, Windows. We can use implement following mobile feature using Azure and create backend logic in C# or Node.Js
Store data in Azure Cloud Storage
Store image using blob storage
Azure AD Authentication
Send Push notification
Access on-premises resource
This article will be an step by step guide on how to create mobile apps service using azure.

Prerequisites
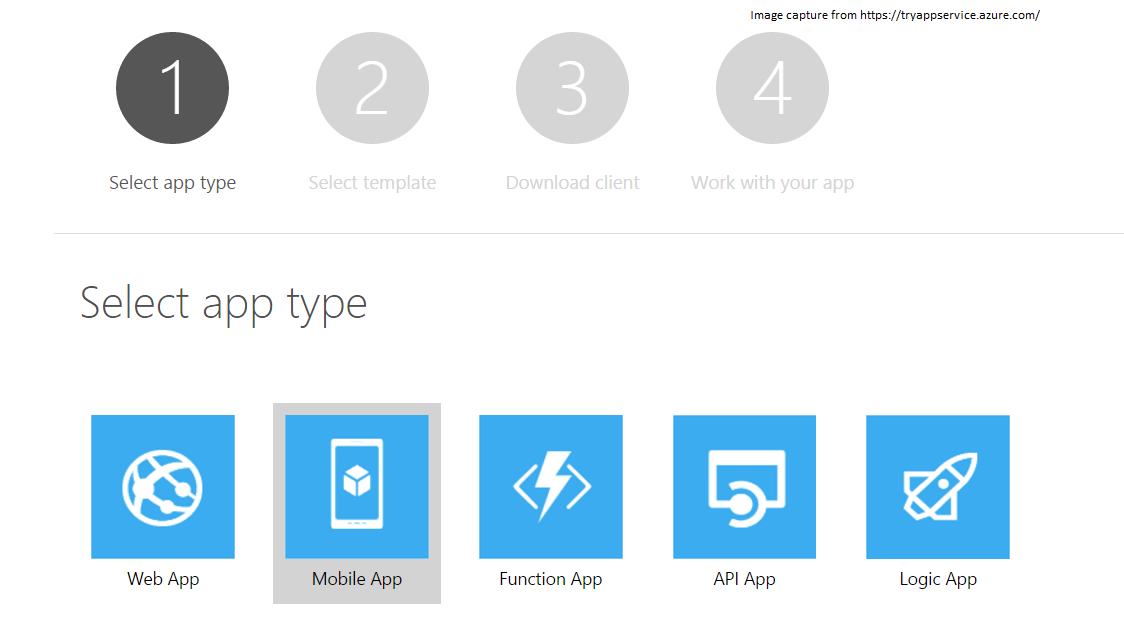
If you are not having Azure account, you can click here for a free trial azure subscription.If you want to get start with azure app service before signup to azure account. Try App Service
Create Mobile App Service
Step 1:
Sign -in into Azure portalStep 2:
In the upper left corner of the azure portal. Click on + New and type Mobile Apps in search box like belowStep 3:
Select Mobile Apps and Click on Create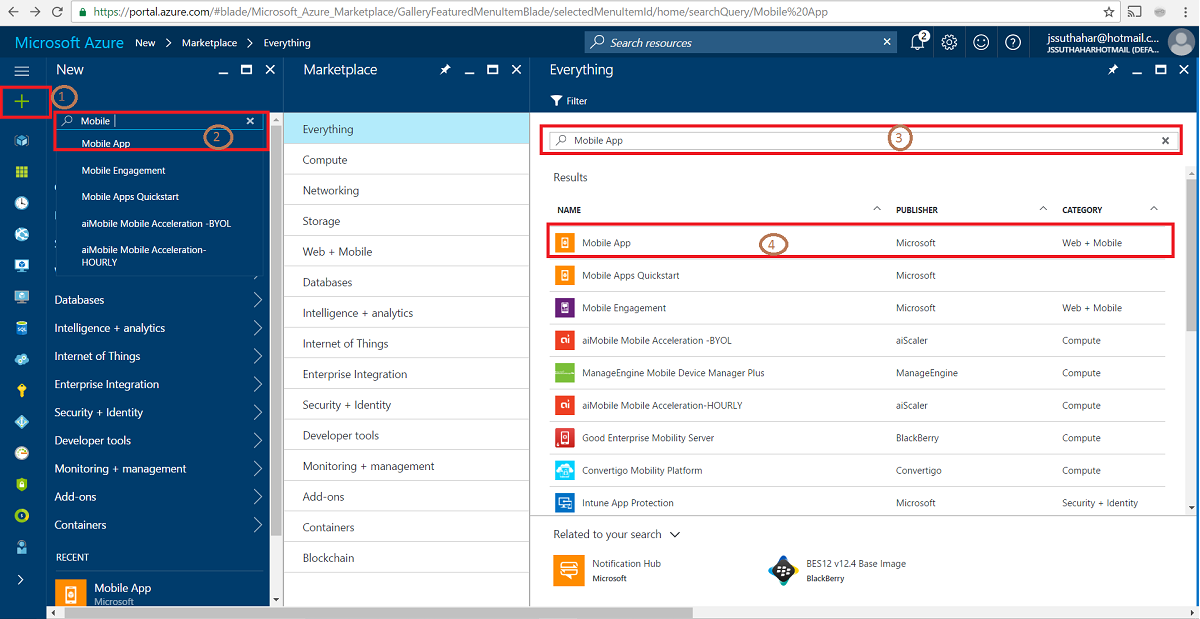
Step 4: Create Mobile App
Provide the App name, Resource Group name and click on create.
Step 5: Successfully created Mobile App Service:
After Click on Create. Wait a few minutes for the service to be deployed successfully before proceeding.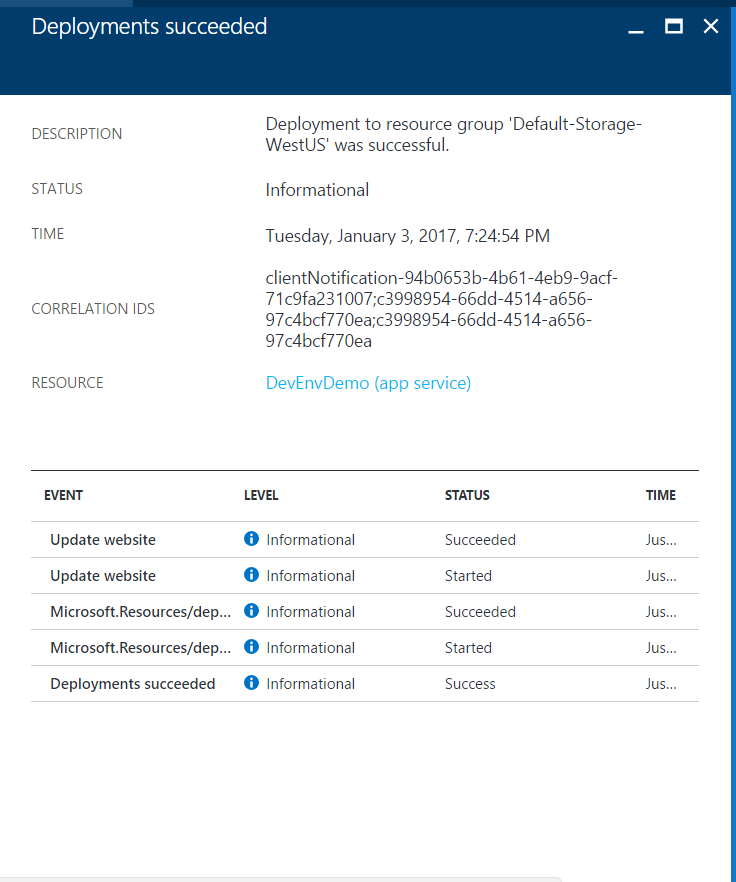
Step 6: Mobile Service Settings
Click on Menu > Select App Services > Select newly created App Service(DevEnvDemo) > Click on (…) > Select Settings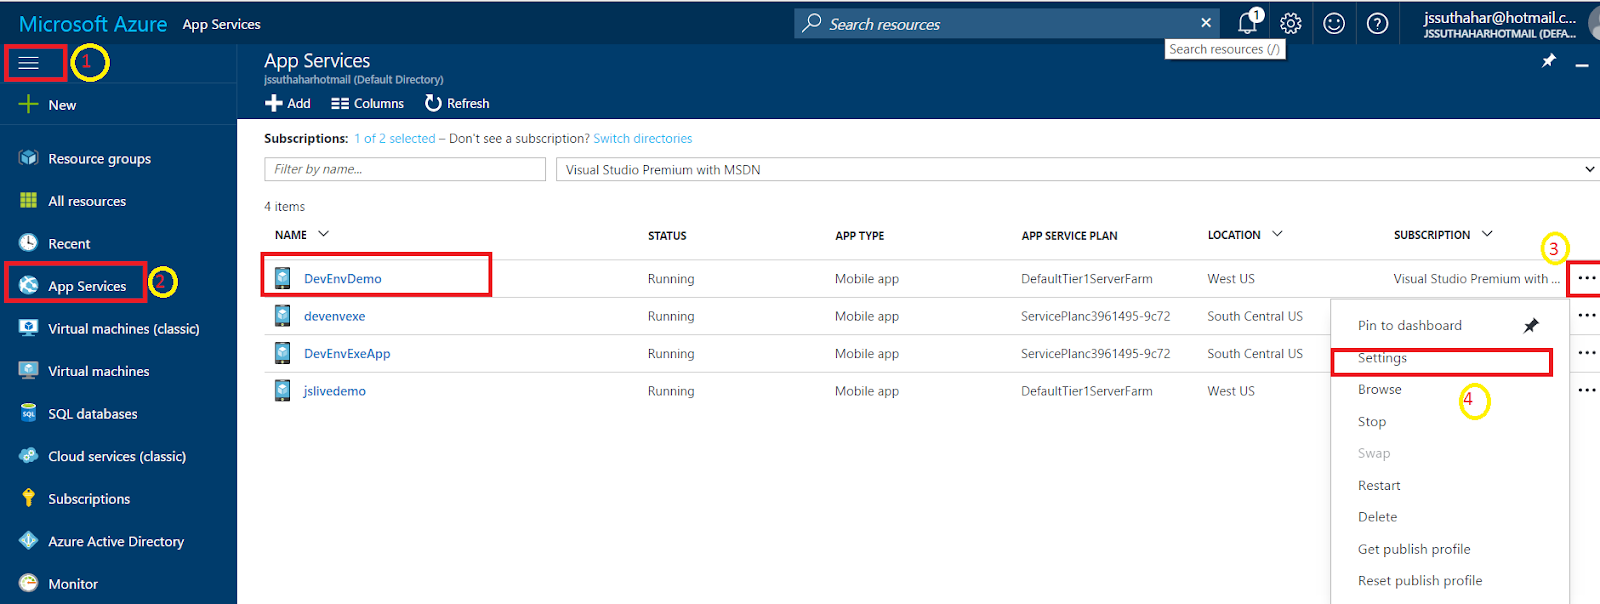
Step 7: Select Client Application platform:
Search “Quick Start” > Select client application platform (Xamarin,Windows,native App) > Select Database ( Click on Connect a database)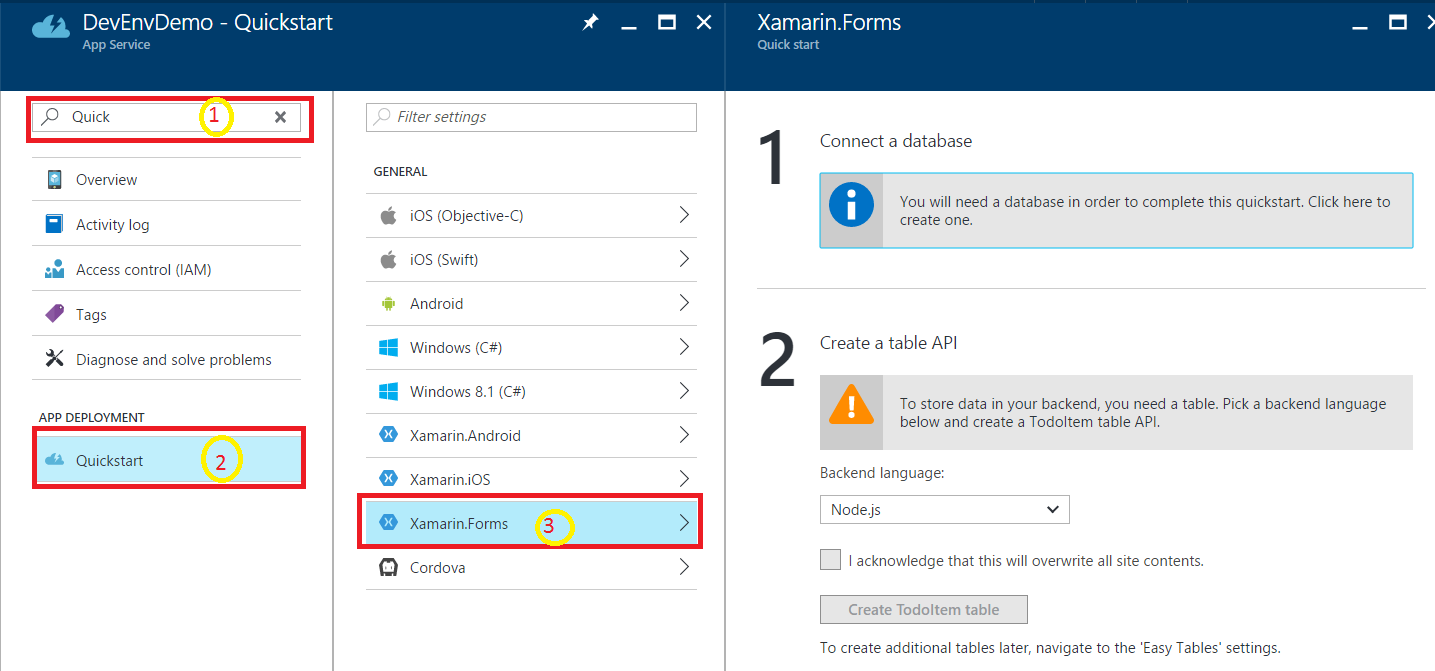
Step 8: Create Data Connection:
Click on + Add button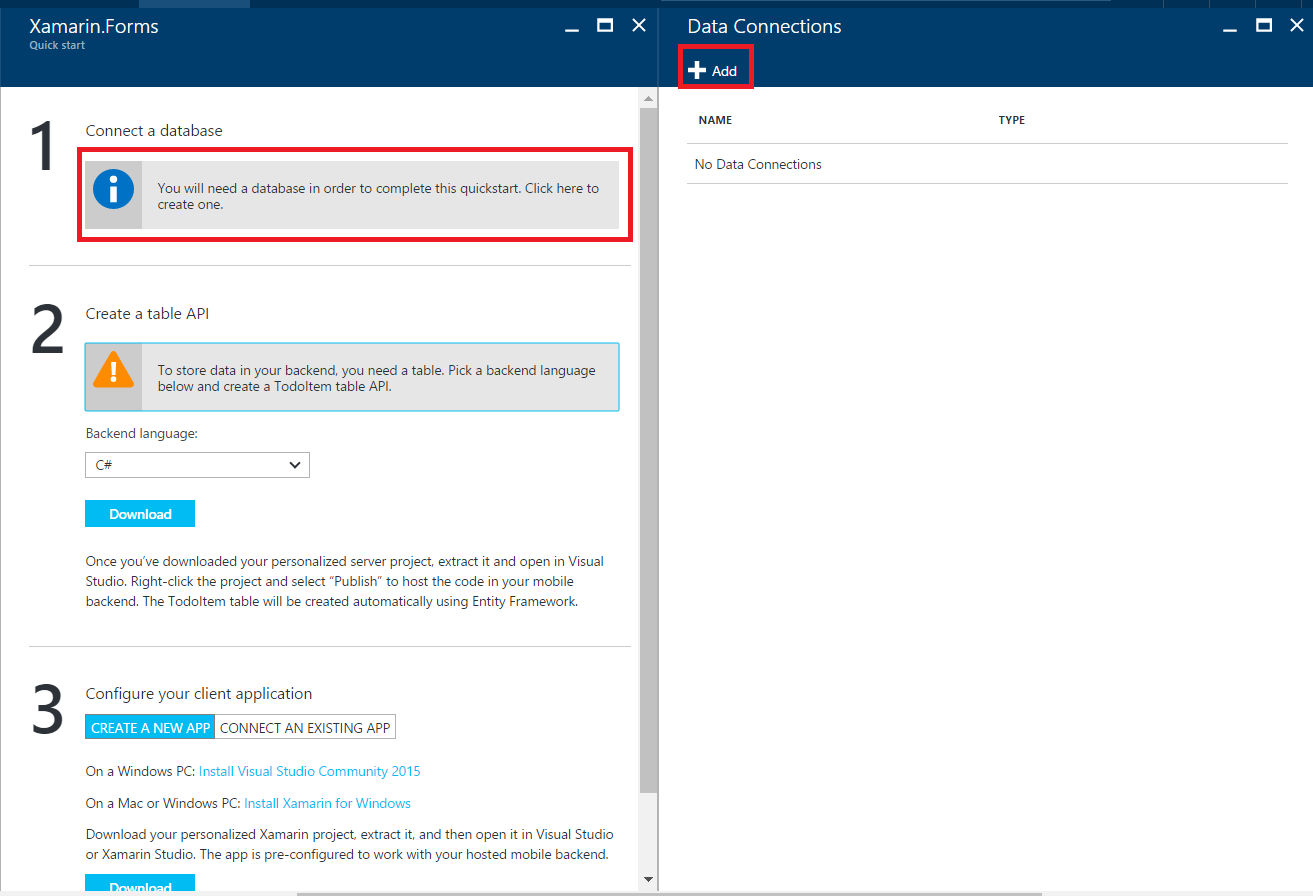
Step 9: Select or Create Database:
Select database connection type as Sql Database > Select Sql Database configure Setting > Create New Database or Select database > if New Database – provide new Database name > Select Server or create New Server > if new server – provide server details and click on Select > Click on Ok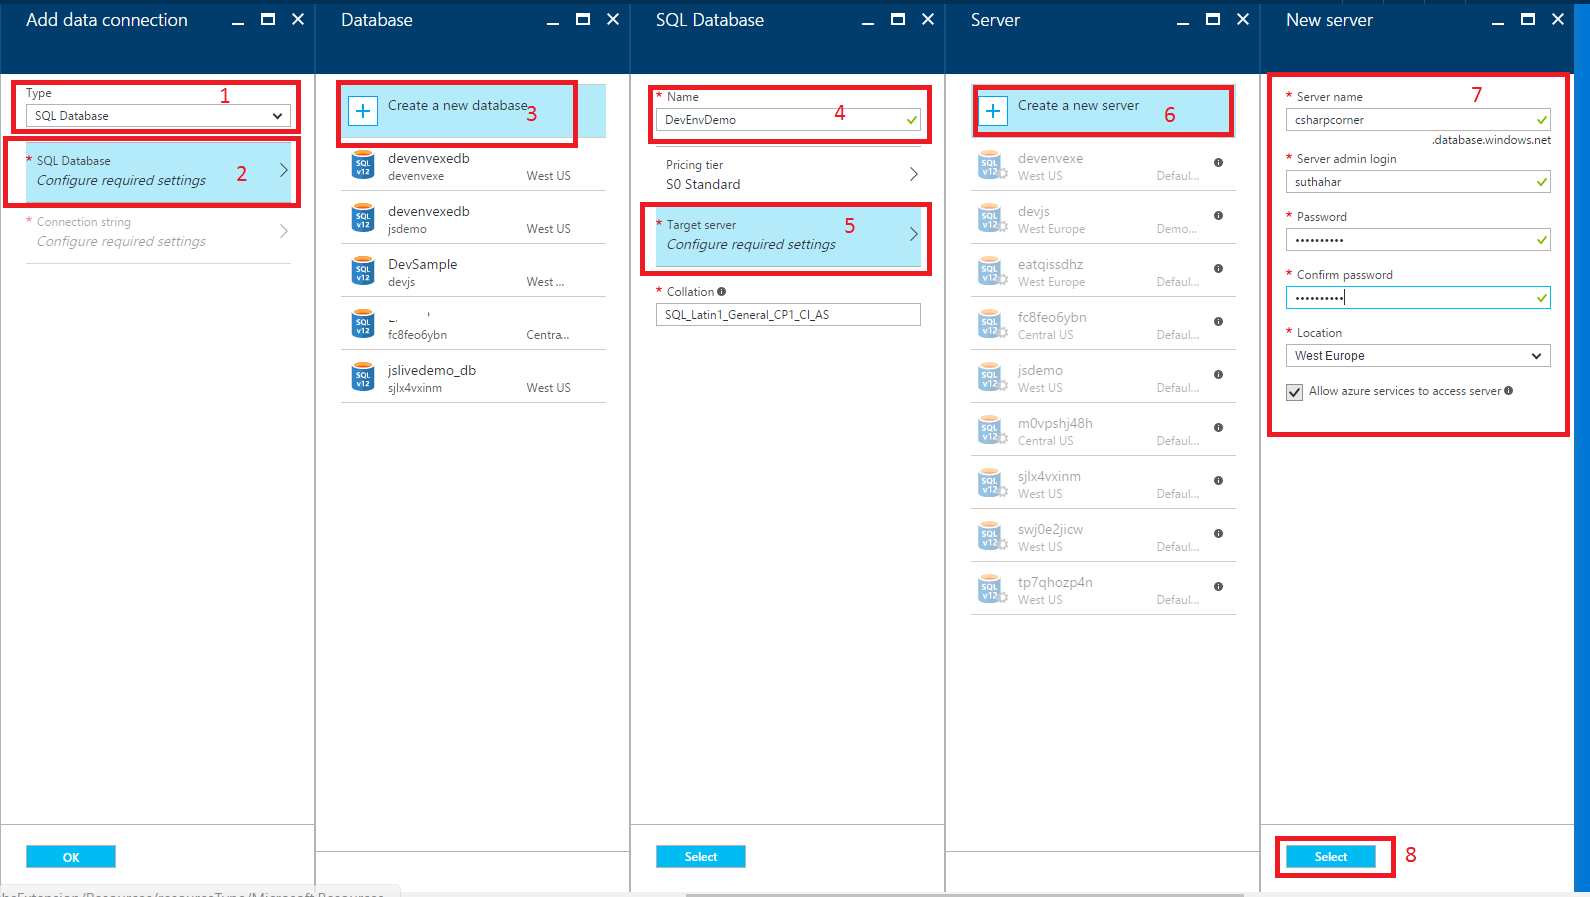
Step 10: Data Connection Status
After Click on Ok. Wait a few minutes for the Data connection create successfully before proceeding or click Notification icon and check data connection is created or not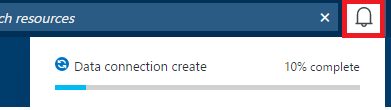
Step 11: Download Client Application and Mobile Service:
Select client application > select backend language (C# or node.js ) > Click on Download button for both client and cloud project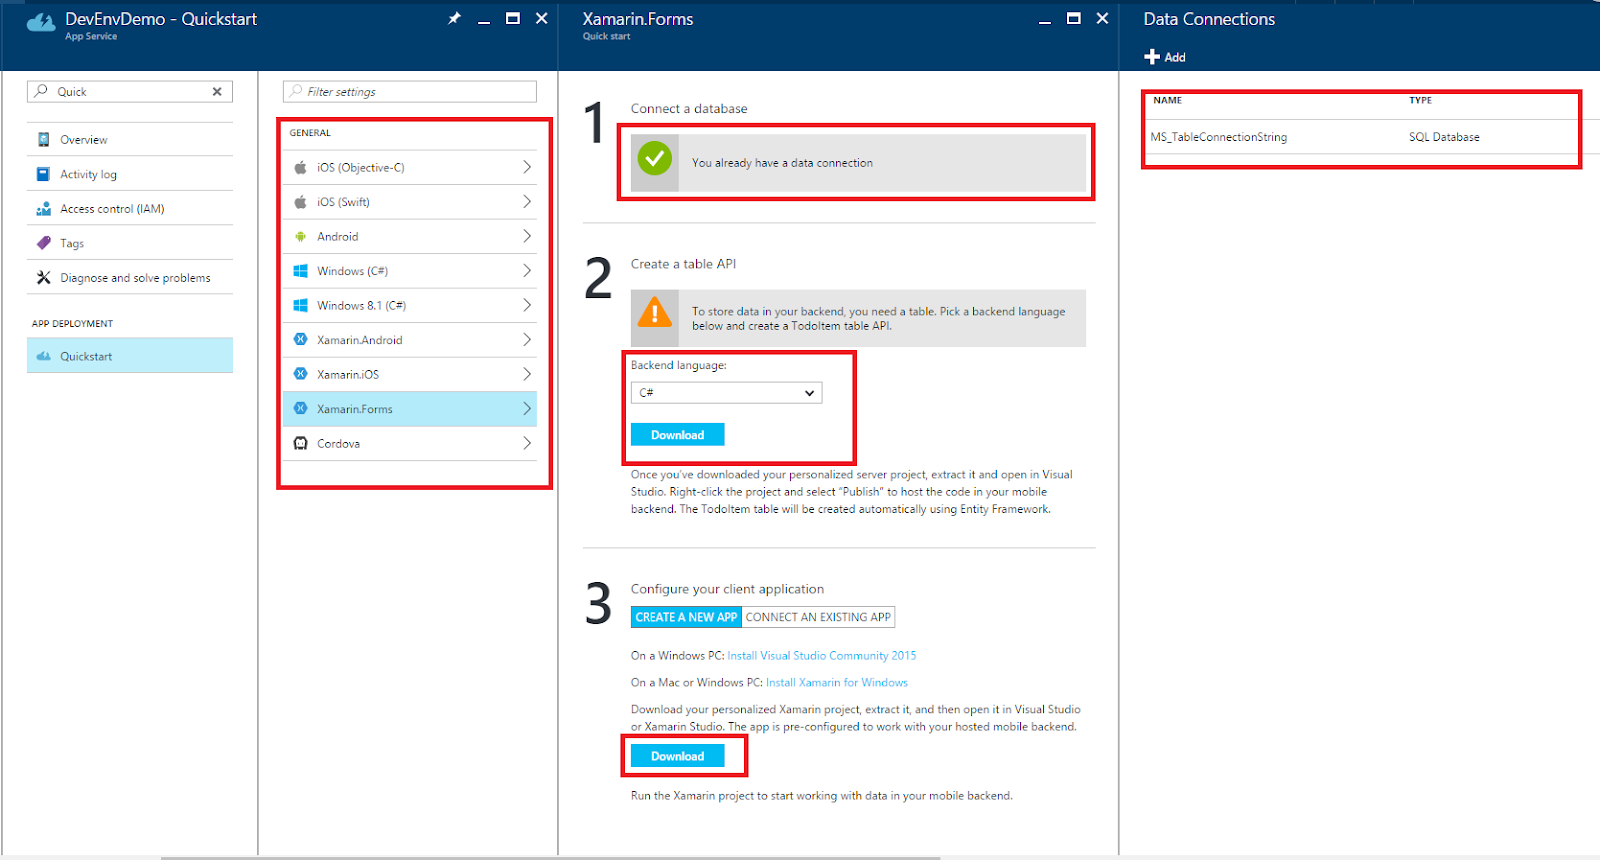
now you can download cloud and Client application
Open Visual Studio as Run as Admin, rebuild the project to restore NuGet packages.
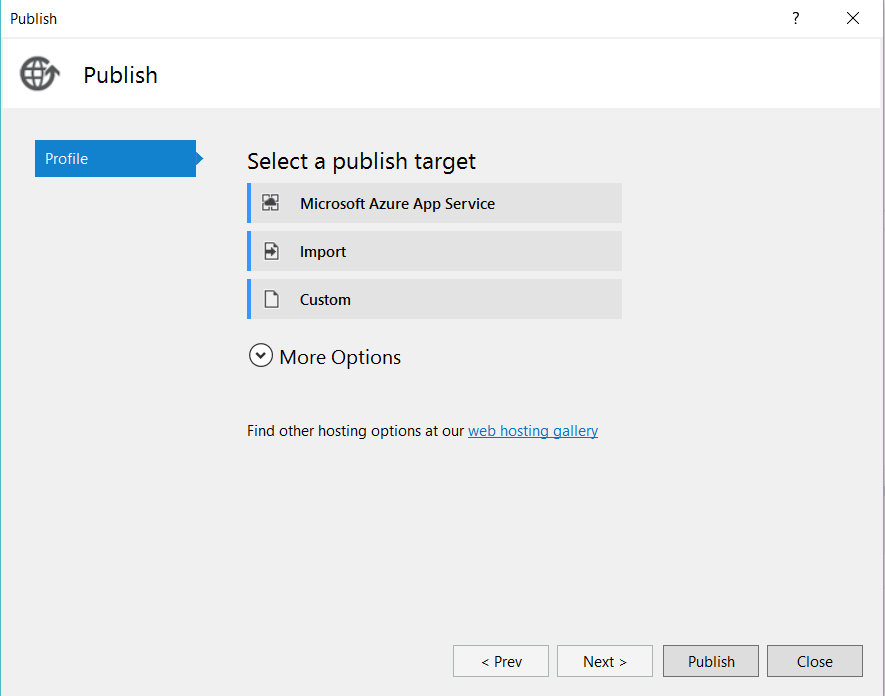
In Solution Explorer, right-click the project, click Publish.
Click on Microsoft Azure App Service > Next > sign-in with your Azure credentials.
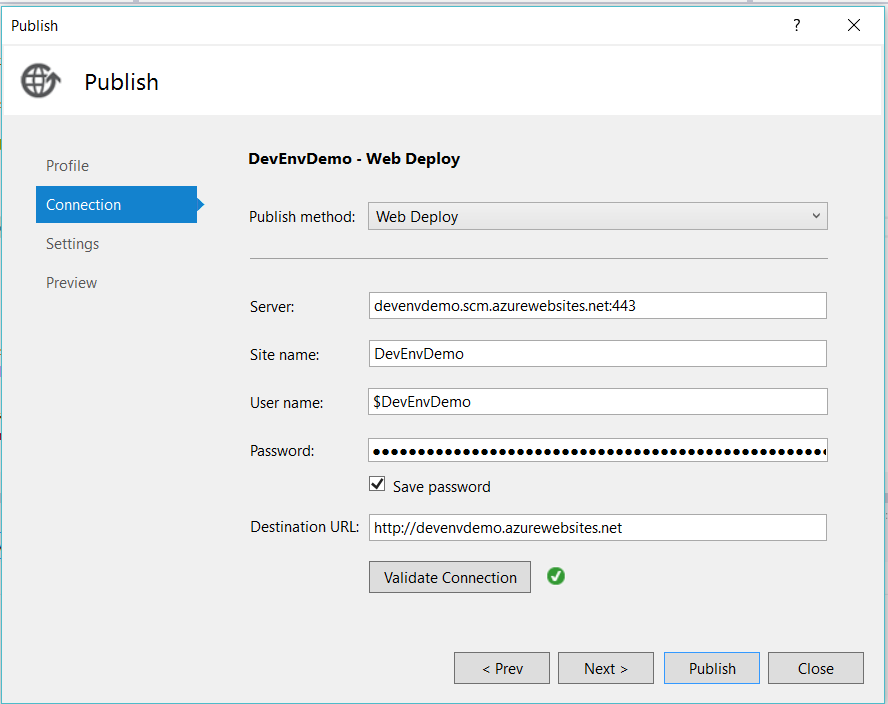
Provide server details > click on validate connection and publish the service
Wait few minutes for deploy service

I believe this article will help you to create mobile app service in Azure. If you have any question or feedback, please share in the comment box.
Step 11: Publish and Debug Server Project
Download install language specific SDK https://azure.microsoft.com/en-us/downloads/Open Visual Studio as Run as Admin, rebuild the project to restore NuGet packages.
In Solution Explorer, right-click the project, click Publish.
Click on Microsoft Azure App Service > Next > sign-in with your Azure credentials.
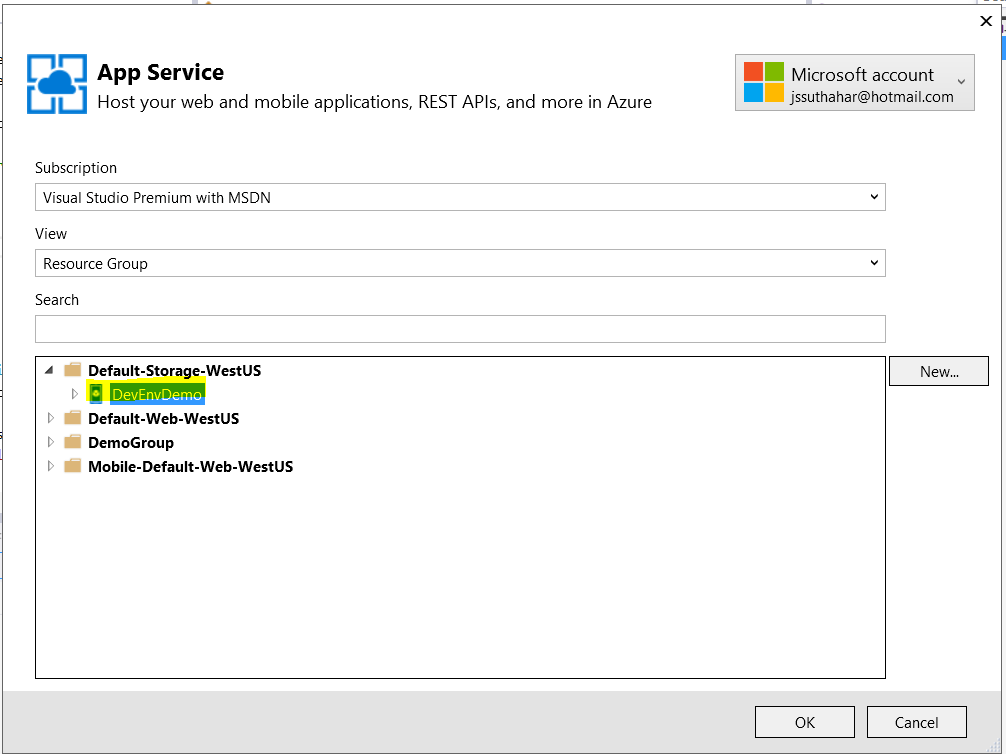
Select App service:
Provide server details > click on validate connection and publish the service
Wait few minutes for deploy service
Step 12: Run and Debug Application
Now you can Extract the client project that you downloaded, and then open it in Xamarin Studio or Visual Studio.I believe this article will help you to create mobile app service in Azure. If you have any question or feedback, please share in the comment box.


0 Comments