Building Mobile Apps Using Xamarin.Forms with .NET Standard
The .NET Standard Library is a formal specification of .NET APIs that are intended to be available on all .NET runtimes . You can understand another way its expanded, Portable Class Library. It is a single library with a uniform API for all .NET Platforms including .NET Core. You just create a single .NET Standard Library and use it from any runtime that supports .NET Standard Platform.
You can refer following table lists all the versions of .NET Standard and the platforms supported
In this article, you will learn how to create
Create New Xamarin Forms:
Let’s startClick on Ok > You will get
After click on Ok, VS will automatically create PCL,iOS,Android ,UWP projects .
Create .Net Standard Class library
You can follow below steps for create .Net Standard library,
Right Click on solutions > Add new project > Create Class library (.Net Standard) that targets .net Standard and click on Ok

Install Xamarin Forms in .Net Standard library:
The Xamarin.Forms 2.3.5-prerelease will support with .NET Standard. Right Click on .net Standard library > Select on Manage Nuget packageSelect on Browse tab > Search text ‘ Xamarin.Forms ‘ > Select Include prerelease and select Xamarin Forms and click on Install
Customize the Application:
You can follow below steps for customize the platform specific project and .net standard library.Step 1:
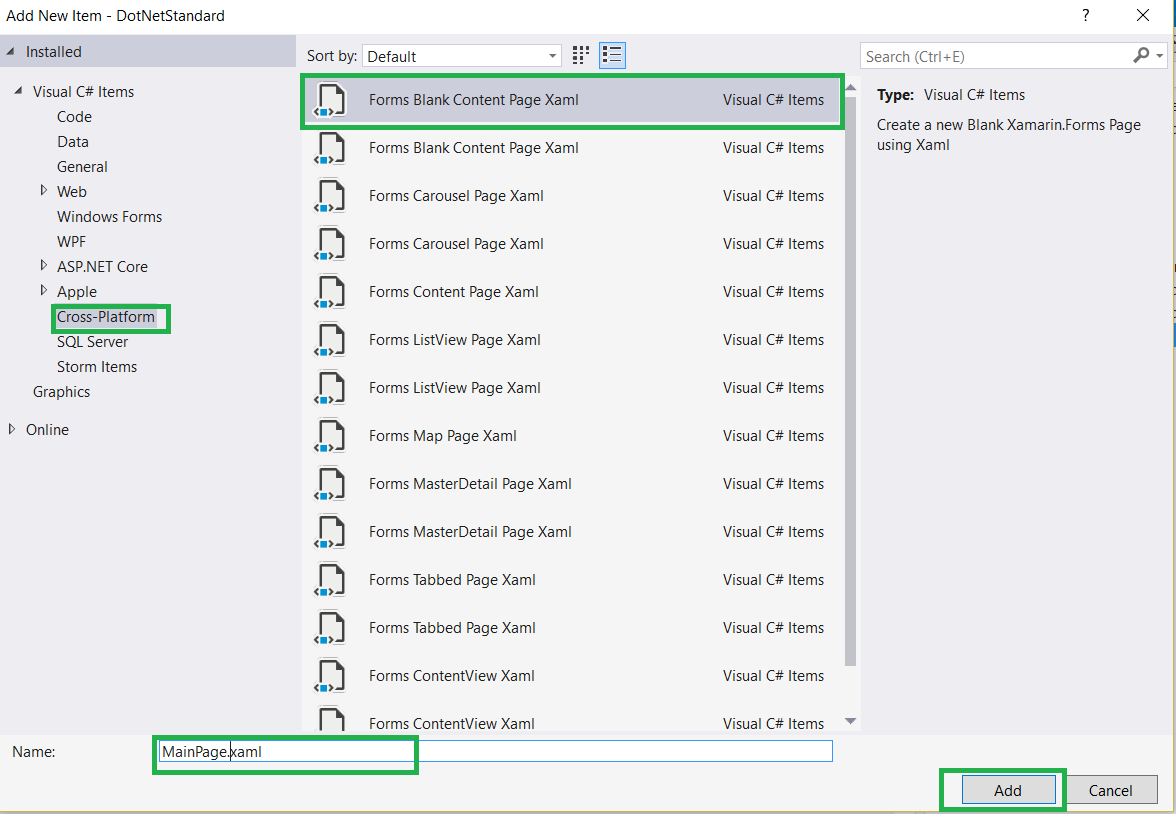
Right Click on .Net Standard library > Click on Add Item > Select Cross -Platform >Forms Blank Content Page Xaml > Provide name as MainPage.xaml

Step 2:
You can add UI design as per your requirement in MainPage.xaml .
<?xml version="1.0" encoding="utf-8" ?>
<ContentPage xmlns="http://xamarin.com/schemas/2014/forms"
xmlns:x="http://schemas.microsoft.com/winfx/2009/xaml"
x:Class="DotNetStandard.MainPage">
<Label Text="Welcome to Xamarin.Forms Apps with .NET Standard!"
VerticalOptions="Center"
HorizontalOptions="Center" />
</ContentPage>
Step 3:
Copy App.cs and App.xaml from PCL or Shared project and past into .net Standard library and change the namespace from xaml and c# page

Step 4: Remove Shared or PCL Project and Remove PCl project reference from all iOS,Android,UWP project. Now solution look like below

Step 4: Remove Shared or PCL Project and Remove PCl project reference from all iOS,Android,UWP project. Now solution look like below
Step 5:
Add your .Net Standard class library reference to iOS,Android,UWP project.
Step 6:
Change namespace from following project
In UWP project, updated the namespace from mainPage.cs
LoadApplication(new DotNetStandard.App());
In Android Project , Update the namespace from Main Activity
LoadApplication(new DotNetStandard.App());
In iOS Project , Update the namespace from Appdelegate
LoadApplication(new DotNetStandard .App());
Step 6:
If you get following error while build the project

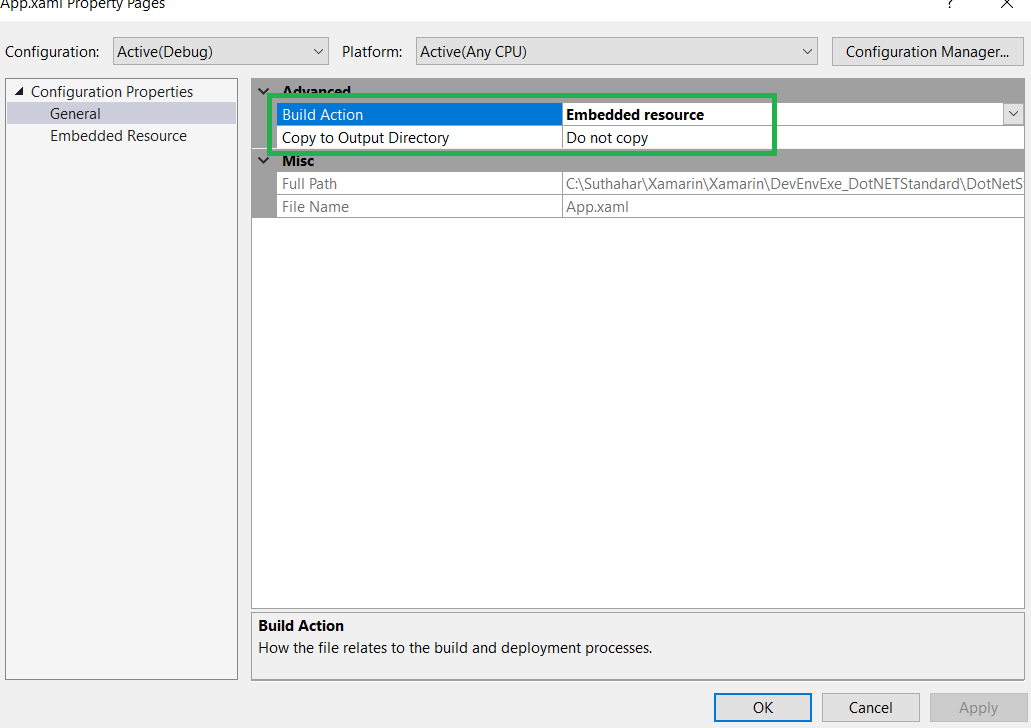
You can follow below for resolution Right Click on Xaml page > Select property and Build Action Should be Embedded Resource


If you have any questions/ feedback/ issues, please write in the comment box.
You can follow below for resolution Right Click on Xaml page > Select property and Build Action Should be Embedded Resource
Run the Application:
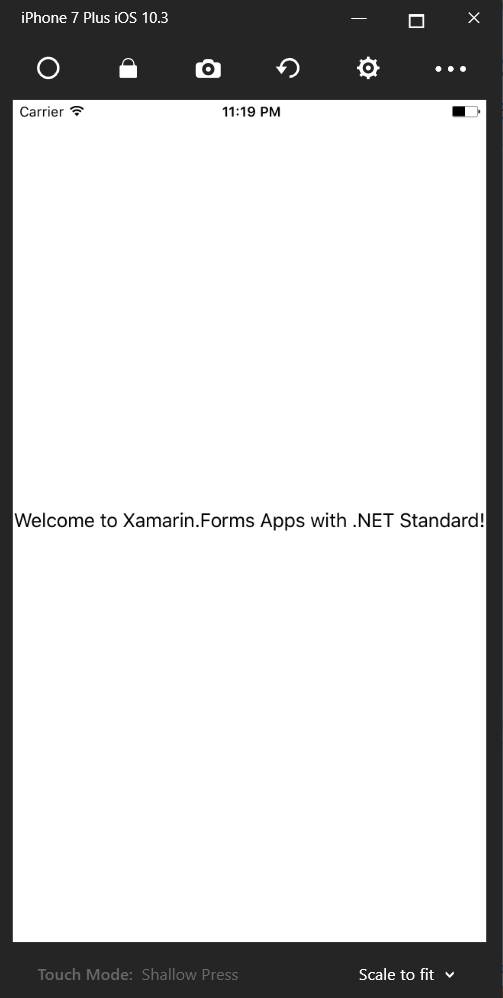
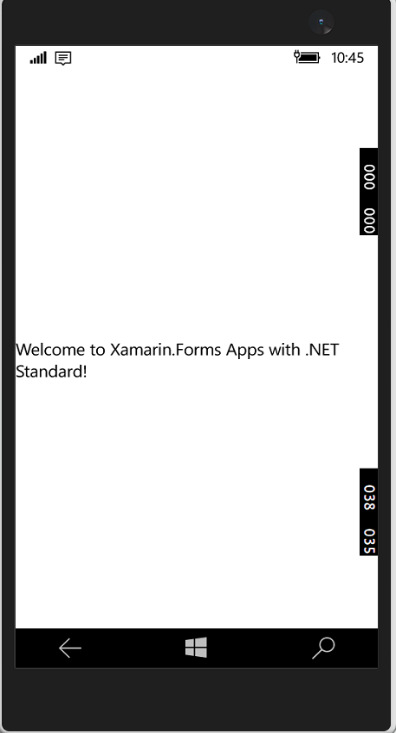
You can run the application (iOS,Android ,Windows) to all the platformSummary
In this article, you learned how to create mobile cross platform application using Xamarin Forms with .NET Standard libraries.If you have any questions/ feedback/ issues, please write in the comment box.


Nice Article you have posted here. Thank you for giving this innovative information and
ReplyDeleteplease add more in future.
Xamarin Training in Chennai
Xamarin Training Course
German Courses in Chennai
French Language Classes in Chennai
pearson vue exam centers in chennai
Informatica MDM Training in Chennai
Xamarin Training in Tnagar
Xamarin Training in OMR
Woah!! Such a piece of the nice information you have shared here, I have read the entire post and I must say that the information is very helpful for me.
ReplyDeleteXamarin Development services in Indore