
Getting Started with Customize a FormFlow using Microsoft Bot framework
Introduction:
The Bot Framework enables you to build bots that support different types of interactions with users. You can design conversations in your bot to be freeform. Your bot can also have more guided interactions where it provides the user choices or actions. The conversation can use simple text strings or more complex rich cards that contain text, images, and action buttons. And you can add natural language interactions, which let your users interact with your bots in a natural and expressive way.Bot Builder SDK introduced Form Flow, it will automatically generate the dialogs conversation based on your property and type that a specified on a class. Before read this article, you can refer my previous article for basic understanding about Form Flow
In this article, will help you to customize the form process, change prompt text, field order and how to add condition field. We are going to edit bus booking bot and adding validation and form flow attribute.
Prerequisite:
I have explained about Bot framework Installation, deployment and implementation in the below article- Getting Started with Chatbot Using Azure Bot Service
- Getting Started with Bots Using Visual Studio 2017
- Deploying A Bot to Azure Using Visual Studio 2017
- How to Create ChatBot In Xamarin
- Getting Started with Dialog Using Microsoft Bot Framework
- Getting Started with Prompt Dialog Using Microsoft Bot Framework
- Getting Started With Conversational Forms And FormFlow Using Microsoft Bot Framework
Customize Form Flow Property Text:
Prompt Text:
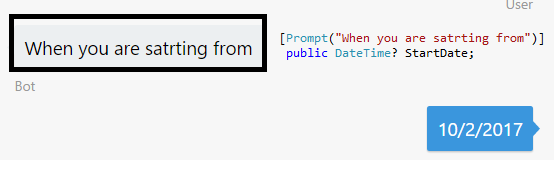
The Form Flow provide default prompt text based on property name, for example Email Property default prompt text is “Please enter email “ but Bot Framework provided feature for customize text using prompt attribute like below[Prompt("When you are satrting from")]
public DateTime? StartDate
The output look like below
Enum List Item with Prompt text:
The following code showing prompt text with list of data .You can add custom prompt text and add pattern language({&},{||} ) to dynamically populate list of data at runtime .{&} will replace the replace with description of the field.{||} is replace with the list of choice in the enumeration
[Prompt("You can Select {&} {||}")]
public FromCity? FromAddress;
[Prompt("You can Select {&} {||}")]
public ToCity? ToAddress;
The output look like below

Form Flow User Input Validation:
Numeric field:
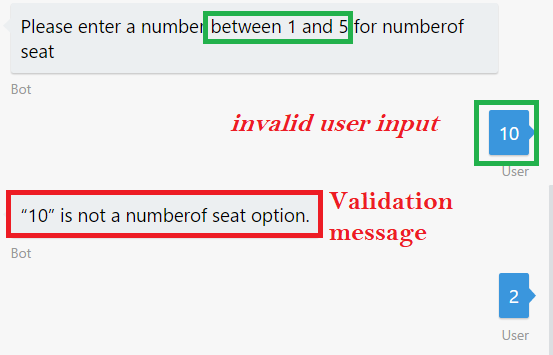
The Numeric attribute to specify to restrict the range of allowed values for a numeric field. The following code allow the number between 1 and 5.[Numeric(1,5)]
public int? NumberofSeat;
If user provide value above 5 or below 1 , bot will show the validation message like below
Optional Field:
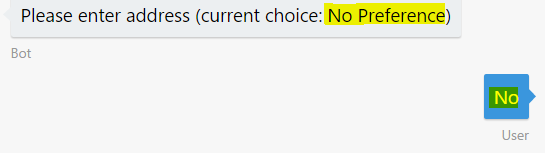
The Form Flow attribute by default every fields is required and must be filled in the form. If you specify the Optional attribute, it will default select as “No preference “.[Optional]
public string Address;
The Optional Field type output look like below
Pattern field:
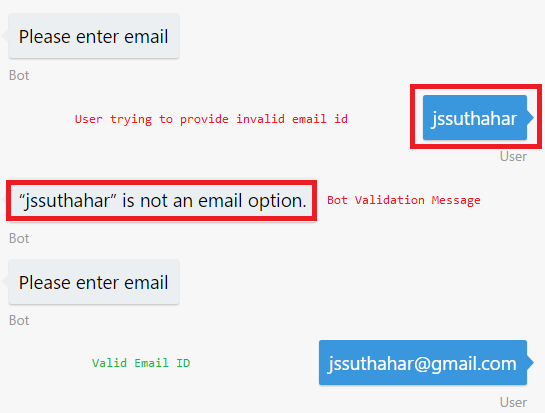
A regular expression is an object that describes a pattern of characters. Regular expressions are used to perform pattern-matching and "search-and-replace" functions on text. You can add regular expressions into pattern attribute and validate the user input. The following code will validate user email id .[Pattern(@"^([a-zA-Z0-9_\-\.]+)@((\[[0-9]{1,3}\.[0-9]{1,3}\.[0-9]{1,3}\.)|(([a-zA-Z0-9\-]+\.)+))([a-zA-Z]{2,4}|[0-9]{1,3})(\]?)$")]
public string Email;
The below output showing, user trying provide invalid email id, immediately bot will reply and ask valid email
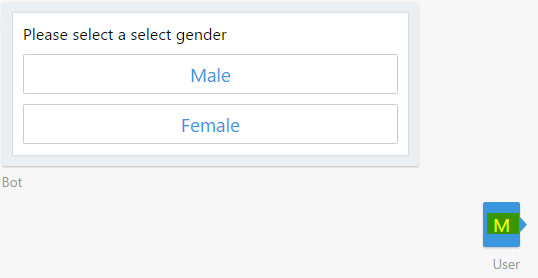
Terms:
You can add the Terms attribute to match the user input. When we ask the user for gender they are presented with buttons for them to choose between Male or Female. However, they don’t have to use the buttons and can instead type their answer if they wish. By default, if the user types their answer they must enter the choice exactly, e.g. “Male” or “Female”, but in the context of a natural conversation the user might say something like “M” or “girl”./// <summary>
/// Gender
/// </summary>
public enum Gender
{
[Terms("M","boy")]
Male,
[Terms("F","girl")]
Female
}
The Form Flow like below and user can select or provider terms
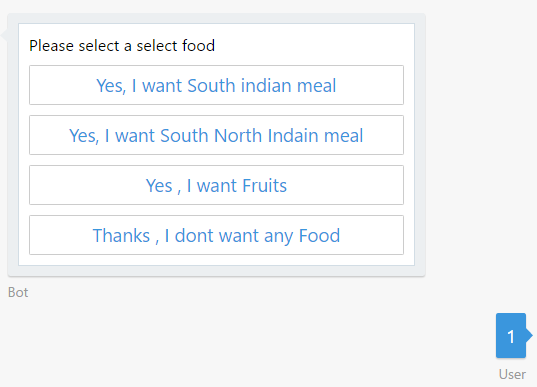
Custom message for Enum :
The following code showing, how to show custom item list for enum . We have attribute for Describe for customize enum item using Describe
public enum Food
{
[Describe("Yes, I want South indian meal")]
SMeal = 1,
[Describe("Yes, I want South North Indain meal")]
NMeal = 2,
[Describe("Yes , I want Fruits")]
Fruts = 3 ,
[Describe("Thanks , I dont want any Food")]
No =4
}
The output look like below
[Template(TemplateUsage.EnumSelectOne, "What kind of {&} would you like ? {||}", ChoiceStyle = ChoiceStyleOptions.PerLine)]

[Template(TemplateUsage.NotUnderstood, "Sorry , \"{0}\" Not avilable .", "Try again, I don't get \"{0}\".")]
public Food LunchFood;
The output look like below
public static IForm<BusFormFlow> BuildForm()
{
return new FormBuilder<BusFormFlow>()
.Message("Welcome to the BotChat Bus Booking !")
.Field(nameof(ToAddress))
.Field(nameof(StartDate))
.Field(nameof(BusTypes))
.Field(nameof(NumberofSeat))
.Field(nameof(LunchFood))
.Message("Passenger Details")
.AddRemainingFields()
.Message("You will get confirmation email and SMS .Thanks for using Chat Bot Bus Booking")
.OnCompletion(async (context, profileForm) =>
{
string message = "Your Bus booking Successfully Completed , Welcome Again !!! :)";
await context.PostAsync(message);
})
.Build();
}

{
[Describe("Yes, I want South indian meal")]
SMeal = 1,
[Describe("Yes, I want South North Indain meal")]
NMeal = 2,
[Describe("Yes , I want Fruits")]
Fruts = 3 ,
[Describe("Thanks , I dont want any Food")]
No =4
}
The output look like below
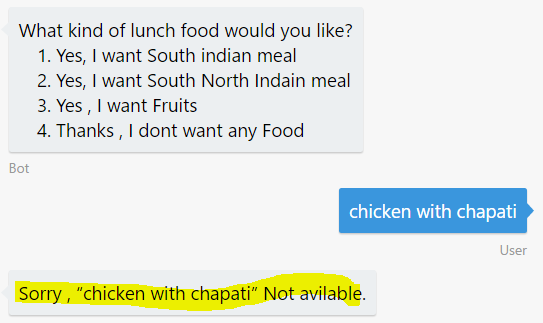
Template Attribute:
The Template attribute enables you to replace the default templates that FormFlow uses to automatically generate prompts. The following code example uses the Template attribute to redefine how the form handles enumeration fields. The attribute indicates that the user may select only one item, sets the prompt text by using pattern language, and specifies that the form should display only one item per line.[Template(TemplateUsage.EnumSelectOne, "What kind of {&} would you like ? {||}", ChoiceStyle = ChoiceStyleOptions.PerLine)]
public Food LunchFood;
Pattern language uses curly braces ({}) to identify elements that will be replaced at runtime with actual values. The output look like belowCustom template Error:
The following code redefines the TemplateUsage.NotUnderstood template to specify two different variations of message. When the bot needs to communicate that it does not understand a user's input, it will determine message contents by randomly selecting one of the two text strings.[Template(TemplateUsage.NotUnderstood, "Sorry , \"{0}\" Not avilable .", "Try again, I don't get \"{0}\".")]
public Food LunchFood;
The output look like below
Welcome, Confirmation and Form Builder:
The following code example uses FormBuilder to define the steps of the form, validation, welcome message and dynamically define a field value and confirmation. By default, steps in the form will be executed in the sequence in which they are listed followingpublic static IForm<BusFormFlow> BuildForm()
{
return new FormBuilder<BusFormFlow>()
.Message("Welcome to the BotChat Bus Booking !")
.Field(nameof(ToAddress))
.Field(nameof(StartDate))
.Field(nameof(BusTypes))
.Field(nameof(NumberofSeat))
.Field(nameof(LunchFood))
.Message("Passenger Details")
.AddRemainingFields()
.Message("You will get confirmation email and SMS .Thanks for using Chat Bot Bus Booking")
.OnCompletion(async (context, profileForm) =>
{
string message = "Your Bus booking Successfully Completed , Welcome Again !!! :)";
await context.PostAsync(message);
})
.Build();
}
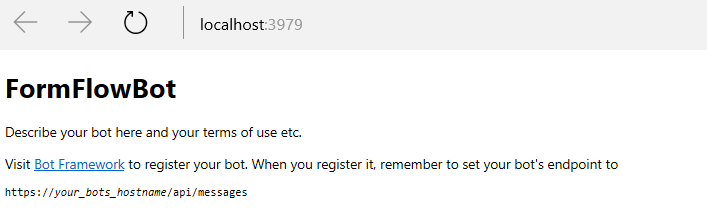
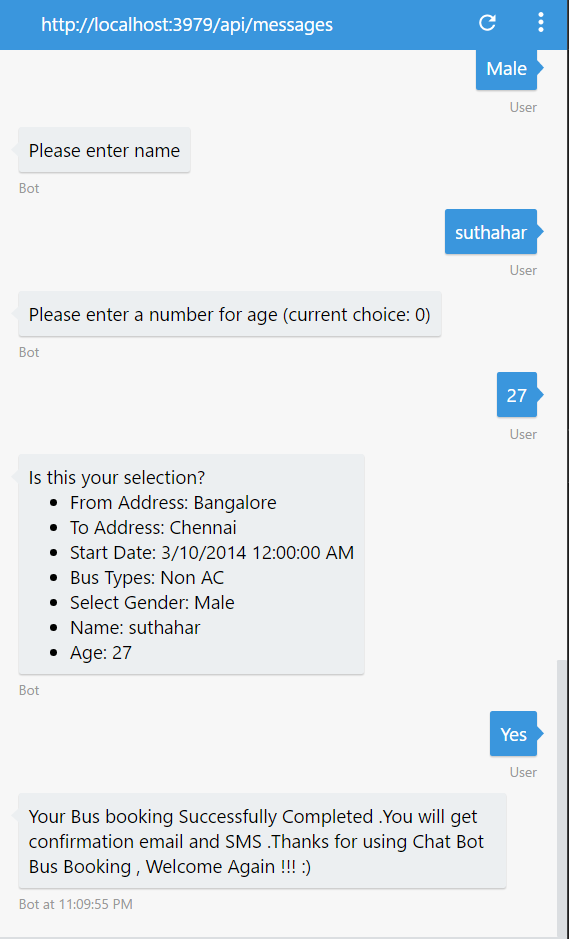
Run Bot Application:
The emulator is a desktop application that lets we test and debug our bot on localhost. Now, you can click on "Run the application" in Visual studio and execute in the browser.- Test Application on Bot Emulator
- You can follow the below steps for test your bot application.
- Open Bot Emulator.
- Copy the above localhost url and paste it in emulator e.g. - http://localHost:3979
- You can append the /api/messages in the above url; e.g. - http://localHost:3979/api/messages.
- You won't need to specify Microsoft App ID and Microsoft App Password for localhost testing, so click on "Connect".
Download Source :


0 Comments