
Getting Started with Thumbnail Card Design Using Microsoft Bot Framework
Introduction:
The Bot Framework has supported the different type of rich cards and provides a richer interaction experience to the user. In this article, I will share about how to integrate Thumbnail card UI design in Bot Application. The Thumbnail card is a multipurpose card, its contains small an image, title text, sub text, multiple buttons, and a card tap action.A Hero Card and a Thumbnail Card have different in the size of image and text alignment of card.
Prerequisite:
I have explained about Bot framework Installation, deployment and implementation in the below article- Getting Started with Chatbot Using Azure Bot Service
- Getting Started with Bots Using Visual Studio 2017
- Deploying A Bot to Azure Using Visual Studio 2017
- How to Create ChatBot In Xamarin
- Getting Started with Dialog Using Microsoft Bot Framework
- Getting Started with Prompt Dialog Using Microsoft Bot Framework
- Getting Started With Conversational Forms And FormFlow Using Microsoft Bot Framework
- Getting Started With Customizing A FormFlow Using Microsoft Bot Framework
- Sending Bot Reply Message With Attachment Using Bot Framework
Download Source:

Create New Bot Application:
Let's create a new bot application using Visual Studio 2017. Open Visual Studio > Select File > Create New Project (Ctrl + Shift +N) > Select Bot application.
The Bot application template was created with all the components and all required NuGet references installed in the solutions.

Create New ThumbnailCardDialog Class:
Step 1:
You can Create new ThumbnailCardDialog class for a show the ThumbnailCard dialog. Right Click on project > Select Add New Item > Create a class that is marked with the [Serializable] attribute (so the dialog can be serialized to state) and implement the IDialog interface.using Microsoft.Bot.Builder.Dialogs;
using Microsoft.Bot.Connector;
using System;
using System.Collections.Generic;
using System.Threading.Tasks;
namespace BotThumbnailCard.Dialogs
{
[Serializable]
public class ThumbnailCardDialog : IDialog<object>
{
Step 2
IDialog interface has only StartAsync() method. StartAsync() is called when the dialog becomes active. The method is passed the IDialogContext object, used to manage the conversation.public async Task StartAsync(IDialogContext context)
{
context.Wait(this.MessageReceivedAsync);
}
Step 3:
Create a MessageReceivedAsync method and write following code for the welcome message and show the list of demo options dialog.///
/// MessageReceivedAsync
///
/// context">
/// result">
///
public async virtual Task MessageReceivedAsync(IDialogContext context, IAwaitable<IMessageActivity> result)
{
var message = await result;
var welcomeMessage = context.MakeMessage();
welcomeMessage.Text = "Welcome to bot Thumbnail Card Demo";
await context.PostAsync(welcomeMessage);
await this.DisplayThumbnailCard(context);
}
///
/// DisplayThumbnailCard
///
/// context">
///
public async Task DisplayThumbnailCard(IDialogContext context)
{
var replyMessage = context.MakeMessage();
Attachment attachment = GetProfileThumbnailCard(); ;
replyMessage.Attachments = new List<Attachment> { attachment };
await context.PostAsync(replyMessage);
}
After user enter the first message, bot will reply welcome message like below

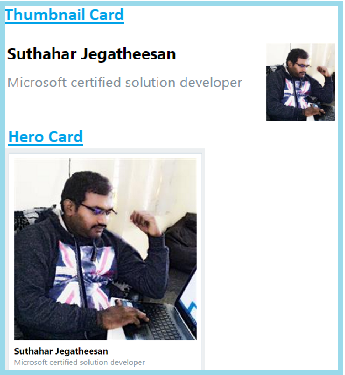
Step 4: Design Thumbnail Card:
The Thumbnail card typically contains a small image with left alignment, one or more buttons, and text. Thumbnail Card class has the following propertyTitle - Title text of the card
Subtitle -sub title text for the title
Text – Summary text to display on the card
Images – Display small image with left alignment
Buttons - One or more buttons. The Skype allow only 5 buttons will display on a card. If you have more buttons, you can create two cards.
Tap - An action that is triggered when a user taps on the card.
The following code showing design the user profile message with image, text, subtext and action button. .
///
/// GetProfileThumbnailCard
///
///
private static Attachment GetProfileThumbnailCard()
{
var thumbnailCard = new ThumbnailCard
{
// title of the card
Title = "Suthahar Jegatheesan",
//subtitle of the card
Subtitle = "Microsoft certified solution developer",
// navigate to page , while tab on card
Tap = new CardAction(ActionTypes.OpenUrl, "Learn More", value: "http://www.devenvexe.com"),
//Detail Text
Text = "Suthahar J is a Technical Lead and C# Corner MVP. He has extensive 10+ years of experience working on different technologies, mostly in Microsoft space. His focus areas are Xamarin Cross Mobile Development ,UWP, SharePoint, Azure,Windows Mobile , Web , AI and Architecture. He writes about technology at his popular blog http://devenvexe.com",
// smallThumbnailCard Image
Images = new List<CardImage> { new CardImage("http://csharpcorner.mindcrackerinc.netdna-cdn.com/UploadFile/AuthorImage/jssuthahar20170821011237.jpg") },
// list of buttons
Buttons = new List<CardAction> { new CardAction(ActionTypes.OpenUrl, "Learn More", value: "http://www.devenvexe.com"), new CardAction(ActionTypes.OpenUrl, "C# Corner", value: "http://www.c-sharpcorner.com/members/suthahar-j"), new CardAction(ActionTypes.OpenUrl, "MSDN", value: "https://social.msdn.microsoft.com/profile/j%20suthahar/") }
};
return thumbnailCard.ToAttachment();
}
The above code will generate thumbnail card and reply to the user
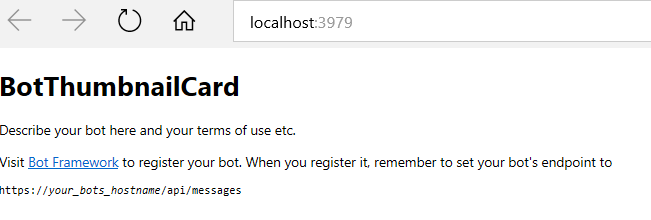
Run Bot Application
The emulator is a desktop application that lets us test and debug our bot on localhost. Now, you can click on "Run the application" in Visual studio and execute in the browser- Test Application on Bot Emulator
- You can follow the below steps to test your bot application.
- Open Bot Emulator.
- Copy the above localhost url and paste it in emulator e.g. - http://localHost:3979
- You can append the /api/messages in the above url; e.g. - http://localHost:3979/api/messages.
- You won't need to specify Microsoft App ID and Microsoft App Password for localhost testing, so click on "Connect".


0 Comments