Introduction:
Microsoft Cognitive Services awesome APIs and services for developers to create more intelligent applications. You can add more interesting feature like people emotion and video detection, facial, speech and vision recognition and speech and language understanding into our all the application. The following sample image showing for emotion and face detection using cognitive service.
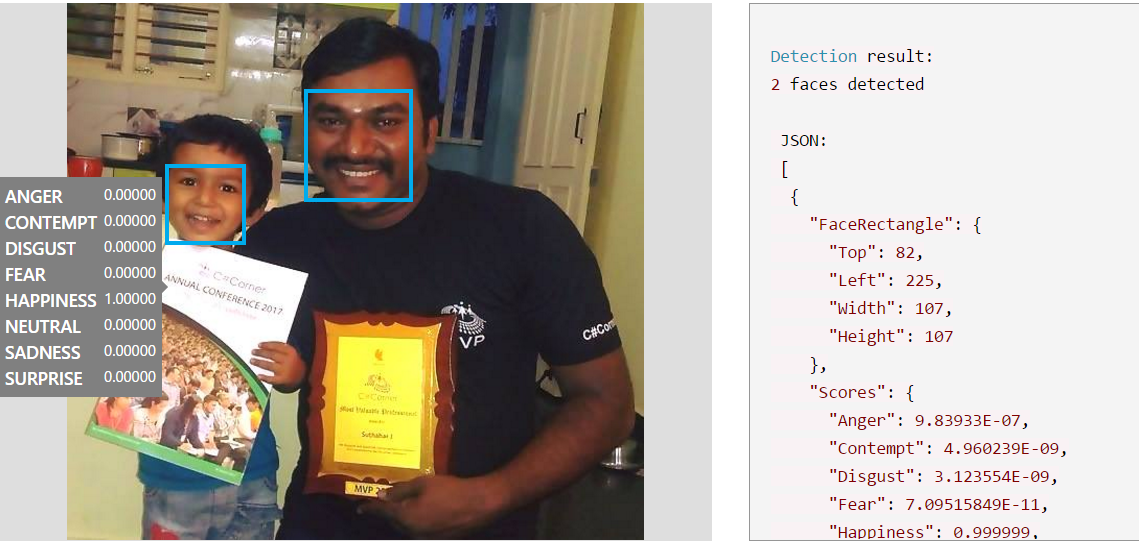
In this article, you will get understand how to Create a Cognitive Services APIs account in the Azure Portal.
In this article, you will get understand how to Create a Cognitive Services APIs account in the Azure Portal.
Prerequisites:
Create a free trial Azure subscription from Azure portal.If you are looking paid version, Click here for detail
Create a Cognitive Services Account in Azure:
You can follow below steps for Create a Cognitive Services APIs account in the Azure Portal.
Step 1:
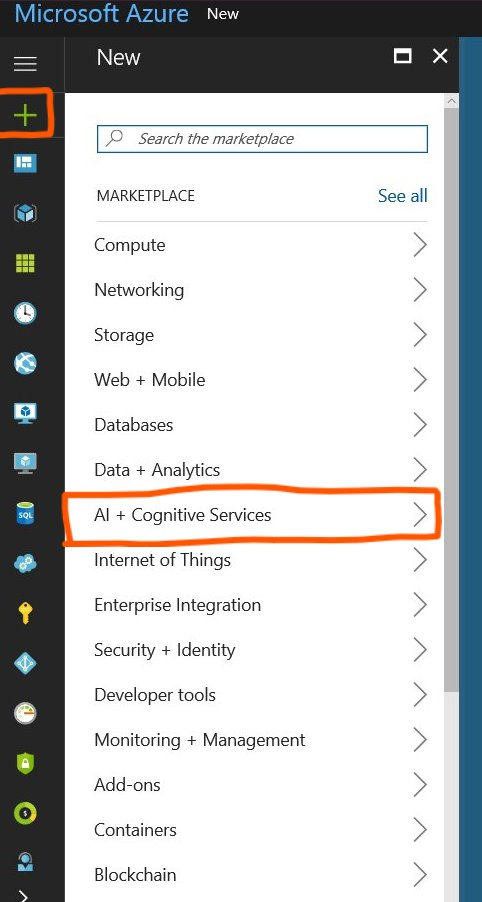
Click + NEW and Select AI + Cognitive Services
Step 3:
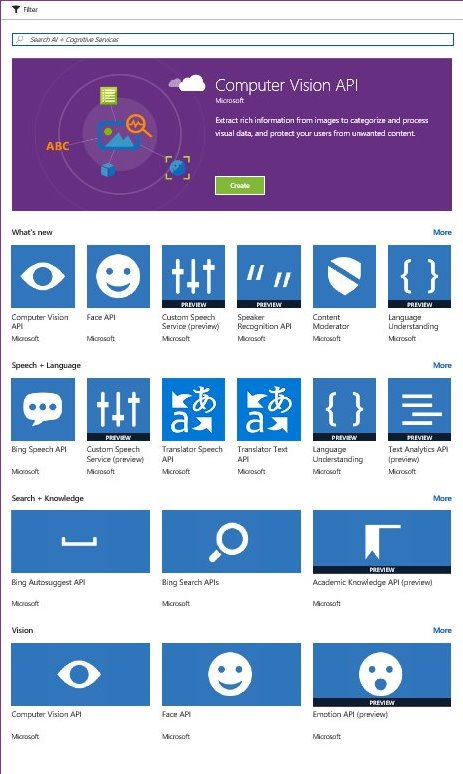
You can see the entire list of Cognitive Services APIs. Click on the API of your choice to proceed.
Step 4:
Select on required API and read about the API and Click on Create
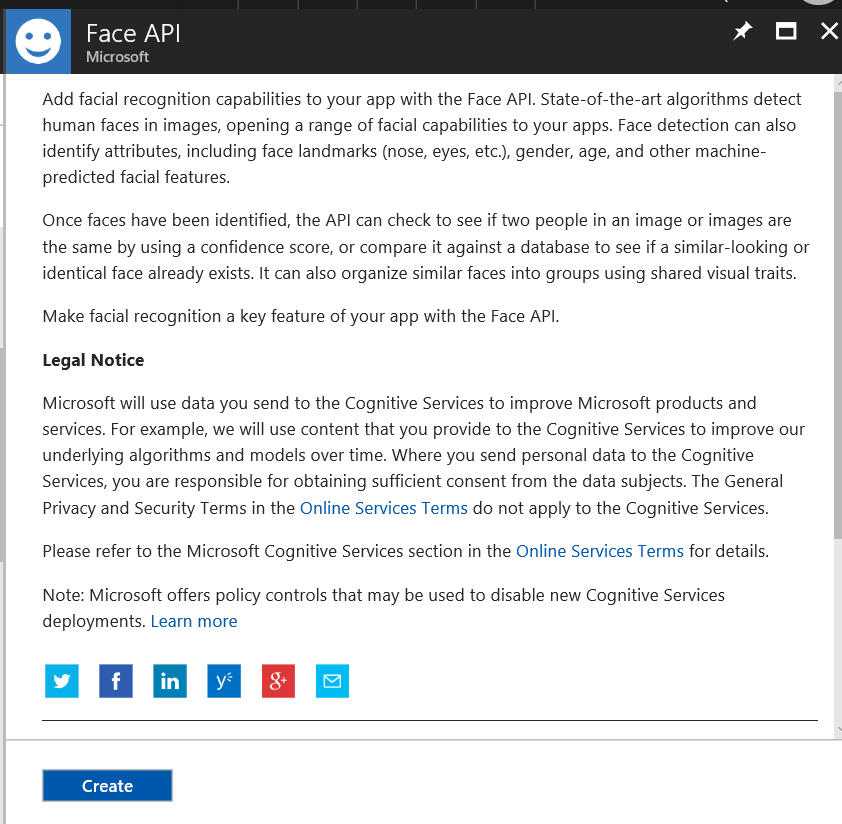
Step 5:
after click on create button, provide the following information for create cognitive service and click on create.
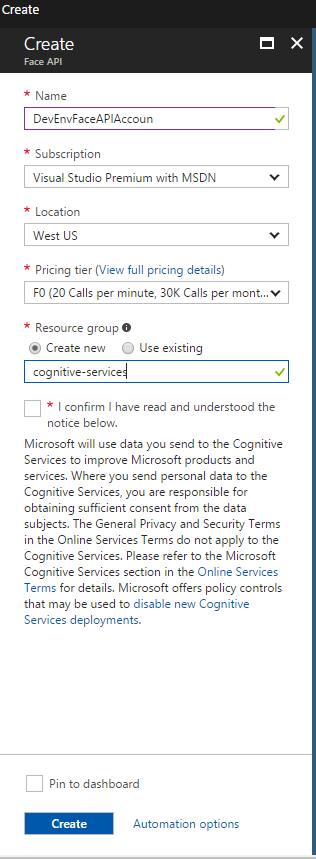
Name: Name of the account, Microsoft recommend a descriptive name. for example, <common name><APIName>Account.
Subscription: Select the available Azure subscriptions.
Name: Name of the account, Microsoft recommend a descriptive name. for example, <common name><APIName>Account.
Subscription: Select the available Azure subscriptions.
Location: Select the service locations.
Pricing tier: you can choose your pricing tier. F0 is free service and S0 paid service. based on your usage you can choose the pricing tier
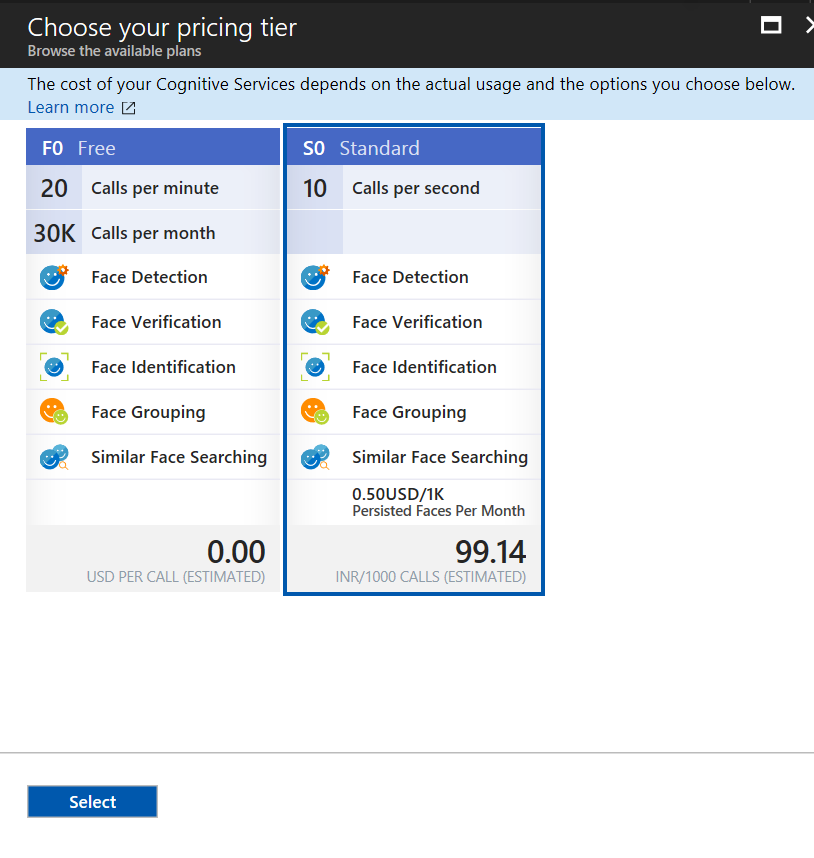
Select the Resource group > confirm the Microsoft notice and Click on create for create the account
Step 6:
wait for few second and you will get notification after complete. If Cognitive Services account is successfully deployed, click the notification to view the account information.
You can see and copy the Endpoint URL in the Overview section.
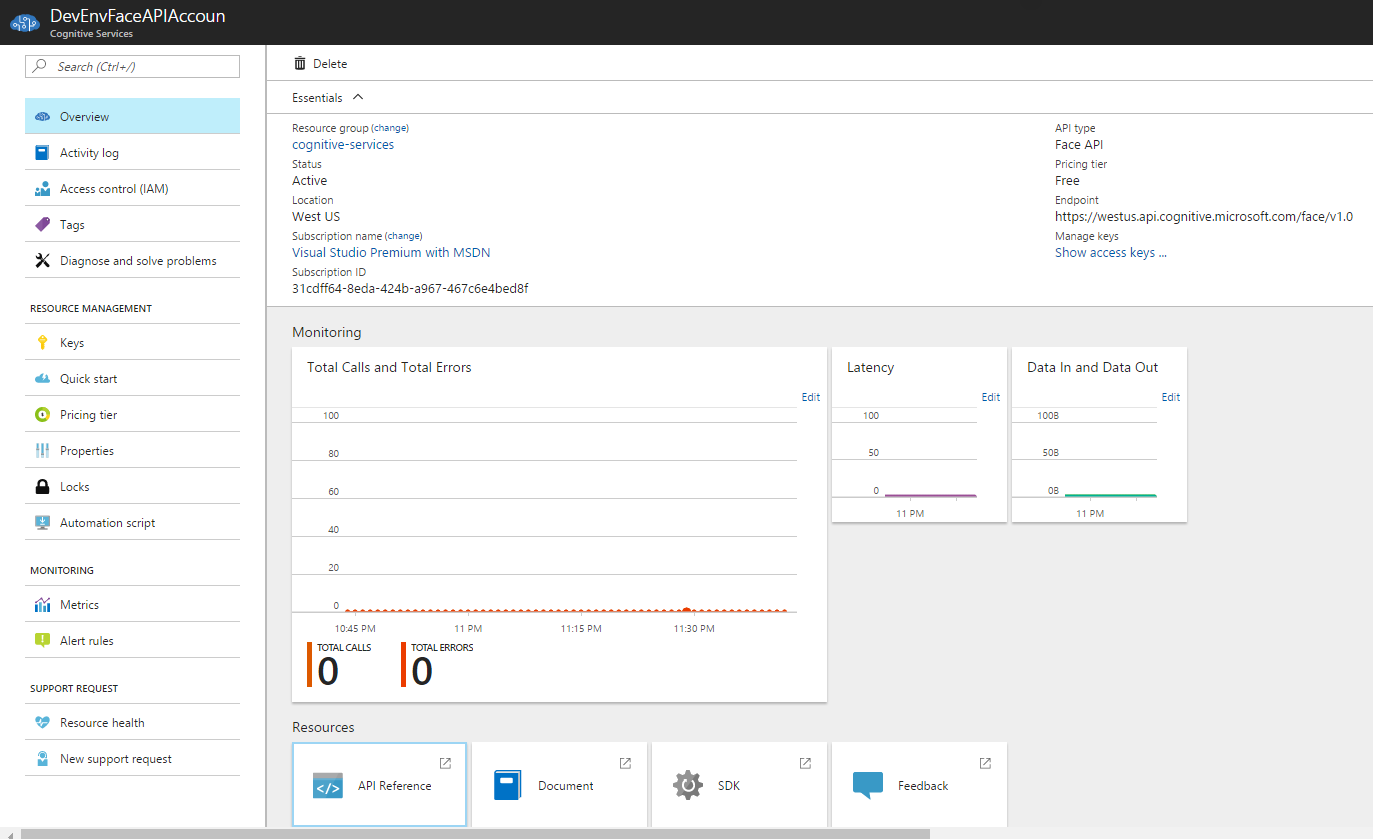
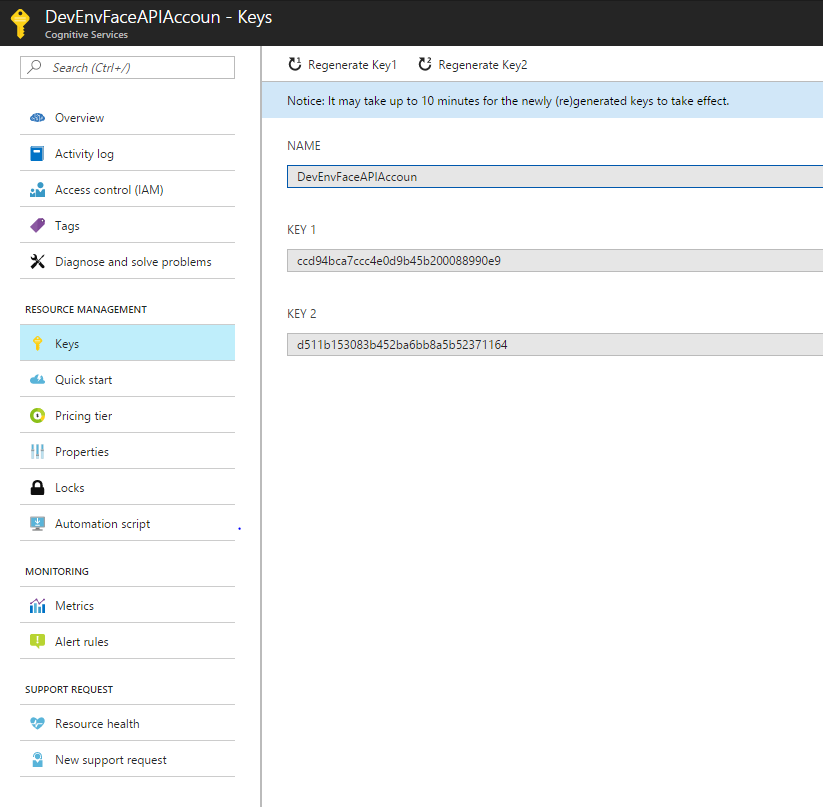
You can also copy keys in the Keys section to start making API calls in our Xamarin or other applications.
Summary:
In this article, you learned about how to Create a Cognitive Services APIs account in the Azure Portal.We can use these keys and end point URL to the next article with app to communicate intelligent feature in Xamarin application.
If you have any questions/ feedback/ issues, please write in the comment box.
ReplyDeleteInteresting blog, here a lot of valuable information is available, it is very useful information.
SQL Azure Online Training
Azure SQL Training
SQL Azure Training