The Azure AD is the identity provider, responsible for verifying the identity of users and applications and providing security tokens upon successful authentication of those users and applications. create
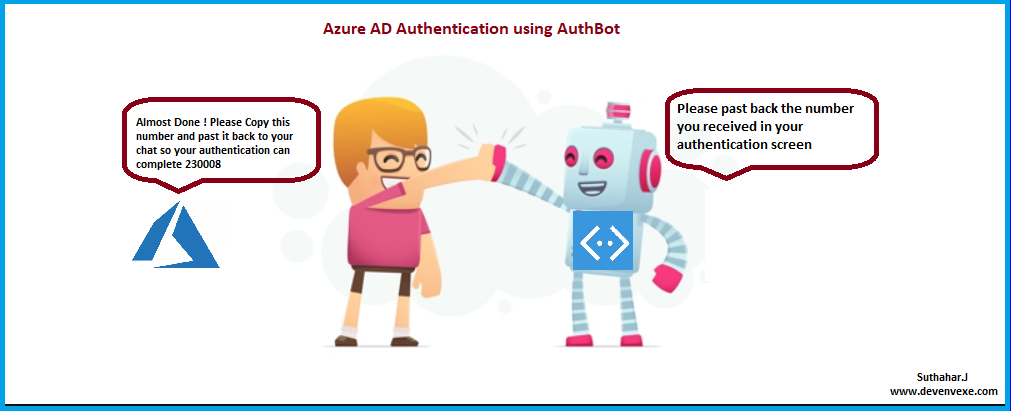
The Bot show very simple dialog with
You can follow below given steps one by one and you will get to see an interesting demo at end of article.
Azure AD App registration:
I will show the steps given below for the azure application creation, user creation and permission configuration. While implementing bot application, We need Client ID, tenant, return URL, so here I will show how to get all the configuration information from the steps given below.Step 1:
If you have not created AZURE Active directory, try to create new AD creation for tenant url or Select or add tenant url from Domain names sections

Step 3:
Select Application Registration and Provide the details given below, name for the application , application type must be Web app/API, enter your application redirect URL and click on Create.

Step 4:
We need to give the permission to access the application from Bot, so grand the permission. Select newly created Application > select Required Permission > Click Grand permission.
Step 5:
Step 6:
Create client secret key from Application . Select Application > Select keys > add new / copy client secret key .

Step 4:
You can copy tenant, client ID and Client Secret and you can follow below steps for create and implement AD authentication in Bot
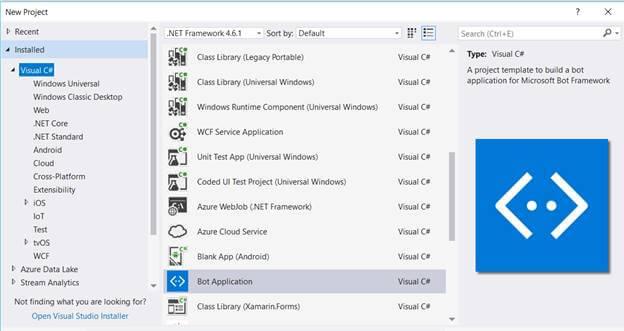
The Bot application template gets created with all the components and all required NuGet references installed in the solutions.
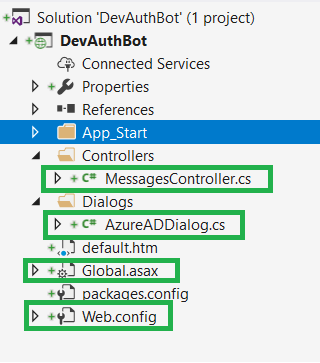
implement Azure AD login in Bot .
Right click onSolution , select Manage NuGet Package for Solution > Search “ AuthBot” > select Project and install the package.
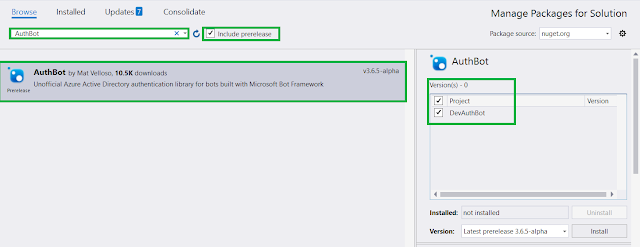
You can follow given below steps forintegrate AD authentication
Create New Bot Application:
Let's create a new bot application using Visual Studio 2017. Open Visual Studio > Select File > Create New Project (Ctrl + Shift +N) > Select Bot application.The Bot application template gets created with all the components and all required NuGet references installed in the solutions.
Install AuthBot Nuget Package:
The AuthBot provide Azure Active Directory authentication library forRight click on
You can follow given below steps for
Step 1:
Select Web. config file and add Mode, resourceID , Endpointurl , Tenant, clientID , clientSecret and redirect url appsettings property and replace Azure AD details as per below
<appSettings >
<add key="BotId" value="YourBotId" />
<add key="MicrosoftAppId" value="" />
<add key="MicrosoftAppPassword" value="" />
<add key="ActiveDirectory. Mode" value="v1" />
<add key="ActiveDirectory. ResourceId" value="https://graph.windows.net/" />
<add key="ActiveDirectory. EndpointUrl" value="https://login.microsoftonline.com" />
<add key="ActiveDirectory. Tenant" value="dxdemos.net" />
<add key="ActiveDirectory.ClientId" value="2d3b5788-05a5-486d-b2a4-2772a4511396" />
<add key="ActiveDirectory.ClientSecret" value="wU3oFBJ1gjWcB8Lo/fMaaCwg7ygg8Y9zBJlUq+0yBN0=" />
<add key="ActiveDirectory.RedirectUrl" value="http://localhost:3979/api/OAuthCallback" />
</appSettings>
<
<
<
<
<
<
<
<
<add key="ActiveDirectory.ClientId" value="2d3b5788-05a5-486d-b2a4-2772a4511396" />
<add key="ActiveDirectory.ClientSecret" value="wU3oFBJ1gjWcB8Lo/fMaaCwg7ygg8Y9zBJlUq+0yBN0=" />
<add key="ActiveDirectory.RedirectUrl" value="http://localhost:3979/api/OAuthCallback" />
</appSettings>
Step 2:
Select Global.asax.cs file and call all the bot app setting property and assign to AuthBot model class, like below
using System.Configuration;
using System.Web.Http;
namespace DevAuthBot
{
public class WebApiApplication : System.Web.HttpApplication
{
protected void Application_Start()
{
GlobalConfiguration.Configure(WebApiConfig.Register);
AuthBot.Models.AuthSettings.Mode = ConfigurationManager.AppSettings["ActiveDirectory.Mode"];
AuthBot.Models.AuthSettings.EndpointUrl = ConfigurationManager.AppSettings["ActiveDirectory.EndpointUrl"];
AuthBot.Models.AuthSettings.Tenant = ConfigurationManager.AppSettings["ActiveDirectory.Tenant"];
AuthBot.Models.AuthSettings.RedirectUrl = ConfigurationManager.AppSettings["ActiveDirectory.RedirectUrl"];
AuthBot.Models.AuthSettings.ClientId = ConfigurationManager.AppSettings["ActiveDirectory.ClientId"];
AuthBot.Models.AuthSettings.ClientSecret = ConfigurationManager.AppSettings["ActiveDirectory.ClientSecret"];
}
}
}
using System.Configuration;
using System.Web.Http;
namespace DevAuthBot
{
public class WebApiApplication : System.Web.HttpApplication
{
protected void Application_Start()
{
GlobalConfiguration.Configure(WebApiConfig.Register);
AuthBot.Models.AuthSettings.Mode = ConfigurationManager.AppSettings["ActiveDirectory.Mode"];
AuthBot.Models.AuthSettings.EndpointUrl = ConfigurationManager.AppSettings["ActiveDirectory.EndpointUrl"];
AuthBot.Models.AuthSettings.Tenant = ConfigurationManager.AppSettings["ActiveDirectory.Tenant"];
AuthBot.Models.AuthSettings.RedirectUrl = ConfigurationManager.AppSettings["ActiveDirectory.RedirectUrl"];
AuthBot.Models.AuthSettings.ClientId = ConfigurationManager.AppSettings["ActiveDirectory.ClientId"];
AuthBot.Models.AuthSettings.ClientSecret = ConfigurationManager.AppSettings["ActiveDirectory.ClientSecret"];
}
}
}
Step 3:
You can create a new AzureADDialog class to show the default login and logout UI Design dialog. Rightclick on Project, select Add New Item, create a class that is marked with the [Serializable] attribute (so the dialog can be serialized to state), and implement the IDialog interface.
using AuthBot;
using AuthBot.Dialogs;
using Microsoft.Bot.Builder.Dialogs;
using Microsoft.Bot.Connector;
using System;
using System.Configuration;
using System.Threading;
using System.Threading.Tasks;
namespace DevAuthBot.Dialogs
{
[Serializable]
public class AzureADDialog : IDialog<string>
{
using AuthBot;
using AuthBot.Dialogs;
using Microsoft.Bot.Builder.Dialogs;
using Microsoft.Bot.Connector;
using System;
using System.Configuration;
using System.Threading;
using System.Threading.Tasks;
namespace DevAuthBot.Dialogs
{
[Serializable]
public class AzureADDialog : IDialog<string>
{
Step 4 :
IDialog interface has only StartAsync() method. StartAsync() is called when the dialog becomes active. The method passes the IDialogContext object, used to manage the conversation.
public async Task StartAsync(IDialogContext context)
{
context.Wait(MessageReceivedAsync);
}
public async Task StartAsync(IDialogContext context)
{
context.Wait(MessageReceivedAsync);
}
Step 5:
Create a MessageReceivedAsync method and write the following code for the login and logout default dialog and create a ResumeAfterAuth for after the user login, bot will reply the user name and email id details.
///
/// Login and Logout
///
/// context">
/// item">
///
public virtual async Task MessageReceivedAsync(IDialogContext context, IAwaitable<IMessageActivity> item)
{
var message = await item;
//endpoint v1
if (string.IsNullOrEmpty(await context.GetAccessToken(ConfigurationManager.AppSettings["ActiveDirectory.ResourceId"])))
{
//Navigate to website for Login
await context.Forward(new AzureAuthDialog(ConfigurationManager.AppSettings["ActiveDirectory.ResourceId"]), this.ResumeAfterAuth, message, CancellationToken.None);
else
{
//Logout
await context.Logout();
context.Wait(MessageReceivedAsync);
}
}
///
/// ResumeAfterAuth
///
/// context">
/// result">
///
private async Task ResumeAfterAuth(IDialogContext context, IAwaitable<string> result)
{
//AD resposnse message
var message = await result;
await context.PostAsync(message);
context.Wait(MessageReceivedAsync);
}
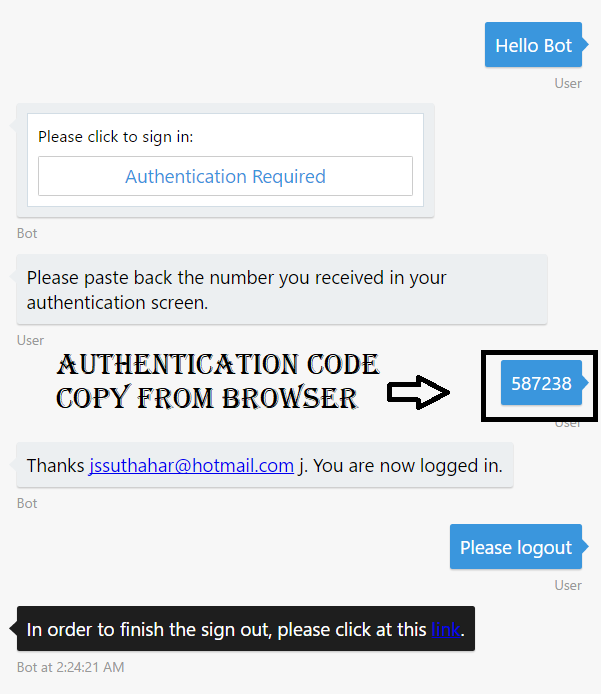
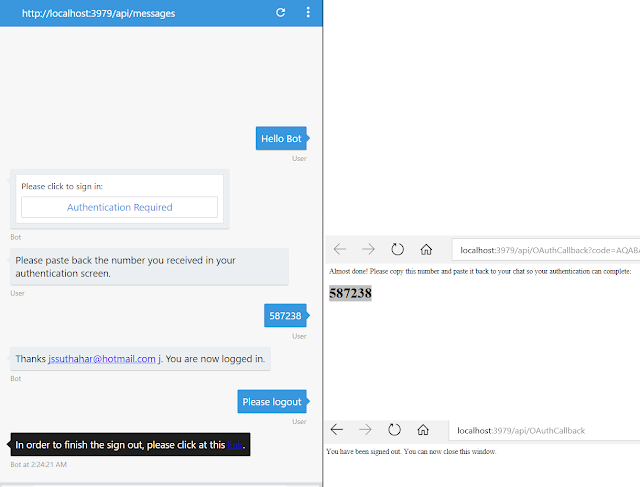
After the user enters the first message, our bot will reply and ask to login to the AD. Then, it waits for Authentication code and bot will reply the user details as a response like below.

///
/// Login and Logout
///
/// context">
/// item">
///
public virtual async Task MessageReceivedAsync(IDialogContext context, IAwaitable<IMessageActivity> item)
{
var message = await item;
//endpoint v1
if (string.IsNullOrEmpty(await context.GetAccessToken(ConfigurationManager.AppSettings["ActiveDirectory.ResourceId"])))
{
//Navigate to website for Login
await context.Forward(new AzureAuthDialog(ConfigurationManager.AppSettings["ActiveDirectory.ResourceId"]), this.ResumeAfterAuth, message, CancellationToken.None);
else
{
//Logout
await context.Logout();
context.Wait(MessageReceivedAsync);
}
}
///
/// ResumeAfterAuth
///
/// context">
/// result">
///
private async Task ResumeAfterAuth(IDialogContext context, IAwaitable<string> result)
{
//AD resposnse message
var message = await result;
await context.PostAsync(message);
context.Wait(MessageReceivedAsync);
}
After the user enters the first message, our bot will reply and ask to login to the AD. Then, it waits for Authentication code and bot will reply the user details as a response like below.
Run Bot Application
The emulator is a desktop application that lets us test and debug our bot on localhost. Now, you can click on "Run the application" in Visual studio and execute in the browser- Test Application on Bot Emulator
- You can follow the below steps to test your bot application.
- Open Bot Emulator.
- Copy the above localhost url and paste it in emulator e.g. - http://localHost:3979
- You can append the /api/messages in the above url; e.g. - http://localHost:3979/api/messages.
- You won't need to specify Microsoft App ID and Microsoft App Password for localhost testing, so click on "Connect".
Related Article:
I have explained about Bot framework Installation, deployment and implementation in the below article- Getting Started with Chatbot Using Azure Bot Service
- Getting Started with Bots Using Visual Studio 2017
- Deploying A Bot to Azure Using Visual Studio 2017
- How to Create ChatBot In Xamarin
- Getting Started with Dialog Using Microsoft Bot Framework
- Getting Started with Prompt Dialog Using Microsoft Bot Framework
- Getting Started With Conversational Forms And FormFlow Using Microsoft Bot Framework
- Getting Started With Customizing A FormFlow Using Microsoft Bot Framework
- Sending Bot Reply Message With Attachment Using Bot Framework
- Getting Started With Hero Card Design Using Microsoft Bot Framework
- Getting Started With Thumbnail Card Design Using Microsoft Bot Framework
- Getting Started With Adaptive Card Design Using Microsoft Bot Framework
- Getting Started with Receipt Card Design Using Microsoft Bot Framework
No comments: