
Microsoft Bot Framework : Receipt Card Design
Prerequisite:
I have explained about Bot framework Installation, deployment and implementation in the below article- Getting Started with Chatbot Using Azure Bot Service
- Getting Started with Bots Using Visual Studio 2017
- Deploying A Bot to Azure Using Visual Studio 2017
- How to Create ChatBot In Xamarin
- Getting Started with Dialog Using Microsoft Bot Framework
- Getting Started with Prompt Dialog Using Microsoft Bot Framework
- Getting Started With Conversational Forms And FormFlow Using Microsoft Bot Framework
- Getting Started With Customizing A FormFlow Using Microsoft Bot Framework
- Sending Bot Reply Message With Attachment Using Bot Framework
- Getting Started With Hero Card Design Using Microsoft Bot Framework
- Getting Started With Thumbnail Card Design Using Microsoft Bot Framework
- Getting Started With Adaptive Card Design Using Microsoft Bot Framework
Create New Bot Application:
Let's create a new bot application using Visual Studio 2017. Open Visual Studio > Select File > Create New Project (Ctrl + Shift +N) > Select Bot application.
The Bot application template gets created with all the components and all required NuGet references installed in the solutions.

Create New ReceiptCardCardDialog Class:
Step 1:
You can Create new ReceiptCardDialog class for a show the receiptCard dialog. Right Click on project > Select Add New Item > Create a class that is marked with the [Serializable] attribute (so the dialog can be serialized to state) and implement the IDialog interface.namespace BotReceiptCard.Dialogs
{
[Serializable]
public class ReceiptCardDialog : IDialog<object>
{
Step 2
IDialog interface has only StartAsync() method. StartAsync() is called when the dialog becomes active. The method is passes the IDialogContext object, used to manage the conversation.public async Task StartAsync(IDialogContext context)
{
context.Wait(this.MessageReceivedAsync);
}
Step 3:
Create a MessageReceivedAsync method and write following code for the welcome message and show the list of demo options dialog.///
/// MessageReceivedAsync
///
/// context">
/// result">
///
public async virtual Task MessageReceivedAsync(IDialogContext context, IAwaitable<IMessageActivity> result)
{
var message = await result;
var welcomeMessage = context.MakeMessage();
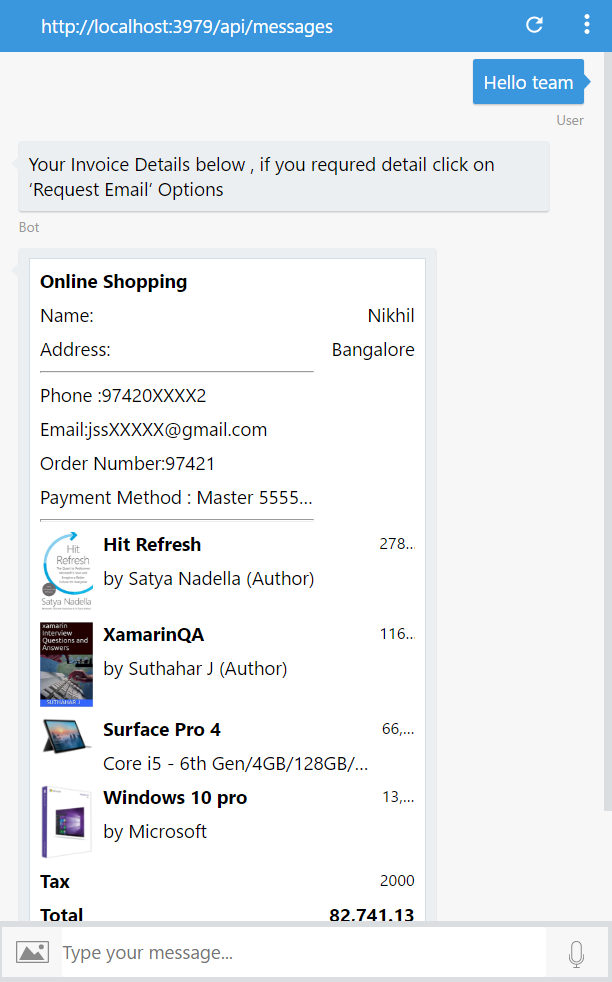
welcomeMessage.Text = "Your Invoice Details below , if you requred detail click on 'Request Email' Options ";
await context.PostAsync(welcomeMessage);
await this.DisplayThumbnailCard(context);
}
///
/// DisplayReceiptCard
///
/// context">
///
public async Task DisplayReceiptCard(IDialogContext context)
{
var replyMessage = context.MakeMessage();
Attachment attachment = getBotReceiptCard(); ;
replyMessage.Attachments = new List<Attachment> { attachment };
await context.PostAsync(replyMessage);
}
After user enter the first message, bot will reply welcome message like below

Step 4: Design Receipt Card:
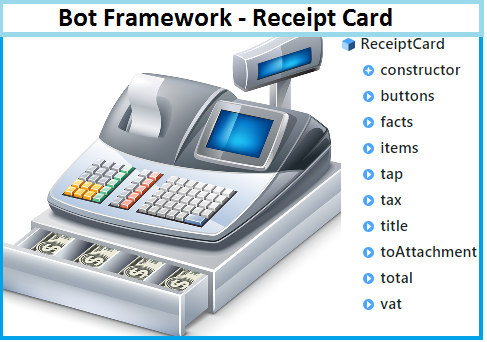
The Receipt card enables a bot to provide a receipt to the user. It typically contains the list of items to include on the receipt, tax and total ,vat and title text.
Title - Title text of the card
Facts – Fact is set of key-value pairs and rendered with default style so developer no need to specify style
ReceiptItems –Receipt Items has list of item title, image, prize, Quantity, subtitle, text and tab navigation for every single item.
Tab – tab provide navigate to different screen or actions
Tax – assign tax amount into tax property.
Vat – assign vat amount into vat property.
Total – calculate and assign total amount into total property
Card Actions – add list of actions in the receipt card and also action card has image, title, type and value property.
The following code showing design the online shopping receipt card design with image, text, Facts, tab,vat,total and action button. .
///
/// getBotReceiptCard
///
///
/// getBotReceiptCard
///
///
private static Attachment getBotReceiptCard()
{
var receiptCard = new ReceiptCard
{
Title = "Online Shopping",
Facts = new List<Fact> { new Fact("Name:","Nikhil"),
new Fact("Address:","Bangalore"),
new Fact("------------------------",""),
new Fact("Phone :97420XXXX2",""),
new Fact("Email:jssXXXXX@gmail.com",""),
new Fact("Order Number:97421",""),
new Fact("Payment Method : Master 5555-****", ""),
new Fact("------------------------","")
},
Items = new List<ReceiptItem>
{
new ReceiptItem("Hit Refresh",subtitle:"by Satya Nadella (Author)",text:"Kindle Edition", price: "278.31", quantity: "1", image: new CardImage(url: "https://images-eu.ssl-images-amazon.com/images/I/41eAfVuUzeL.jpg"),tap: new CardAction("Read More")),
new ReceiptItem("XamarinQA",subtitle:"by Suthahar J (Author)",text:"Kindle Edition", price: "116.82", quantity: "1", image: new CardImage(url: "https://images-eu.ssl-images-amazon.com/images/I/51z6GXy3FSL.jpg"),tap: new CardAction("Read More")),
new ReceiptItem("Surface Pro 4",subtitle:"Core i5 - 6th Gen/4GB/128GB/Windows 10 Pro/Integrated Graphics/31.242 Centimeter Full HD Display", price: "66,500", quantity: "1", image: new CardImage(url: "https://images-na.ssl-images-amazon.com/images/I/41egJVu%2Bc0L.jpg"),tap: new CardAction("Read More")),
new ReceiptItem("Windows 10 pro",subtitle:"by Microsoft", price: "13,846", quantity: "1", image: new CardImage(url: "https://images-na.ssl-images-amazon.com/images/I/7176wliQYsL._SL1500_.jpg"),tap: new CardAction("Read More"))
},
Tax = "2000",
Total = "82,741.13",
Tap =new CardAction(ActionTypes.OpenUrl,value: "https://www.microsoft.com/en-in/store/b/home?SilentAuth=1&wa=wsignin1.0"),
Buttons = new List<CardAction>
{
new CardAction(
ActionTypes.OpenUrl,
"Request Email",
"https://assets.onestore.ms/cdnfiles/external/uhf/long/9a49a7e9d8e881327e81b9eb43dabc01de70a9bb/images/microsoft-gray.png",
"mailto:jssuthahar@gmail.com?subject=Order%20Number:97421&body=Hi%team,%20I%need%20Invoice")
}
};
return receiptCard.ToAttachment();
}
The above code will generate receipt card and reply to the user like below

Run Bot Application
The emulator is a desktop application that lets us test and debug our bot on localhost. Now, you can click on "Run the application" in Visual studio and execute in the browser
- Test Application on Bot Emulator
- You can follow the below steps to test your bot application.
- Open Bot Emulator.
- Copy the above localhost url and paste it in emulator e.g. - http://localHost:3979
- You can append the /api/messages in the above url; e.g. - http://localHost:3979/api/messages.
- You won't need to specify Microsoft App ID and Microsoft App Password for localhost testing, so click on "Connect".


I always like and such a super contents of these post, Good info I gained more information about that. Thanks for such a helpful information. Keep it up.
ReplyDeleteAI Chatbot
Chatbot Development
RPA Bot
Artificial Intelligence Company in Dubai