Xamarin was released 10 years before, it has helped many developers to develop mobile apps with multi-platform with native feel but now it’s time to say goodbye to Xamarin and happily welcome .NET MAUI (Multi-platform App UI).
Let’s go back a bit in time first, the name
Xamarin comes from the name of the
Tamarin monkey, replacing the leading
T with an
X.
On
May 16, 2011,
Miguel de Icaza announced on his blog that Mono would be developed and supported by Xamarin.
In 2016, Xamarin has been acquired by
Microsoft, after that Xamarin is open source and removed payment options. This helped the adoption of Xamarin. Microsoft then integrated Xamarin into Visual Studio. All the mobile development company started using visual studio in both Windows and Mac, it is great improvement after Microsoft acquires Xamarin.

Every developer and company should be very clear, Microsoft isn’t throwing away Xamarin. Mono won’t be going anywhere yet. .NET MAUI is the next generation of Xamarin Forms, intended to allow developers to build an app once in a single Visual Studio project with a single codebase, targeting any supported device. The aim is to deliver a simplified project structure. Rather than a single solution with separate projects for each platform you’re targeting, with MAUI a single project will contain the resources needed to target specific platforms.
David blog helped me to understand more about setup. In this article, I will explain how to create the first hello world app using the MAUI application.
Visual Studio 2019 Preview
Visual studio 2019 early access preview version you can download from
Microsoft website . This release is not "go-live" so not recommended to use on production computers or for creating production code.

Verify MAUI SDK Installation
Previously was install all the required SDK is manual, Now, Jonathan Dick has put together a useful dotnet tool that evaluates your system and gathers as many of the required pieces as it can. To get started, install maui-check globally from the command line.
Open Run
CMD as an Administrator mode and install
MAUI Check tool using the below line
dotnet tool install -g Redth.Net.Maui.Check
After MAUI check tool install, will start to execute the below the line of code to verify the SDK installation
maui-check")
You need to install the Preview 2 version of the
dotNet 6 SDK, as well as the Preview 2 Android, iOS, and Mac Catalyst workloads so if you are getting any error alert saying SDK is missing, keep give input as “
Yes” for install the missing SDK and wait for the
“Congratulations, everything looks great!” message, that means, you are ready to start the new MAUI application.

Create a new MAUI Mobile application
Visual Studio 2019 Preview version default available MAUI project template and select Create a new project, otherwise, you can download the default project sample available in the Git MAUI official
repository.

Search for "
MAUI" or choose Mobile from the Project type menu. Select the
.Net Maui Mobile application 
Choose a project name – the example uses "
HelloMaui" and click on Create

Once you click on create button automatically solutions will generate. Before building the solutions, Let quickly understand all the folders and files.
MAUI Application Startup
Multi-targeted .NET MAUI Single Project for iOS and Android. .NET MAUI starts every application using
Microsoft.Extensions HostBuilder.

Each platform has a different starting point, and the consistent point of entry for your application is
Startup.cs will allow the following. It includes a Configure method to pipe service registration, handler registration
public class Startup : IStartup
{
public void Configure(IAppHostBuilder appBuilder)
{
appBuilder .UseMauiApp<App>();
}
}
Application customization processes, this is where you can do such things as register fonts and register compatibility for Xamarin.Forms renderers or your own custom renderers, By default,
if you don't want to customize anything special, ignore this
appBuilder
.UseFormsCompatibility()
.UseMauiApp<App>()
.ConfigureFonts(fonts => {
fonts.AddFont("ionicons.ttf", "IonIcons");
})
MAUI Application Life cycle
.Net MAUI Application preview 3 Support to manage the life cycle of the application.
Life Cycle API included in Startup.cs file and will write platform-specific.
public void Configure(IAppHostBuilder appBuilder)
{
appBuilder
.ConfigureLifecycleEvents(lifecycle => {
#if ANDROID
lifecycle.AddAndroid(d => {
d.OnBackPressed(activity => {
System.Diagnostics.Debug.WriteLine("Back button pressed!");
});
});
#endif
});
}
MAUI App.Xaml
In App.Xaml.cs project inherited by Microsoft.Maui.Controls.Application and make sure MAUI namespace added specify common Image directory for all the platform
using Microsoft.Maui;
using Microsoft.Maui.Controls.PlatformConfiguration.WindowsSpecific;
namespace HelloMaui
{
public partial class App : Microsoft.Maui.Controls.Application
{
public App()
{
InitializeComponent();
}
public override IWindow CreateWindow(IActivationState activationState)
{
Microsoft.Maui.Controls.Compatibility.Forms.Init(activationState);
this.On<Microsoft.Maui.Controls.PlatformConfiguration.Windows>()
.SetImageDirectory("Assets");
return new MainWindow();
}
}
}
In App.Xaml, will work same like xamairn form and will add all the common resources and style
<Application xmlns="http://xamarin.com/schemas/2014/forms"
xmlns:x="http://schemas.microsoft.com/winfx/2009/xaml"
xmlns:local="clr-namespace:HelloMaui"
x:Class="HelloMaui.App">
<Application.Resources>
<ResourceDictionary>
<!-- Add any additional resources here. -->
<Color x:Key="PageBackgroundColor">White</Color>
<Color x:Key="PrimaryTextColor">Black</Color>
<Color x:Key="GlyphColor">#2B0B98</Color>
<Style TargetType="Label">
<Setter Property="TextColor" Value="{DynamicResource PrimaryTextColor}" />
</Style>
<Style TargetType="Label" x:Key="Glyph">
<Setter Property="TextColor" Value="{DynamicResource GlyphColor}" />
<Setter Property="FontFamily" Value="IonIcons" />
<Setter Property="FontSize" Value="32" />
</Style>
</ResourceDictionary>
</Application.Resources>
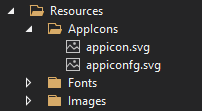
</Application>Application icon
The application icon is one great improvement, the AppIcon folder will available under the MAUI project and it is
just a single SVG, Looks like Maui will just automatically take care of generating all the different icon sizes for different devices.
MAUI Design Screen
AssemblyInfo.cs file is removed from solutions. Main Page Name not changed. The xaml looks like below and you can observe below code the concept of SemanticProperties is added
<ContentPage xmlns="http://xamarin.com/schemas/2014/forms"
xmlns:x="http://schemas.microsoft.com/winfx/2009/xaml"
x:Class="HelloMaui.MainPage"
BackgroundColor="{DynamicResource PageBackgroundColor}">
<ScrollView>
<StackLayout Padding="{OnPlatform iOS='30,60,30,30', Default='30'}">
<Label Text="Getting started with MAUI Xamarin Forms Application using Visual Studio 2019 Preview 16.10"
SemanticProperties.HeadingLevel="Level1"
FontSize="32"
HorizontalOptions="CenterAndExpand" />
<Label Text="Welcome to .NET MAUI!"
HorizontalOptions="CenterAndExpand" />
<Image
Source="dotnet_bot.png"
SemanticProperties.Description="Cute dotnet bot waving hi to you!"
Margin="40,0" />
</StackLayout>
</ScrollView>
</ContentPage>
In MainPage.xaml.cs removed using Xamarin.Forms, add an inheritance from IPage, added the Maui namespace
using System;
using Microsoft.Maui;
using Microsoft.Maui.Controls;
using Microsoft.Maui.Controls.Xaml;
namespace HelloMaui
{
[XamlCompilation(XamlCompilationOptions.Compile)]
public partial class MainPage : ContentPage, IPage
{
public MainPage()
{
InitializeComponent();
}
public IView View { get => (IView)Content; set => Content = (View)value; }
}
}
Restore MAUI Nuget package
Before you will build and run solutions make sure NuGet packages referenced in the configuration file.
Right Click on Solutions > Open Folder in File Explorer 
Make sure global.json and NuGet.config file available before building the solutions
MAUI global.json
global.json file look like below
{
"sdk": {
"version": "6.0.100-preview.3.21202.5",
"rollForward": "disable",
"allowPrerelease": true
}
}
MAUI Nuget.Config
Nuget.Config looks like the below and have the reference key for dotnet6,Xamarin, and public.
<?xml version="1.0" encoding="utf-8"?>
<configuration>
<packageSources>
<clear />
<!-- ensure only the sources defined below are used -->
<add key="dotnet6" value="https://pkgs.dev.azure.com/dnceng/public/_packaging/dotnet6/nuget/v3/index.json" />
<add key="xamarin" value="https://pkgs.dev.azure.com/azure-public/vside/_packaging/xamarin-impl/nuget/v3/index.json" />
<add key="public" value="https://pkgs.dev.azure.com/dnceng/public/_packaging/dotnet-public/nuget/v3/index.json" />
</packageSources>
<config>
<add key="globalPackagesFolder" value="packages" />
</config>
</configuration>
Build and Run MAUI Android App
Inside Android Folder,
not find any MainActivity.cs, only available Resource folder and Androidmanifest file. You will need the Android SDK installed as well as Android SDK Platform 30. When you did a verified MAUI check, SDK was download and installed, if no, a simple way to get this is to install the current Xamarin workload and go to
Tools > Android > Android SDK Manager from within Visual Studio.

Try to click on Run Icon, if you are getting any issue, Right-click on the solution and Select in the open terminal

Build the MAUI Project, run the below comment in the
Visual studio terminaldotnet build HelloMaui
You can launch the Android project to an attached emulator or device
dotnet build HelloMaui -t:Run -f net6.0-android
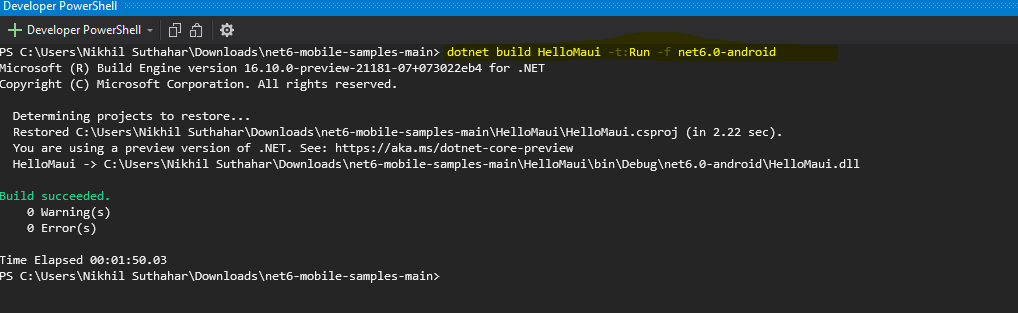
Once the build is successful, the Android emulator / on-device application will run like below

Build and Run iOS Project in window machine
The build and debug .NET 6 iOS applications from Visual Studio 2019 preview. iOS folder is very clean, you can find Appdelegate.cs, Entitlements.plist, info.plist, Launchscreen.storyboard and Program.CS(Main.cs gets renamed Program.cs)
 using Visual Studio 2019 Preview 16.10")
If while connecting Visual Studio to your Mac through XMA you are prompted to install a different version of the SDK, you can ignore that since it refers to the legacy one. Make sure Xcode 12.4 installed in mac machine,
 using Visual Studio 2019 Preview 16.10")
You can launch the iOS project to an attached iOS Simulator. Initially not working for me run the ios app in windows after that start working.
dotnet build HelloMaui -t:Run -f net6.0-ios
Once the build is successful, the iOS simulator/ Device will show the output like below
 using Visual Studio 2019 Preview 16.10")
Summary
In this article, you learned about the setup Maui development preview environment and you said hello to Maui, Will share details in the next article for setup Visual Studio Code and Visual Studio for Mac. If you have any questions/ feedback/ issues, please write in the comment box
Enable GingerCannot connect to Ginger Check your internet connection
or reload the browserDisable in this text fieldRephraseRephrase current sentenceEdit in Ginger
Azure AD B2C stands for azure active directory Business to consumer. AZURE AD B2C has its own login portal management which can be customized to a certain extent to change the look and feel as required customers.

Azure AD B2C Feature
You have a
web app / mobile app and you need a simple way to let users
log in to your application without registration and also manage their own accounts. You don’t want to worry about security, scalability, and ease of use.
Some of the major advantages of using Azure AD B2C below.
- Supports to integrate with Local Accounts and social accounts such as Facebook, LinkedIn, Google, Microsoft, Amazon required additional work
- Azure AD B2C also handles multi-factor authentication and password self-service reset by applying some basic configurations.
- The authentication system provided by Azure AD B2C is very secure for protecting user identity and credentials. Azure AD B2C provides identity as a service for your apps by supporting two industry-standard protocols: OpenID Connect and OAuth 2.0.
- Azure AD B2C components follow high-level features like Self-registration, Sign-in, Profile Editing, Self-service Password Reset, Multi-Factor Authentication, Single Sign-on and Custom Attribute.
- You can create up to 20 tenants per subscription. This limit helps protect against threats to your resources, such as denial-of-service attacks, and is enforced in both the Azure portal and the underlying tenant creation API
Azure AD B2C Pricing Details
Azure AD Identities
pricing is based on Monthly Active Users (MAU), Microsoft reduces costs and forecast with confidence. Your first 50,000 MAUs per month are free for both Premium P1 and Premium P2 features after free, pay only for what you use. A flat fee of ₹2.162 is billed for each SMS/Phone-based multi-factor authentication attempt.
| PREMIUM P1 | PREMIUM P2 |
First 50,000 MAU | ₹0/Monthly Active Users | ₹0/Monthly Active Users |
More than 50,000 MAU | ₹0.234148/Monthly Active Users | ₹1.170736/Monthly Active Users |
Separate Charges
| A flat fee of ₹2.162 is billed for each SMS/Phone-based multi-factor authentication attempt. |
Setup Azure AD B2C
- Sign in to the Azure portal. Or - Sign in with an Azure account that's been assigned at least the Contributor role within the subscription or a resource group within the subscription.
- You can click on the Directory and subscription filter in the top menu and choose the directory in your subscription. This is a different directory than the one that will contain your Azure AD B2C tenant.

Create new AD B2C
Select a create a
new resource in the top-left corner of the Azure portal home screen or
Search for and select Active Directory B2C.
Select Azure AD B2C enable users to access application published by your organization and share admin experience

Directory Configuration
You need to provide directory confirmation details as per below
- Organization Name – Enter the organization name
- Initial Domain Name - By default, a basic domain name at 'onmicrosoft.com' is included with your directory. Later, you can add a domain name that your organization already uses, such as ‘msdevbuild.com’.
- Country / Region - You cannot change the geo or region after you create your directory. Make sure you select the correct geo or region because your choice determines the datacenter for your directory. Microsoft does not control the location from which you or your end users may access or move directory data through the use of apps or services.
- Subscription - Choose the subscription to use for Azure Active Directory (B2C). It’s free for 50,000 monthly active users (MAUs).

Click on the
Review +Create buttons, wait for a few second, if you are getting any namespace Azure directory issue to follow the below steps otherwise skip
Troubleshoot Microsoft.AzureActiveDirectory issue
For each functionality in azure, there is a resource provider like
Microsoft.AzureAciveDirectory. By default, my Azure Subscription is
not registered with all resource providers and because my Subscription is not registered with Microsoft. AzureAciveDirectory resource provider, so I am getting the below error notification message after click on Create button
 Step 1:
 Navigate Azure Portal
Step 2: Click on All Services or Home Screen
Step 3: Select your Subscription, From the list of subscriptions, select the subscription you want to use for registering the resource provider.
Step 4: Select Resource Provider Section
Step 5: Look at the list of resource providers and Search related resource
Step 6: select the Register Microsoft. AzureAciveDirectory to register
Step 7: Wait for a few second, you will get a Green mark for registration success

Azure AD B2C Tenant Creation Success
If you do not receive any error message after a click on
create button you will get a confirmation message otherwise if you are getting any issue related to the resource provider, you can follow the above steps.

Summary
You have now successfully created a new
Azure AD B2C Tenant. You can navigate to the directory home screen. You will notice that you are the only user registered. In my next article will share steps about users create an account and creating applications for sign-up user flow.

In this article, you learned about creating a new Active Directory B2C tenant in Microsoft AZURE. If you have any questions/ feedback/ issues, please write in the comment box.
Enable GingerCannot connect to Ginger Check your internet connection
or reload the browserDisable in this text fieldRephraseRephrase current sentenceEdit in Ginger
The Bot Application runs inside Skype, web chat, Facebook, Message, etc. Users can interact with bots by sending them messages, commands, and inline requests. You control your bots using HTTPS requests to the bot API. Azure bot Application service automatically configures the Web Chat channel while publishing to Azure. Bot channel includes the Web Chat Channel which can be embedded directly onto websites or bloggers for users to interact.
In this article, we will learn how to integrate our bot application right into your blogger via the Microsoft Bot Web Chat Channel.

Create FAQ Bot Application:
You can refer to my previous article for creating and building a Xamarin FAQ Bot using Azure Bot Service and deploy it into Azure. I am not using any coding for developing Bot Application, you can follow the article provided steps for creating and deploying FAQ Bot .

Generate WebChat Channel Html Code
Login to Azure portal > Select the “All Resources” >Select Your Web App Bot > Select Channels, As already discussed automatically configured the Web Chat channel while publishing to Azure.

You can click on “Edit” or “Get Bot Embed Codes” and Copy the Iframe html code for integrate WebChat Channels to blogger.

Integrate Bot Application into Blogger
Step 1: Sign in to your Blogger(https://www.blogger.com) account. Blogger opens on the default Dashboard page that displays a list of all your hosted blogs.
Step 2: Select your Blogger > Select the layout > Click on Add a Gadget > Add Html and JavaScript Layout component for adding webchat embed code.

Step3: Paste the iFrame HTML code that you copied from the azure portal into the input box and provide the title of the Bot.

Click on preview and verify width and Height is aligned with your blogger layout.
Step 4: Click "Save arrangement “above the layout editor to publish the post containing the Web Chat App to your blog.
Test Web Chat Application
You can click on “View Blog” for view the original layout design and test your Bot Application.

Summary
In this article, you learned how to integrate bot applications right into your blogger via the Microsoft Bot Framework Web Chat Channel. If you have any questions/ feedback/ issues, please write in the comment box.
Enable GingerCannot connect to Ginger Check your internet connection
or reload the browserDisable in this text fieldEditEdit in GingerEdit in Ginger
The azure function is a serverless concept of cloud-native design that allows a piece of code to be deployed and executed without any need for server infrastructure, web server, or any configurations. Azure Functions can be written in multiple languages such as c#, Java, JavaScript, TypeScript, and Python.

You can write, debug, and deploy an Azure Function using
Azure Portal . However, there are many scenarios when writing functions directly in the production and test environment might be risky and customizing and adding unit testing feasibility in azure portal is more complex, most developers prefer to use visual studio code editors.
Developer easily maintain from same service API solutions project, we have shared one more article with same topic for creating azure function using
Visual studio 2017, We will cover in this article very detail to create azure function including new feature using Visual studio 2019 and Microsoft released following version of the azure function and make sure you are updated visual studio and having latest version Azure function V3.
- Azure Function V1 – uses the .net Framework 4.7 and trigger can only be created using Windows
- Azure Function V2(v2x) – runs using .Net Core 2 and trigger wherever possible
- Azure Function V3(v3x) – Contains JavaScript and .Net Changes
Create new Azure Function Project
In Visual Studio, select New, create a new project page. In that, you can select the language as c#, platform as Azure, and project type as Cloud after that you can easily search the Azure function or Scroll down, select Azure Functions, and then select Next.

You can provide the Project Name and location information and click on next.

Azure Function Triggered
The azure functions are triggered by an event rather than being called directly from an app. you specify the type of event that will trigger the functions in your azure function app. In the following screen, you can azure function triggers.
Select Azure Function V3(.Net Core), and then select HTTP Trigger for now, leave the storage account dropdown set to storage emulator and authorization level select as “Anonymous” because we are running the app locally and select the create

Here, The following azure function trigger is available
- Blob Trigger - The blob Trigger function will run when a file is upload or modified in Azure Blob Storage
- Event Hub Trigger - The event Hub trigger azure function will run when the event hub receives the message
- Azure Cosmos DB trigger - Azure Cosmos DB trigger will use when the document is added or modified in Cosmos DB.
- Http Trigger - Http Trigger runs the function when an HTTP request occurs in a web app.
- Queue Trigger - Queue trigger occurs when a new item added to an Azure storage queue.
- Service Bus Queue Trigger - Service bus queue trigger will run when a new item added to the azure bus queue.
- Service Bus Topic Trigger - Service bus topic trigger will run when a new message arriving on the azure bus topic.
- Timer Trigger - Use this event to run the Azure Function at regular intervals.
Azure Function Access rights
From a client's, perspective security is more important while accessing sensitive information and also HTTP requests could be exposed publicly. Azure Function triggered by an HTTP request supports three levels of access rights
- Anonymous - No authentication is required, and any user can trigger the function.
- Function - The HTTP request must provide a key that enables the Azure Function runtime to authorize the request.
- Admin - This is similar to Function but the user must specify a key with the HTTP request that triggers the function.

Azure Function project structure
The code for all the functions in a specific function app is located in a root project folder that contains a host configuration file and one or more subfolders. Each subfolder contains the code for a separate function. The folder structure is shown in the following representation

The host.json metadata file contains global configuration options that affect all functions for a function app.

The project contains the class file and the local setting file named local.setting.json will contain a Key and value pair of Azure Storage connection string.

Azure Function Static Class
- If you need to import namespaces, you can do so as usual, with the using clause.
- Function Static class Function name [AzureFunction]
- The static FunctionName attribute marks the method as a function entry point [MSDEVBUILD_Function] and The name must be unique within a project, start with a letter and only contain letters, numbers, _, and -, up to 127 characters in length.
- Project templates often create a method named Run, but the method name can be any valid C# method name.
- Recall from the previous unit that the parameters to the Run method are an HttpRequest object containing the details of the request that triggered the function
- The above function will accept both get and post requests. If the request is GET type, it will get the value from the query string with the key as name and for POST, it will get a value of key name from the request body. Finally, it will respond with a string “Hello <name value>” to the user

Build and Run Azure Function
Let you start to run the Azure function, press F5. If prompted, accept the request from Visual Studio to download and install
Azure Functions Core (CLI) tools. You may also need to
enable a firewall exception so that the tools can handle HTTP requests.

Copy the below URL of your function from the Azure Functions runtime output.

Test Azure Functions locally
Paste the URL for the HTTP request into your browser’s address bar

Append the query string
? name=<yourname> to this URL and execute the request. The following shows the response in the browser to the local GET request returned by the function

Summary
In this article, you learned about Azure Functions, Event trigger and create, test, locally run Azure Functions using visual studio 2017.If you have any questions/ feedback/ issues, please write in the comment box.
Enable GingerCannot connect to Ginger Check your internet connection
or reload the browserDisable in this text fieldEditEdit in GingerEdit in Ginger