
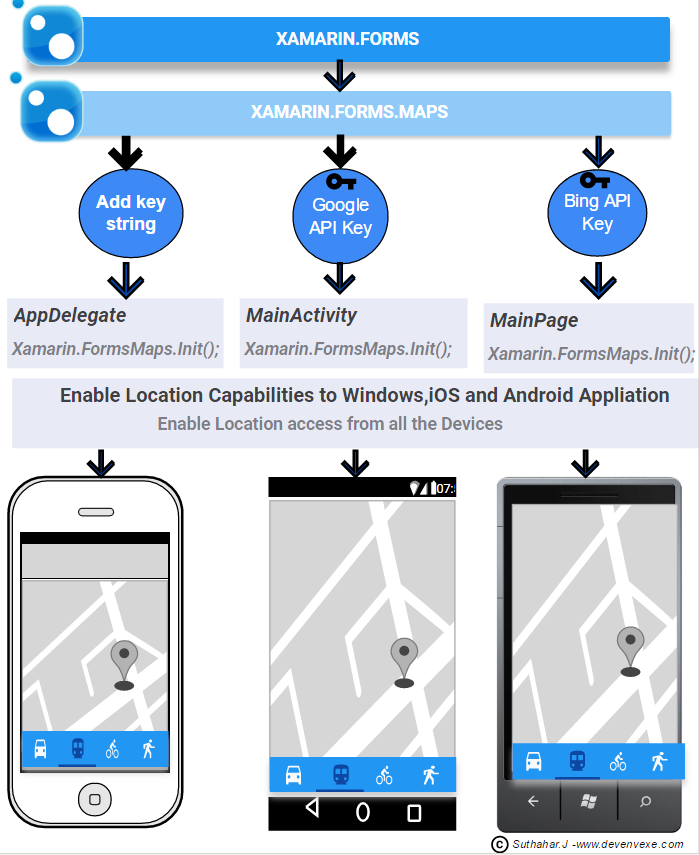
Getting Started with Google and Bing Maps using Xamarin.Forms
Download Source Code :

Step 1:
Let's start with creating a new Xamarin Forms Project in Visual Studio.
Open Run > Type Devenev. Exe and enter > New Project (Ctrl+Shift+N) - select Portable Blank Xaml App
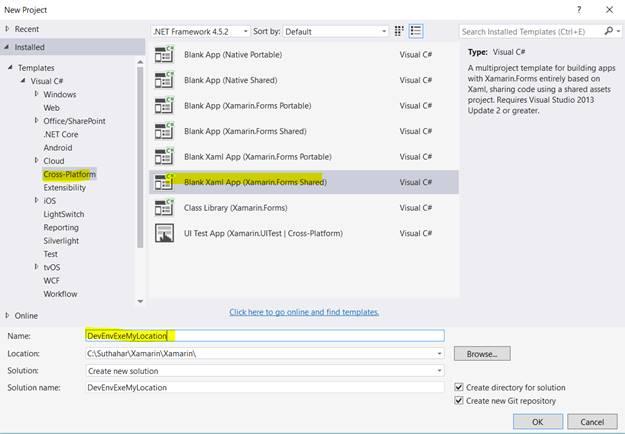
It will automatically create multiple projects like Portable, Android, iOS, UWP. You can refer to my previous article for more.
How to Create Your First Xamarin. Form Application - http://www.c-sharpcorner.com/article/how-to-create-first-xamarin-form-application/
It will automatically create multiple projects like Portable, Android, iOS, UWP. You can refer to my previous article for more.
How to Create Your First Xamarin
Note:
UWP is available in Xamarin.Forms 2.1 and above, and Xamarin.Forms.Maps is supported in Xamarin.Forms 2.2 and above so make sure update xamarin Forms nuget packageStep 2:
Install Xamarin.Forms.Maps nuget Package:
Xamarin.Forms.Maps is a cross-platform nuget package for native map APIs on each platform. Map control android will support google map ,windows and UWP apps will support bing map .
Right Click on Solution > Select “Manage nuget package for project solution “ > Select Xamain.Forms.Maps > Select all the Project > Click on Install
Step 3: Add Maps control in Portable library:
You can design common xaml design to all the platform from portal library.
Add Xamarin.Forms.Maps namespace from MainPage.xaml
xmlns:maps="clr-namespace:Xamarin.Forms.Maps;assembly=Xamarin.Forms.Maps"
Add customized UI map UI Design like below and if you want show user current add IsShowingUser="True" property from map control.
<?xml version="1.0" encoding="utf-8" ?>
<ContentPage xmlns="http://xamarin.com/schemas/2014/forms"
xmlns:x="http://schemas.microsoft.com/winfx/2009/xaml"
xmlns:local="clr-namespace:DevEnvExeMyLocation"
xmlns:maps="clr-namespace:Xamarin.Forms.Maps;assembly=Xamarin.Forms.Maps"
x:Class="DevEnvExeMyLocation.MainPage">
<StackLayout VerticalOptions="StartAndExpand" Padding="30">
<maps:Map WidthRequest="960" HeightRequest="700"
x:Name="MyMap"
IsShowingUser="True"
MapType="Street"/>
</StackLayout>
</ContentPage>
You can add following code for Zoom and center the user position from MainPage.cs file
using Xamarin.Forms;
using Xamarin.Forms.Maps;
namespace DevEnvExeMyLocation
{
public partial class MainPage : ContentPage
{
public MainPage()
{
InitializeComponent();
MyMap.MoveToRegion(
MapSpan.FromCenterAndRadius(
new Position(37, -122), Distance.FromMiles(1)));
}
}
}
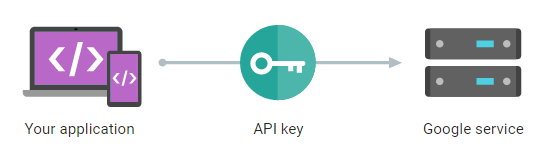
Refer from my previous article for generate Google map API Key http://www.c-sharpcorner.com/article/generate-google-api-key-for-xamarin-android-application/
xmlns:maps="clr-namespace:Xamarin.Forms.Maps;assembly=Xamarin.Forms.Maps"
Add customized UI map UI Design like below and if you want show user current add IsShowingUser="True" property from map control.
<?xml version="1.0" encoding="utf-8" ?>
<ContentPage xmlns="http://xamarin.com/schemas/2014/forms"
xmlns:x="http://schemas.microsoft.com/winfx/2009/xaml"
xmlns:local="clr-namespace:DevEnvExeMyLocation"
xmlns:maps="clr-namespace:Xamarin.Forms.Maps;assembly=Xamarin.Forms.Maps"
x:Class="DevEnvExeMyLocation.MainPage">
<StackLayout VerticalOptions="StartAndExpand" Padding="30">
<maps:Map WidthRequest="960" HeightRequest="700"
x:Name="MyMap"
IsShowingUser="True"
MapType="Street"/>
</StackLayout>
</ContentPage>
You can add following code for Zoom and center the user position from MainPage.cs file
using Xamarin.Forms;
using Xamarin.Forms.Maps;
namespace DevEnvExeMyLocation
{
public partial class MainPage : ContentPage
{
public MainPage()
{
InitializeComponent();
MyMap.MoveToRegion(
MapSpan.FromCenterAndRadius(
new Position(37, -122), Distance.FromMiles(1)));
}
}
}
Step 4: Generate Google map API Key
Android allows us to integrate Google maps in our applications, so we need to generate an API key, using Google developer account. This article shows you how to generate Google map API key from Google developer account.Refer from my previous article for generate Google map API Key http://www.c-sharpcorner.com/article/generate-google-api-key-for-xamarin-android-application/
Step 5: Generate Bing Map Application Key
Windows allows us to integrate Bing Maps in our application, so we need to generate an application key using Bing developer account. This article shows you how to generate Bing maps application key from Bing developer account.
Refer from my previous article for generate Bing map API key - http://www.c-sharpcorner.com/article/generate-bing-map-authentication-key-for-windows-based-application/
 Step6:
Update info.plist file from iOS Project :
The start from iOS 8, we need to add below two keys from info.plist file<key>NSLocationAlwaysUsageDescription</key>
<string>Can we use your location</string>
<key>NSLocationWhenInUseUsageDescription</key>
<string>We are using your location</string>
Step 7:
Xamarin Forms Map initialization
Xamarin.Forms and Xamarin.Forms.Maps is a two different NuGet package that added to all the project .While Creating Xamarin Forms project automatically xamarin.Forms nuget package was added and initialization code was added to all the project .
We are recently added new xamarin.forms.maps nuget to our project so required to add initialization, after the Xamarin.Forms.Forms.Init method call.
iOS
Go to iOS project > open AppDelegate.cs file > in the FinishedLaunching method > after global::Xamarin.Forms.Forms.Init(); > Add below line code
Xamarin.FormsMaps.Init();
Android
Go to Android project > open MainActivity.cs file > in the OnCreate method > after global::Xamarin.Forms.Forms.Init(this, bundle); > Add below line code
Xamarin.FormsMaps.Init(this, bundle);
I believe, you already generated google API key and add below key from Property/ AndroidManifest.xml under Application Tag
<meta-data android:name="com.google.android.geo.API_KEY "android:value="Add API Key – Refer Step 4" />
Xamarin.FormsMaps.Init("INSERT_AUTHENTICATION_TOKEN_HERE -refer step 5");
Xamarin.Forms and Xamarin.Forms.Maps is a two different NuGet package that added to all the project .While Creating Xamarin Forms project automatically xamarin.Forms nuget package was added and initialization code was added to all the project .
We are recently added new xamarin.forms.maps nuget to our project so required to add initialization, after the Xamarin.Forms.Forms.Init method call.
iOS
Go to iOS project > open AppDelegate.cs file > in the FinishedLaunching method > after global::Xamarin.Forms.Forms.Init(); > Add below line code
Xamarin.FormsMaps.Init();
Android
Go to Android project > open MainActivity.cs file > in the OnCreate method > after global::Xamarin.Forms.Forms.Init(this, bundle); > Add below line code
Xamarin.FormsMaps.Init(this, bundle);
I believe, you already generated google API key and add below key from Property/ AndroidManifest.xml under Application Tag
<meta-data android:name="com.google.android.geo.API_KEY "android:value="Add API Key – Refer Step 4" />
Windows ( WinRT ,Windows Phone,UWP) :
Go to Windows project > open MainPage.xaml.cs file > in the MainPage constructor > after LoadApplication() method > Add below line codeXamarin.FormsMaps.Init("INSERT_AUTHENTICATION_TOKEN_HERE -refer step 5");
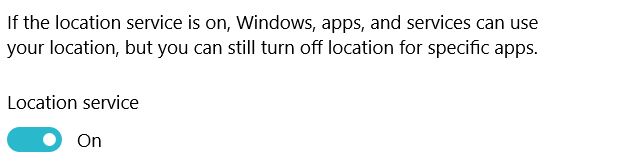
Step9: Enable Required Permissions:
You'll also need to enable appropriate permissions on Android and windows project.


Visual Studio Emulator for Android does not include Google Play Services. This means that several APIs, including support for Google Maps, are not supported by default. To install Google Play Services, follow below steps
Download the Google Apps package from Team Android http://www.teamandroid.com/gapps/
Verify Device Android Version like GApps: CyanogenMod 11 / Android 4.4 KitKat and download
Drag and drop the downloaded .zip package into the running android emulator and wait for installation complete

the emulator will shut down and restart. To verify installation, check that the Play Store app ,gmail,etc is visible in the app menu
Now you can start use android emulator
Android:
Right-clicking on the Android project and selecting Property > select on Android manifest > Enable the location specified permissions android.Windows Project:
Open on the windows Package.appxmanifest file > select on Capabilities > Enable the location specified permissions all windows project.Step10: Location Privacy Setting on Device:
Before debug and run application you need to enable Location on all devices (iOS,Android,Windows)Step 11: Installing google Play Services from Android Emulator:
Xamarin.Forms 2.2.0 on Android now depends on GooglePlayServices 29.0.0.1 for maps.Visual Studio Emulator for Android does not include Google Play Services. This means that several APIs, including support for Google Maps, are not supported by default. To install Google Play Services, follow below steps
Download the Google Apps package from Team Android http://www.teamandroid.com/gapps/
Verify Device Android Version like GApps: CyanogenMod 11 / Android 4.4 KitKat and download
Drag and drop the downloaded .zip package into the running android emulator and wait for installation complete
the emulator will shut down and restart. To verify installation, check that the Play Store app ,gmail,etc is visible in the app menu
Now you can start use android emulator
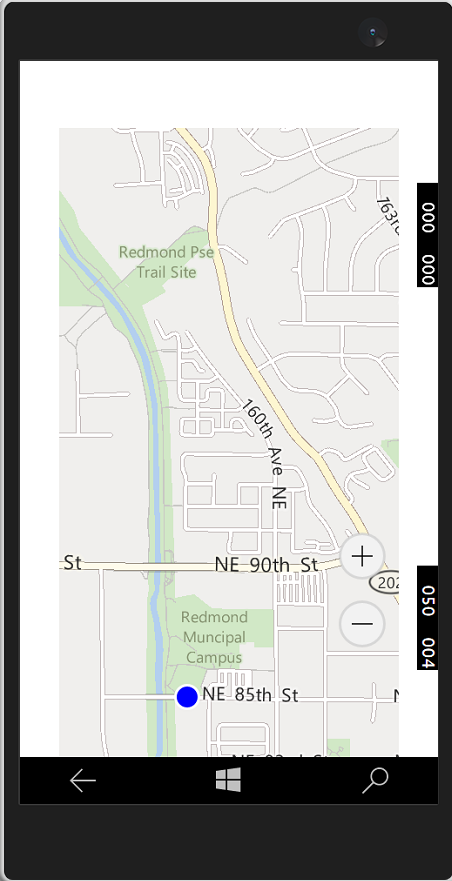
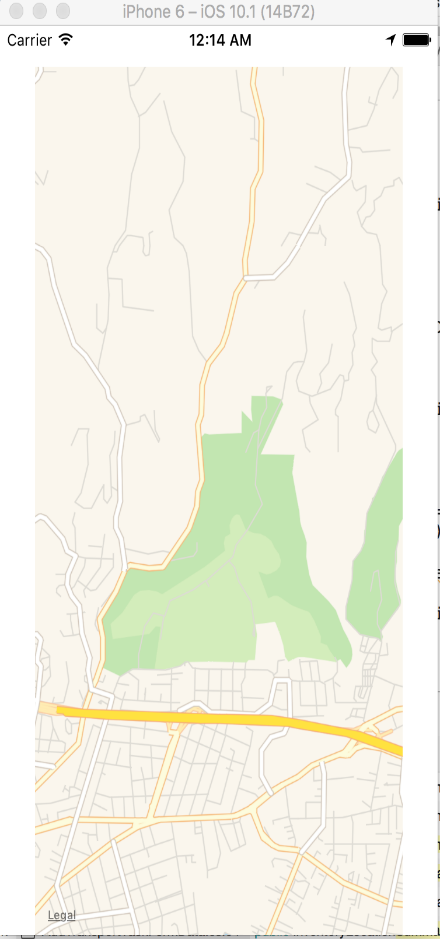
Run Application
After complete all above steps, now you can start run all platform apps


If you have any question /feedback /issue, write in the comment box
After complete all above steps, now you can start run all platform apps
Issues and Resolutions:
I have shared below some implementation, Development, issues and solutionError:
Building in Android: Java Out of Memory ErrorSolution:
Go to Android project options and set, Build/Android Build > Advanced tab > set 1G (or something) in Java heap size.If you have any question /feedback /issue, write in the comment box


Nice blog
ReplyDeleteVery informative . The concept of using maps with xamarin helped me and Mobile development company Xamarin.Forms 4.0 . Thanks for the blog .